Back in 2012 we got a small package on our doorstep. Inside was one of the most unique and rare macro lenses currently in production. After a grueling journey from Japan which also included a meeting with the wonders of the local custom service, we received the Nanoha 5X – one of the only super macro lenses currently produced anywhere in the world.
The following article which took months to prepare is not just a summary of our experience with the lens but can also be seen as a “Beginners’ Guide to super macro photography”. It was adapted from a version published on our sister site – megapixel (the video above was shot more recently during our ongoing review of the Sony A6000).
A bit of background
Super macro lies behind the realm of “conventional macro” photography with its 1:1 magnification ratio. The magnification ratio of a lens can be defined as the size of the subject in an image compared to its actual size.
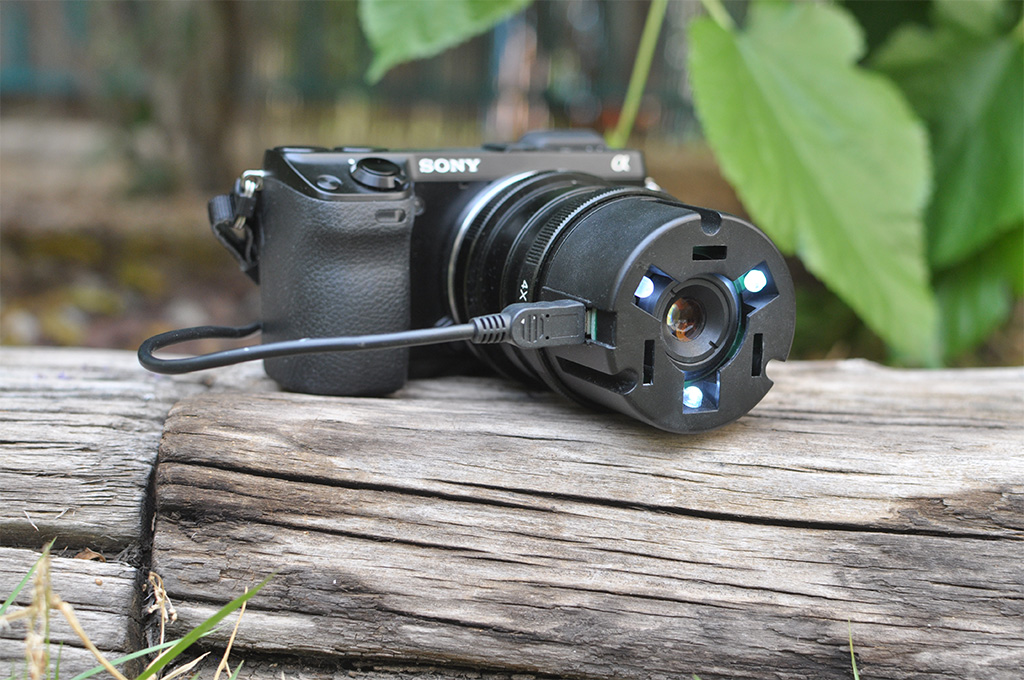
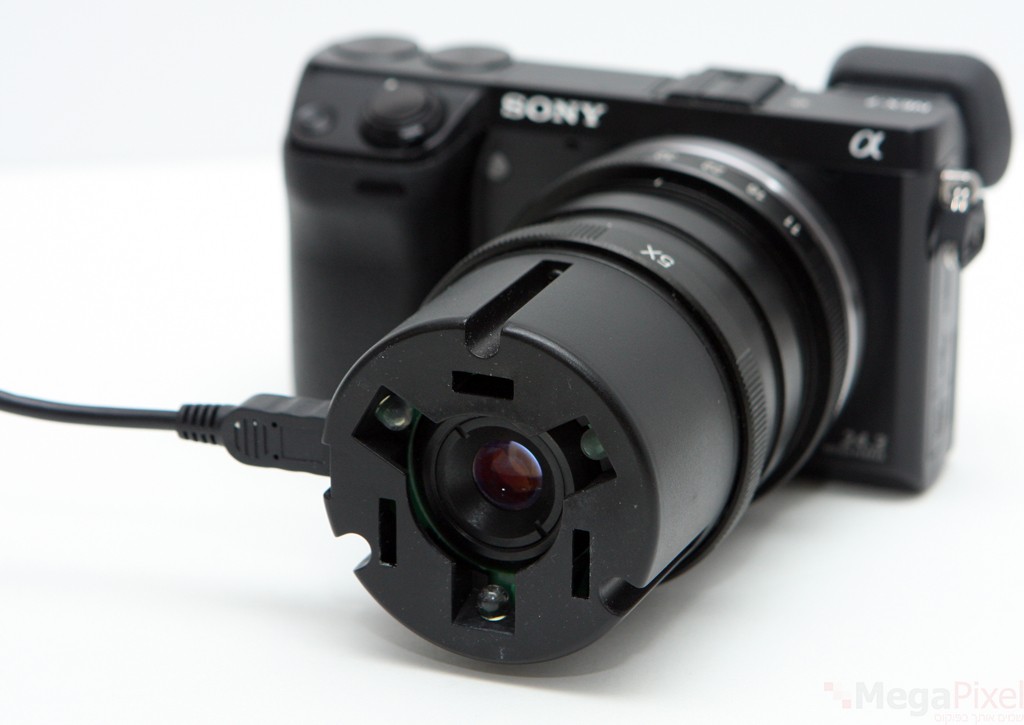
Nanoha 5X mounted on a Sony NEX-7 with the LEDs turned on (Credit: Iddo Genuth)
 A simpler way to understand the concept of magnification ratio is to try and give an answer to the following question: what is the size of smallest subject that will fit the entire size of the sensor frame using the lens we have. If we consider for a second just the width of the frame we shall get the following table:

As you can see the magnification ratio is marked by a fraction (X:Y). A larger fraction (one which is closer to 1) signifies a larger magnification ratio. A super macro lens such as the Nanoha 5X which we tested has a fraction which is actually larger than 1. This means that in super macro lenses with magnification ratio of 2:1 for example (notice the “2” is on the left of the fraction) the smallest object that will occupy the entire width of the frame (on a camera with an APS-C sensor) will have a width of 1.2 cm. In the case of the Nanoha 5X which has a maximum magnification ratio of 5:1 the smallest object will have a width of less than half a centimeter across (!). In other words, and if all these numerical calculations just gave you a headache, the Nanoha 5X is simply a “microscope lens”.
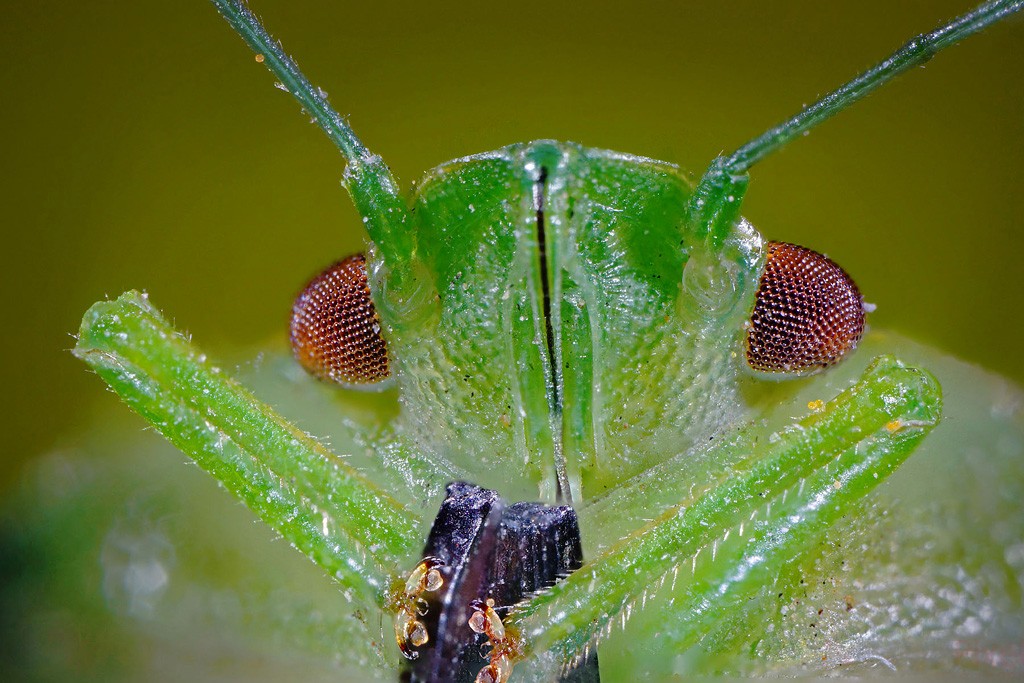
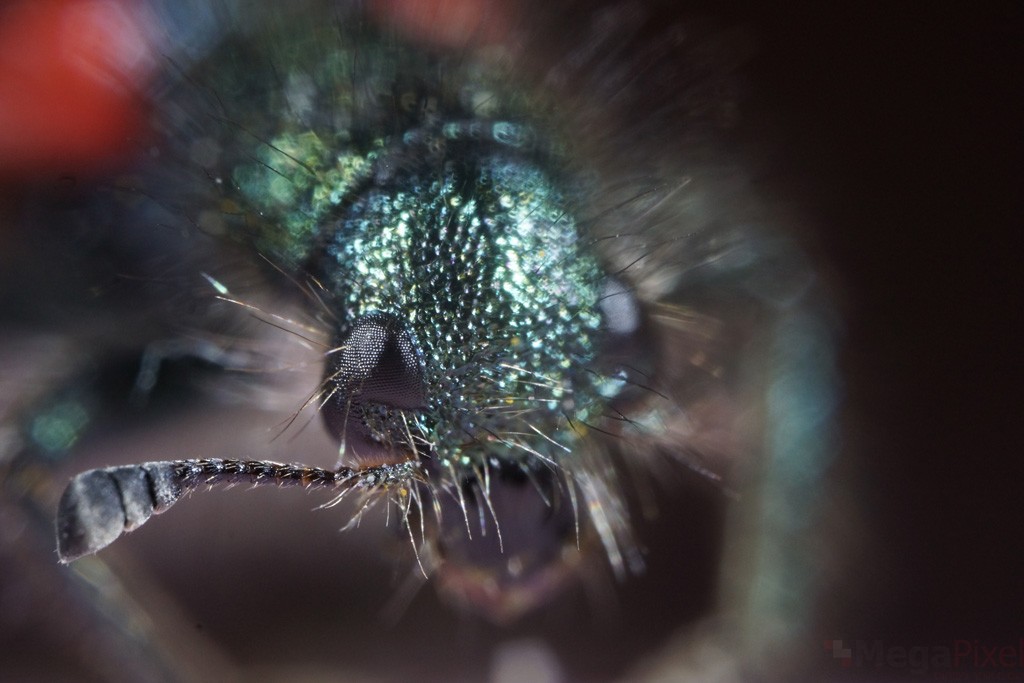
Green beetle – 30 frames combined (Credit: Iddo Genuth)
 We created a special illustration series of different macro magnification images for this article which should help you get some perspective on different magnification ratios and what you can expect to get when using them. All images were taken using a Nikon 105mm Macro lens (the last image was take with the 105mm + a reversed Nikon 35mm lens at 4:1 magnification). Special thanks to our colleague Tomer Yaffe for capturing these images for us.
1:10 magnification ratio (Credit: Tomer Yaffe)
 1:5 magnification ratio (Credit: Tomer Yaffe)
 1:3 magnification ratio (Credit: Tomer Yaffe)
 1:2 magnification ratio (Credit: Tomer Yaffe)

1:1 magnification ratio (Credit: Tomer Yaffe)
 4:1 magnification ratio (Credit: Tomer Yaffe)
 There are different methods for shooting super macro. One popular method is reversed lens macrophotography where a lens is either mounted directly onto the camera in reverse using an adapter, or on top of a different lens (usually a macro lens) using an adapter. Using these fairly inexpensive methods one can reach 3:1 magnifications or more (depending on the type of lens being used). A different option is to use something known as an extension tube or a continuously adjustable bellow, which basically increase the distance between the lens and the camera sensor. The further the lens is from the sensor, the closer the focusing distance and the greater the magnification. Of course there’s no such thing as a free lunch in the realm of optics, and all these solutions come with a price. A decrease in the amount of light reaching the sensor, loss of lens-camera communication and potentially limited magnification ratio might affect those using extension tubes while a degrade in optical quality and some degree of complication can affect those using reverse lenses.
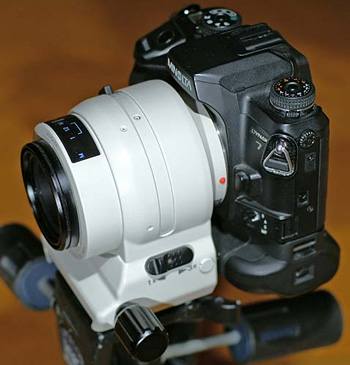
For those who prefer to improvise as little as possible (not something you will be able to escape completely as we shall see later on), there are dedicated super macro lenses. Over the years only a small number of them have been developed specifically for photography. The first lens that we are aware of that reached the market was the Minolta AF 3×-1× Macro Zoom which was announced back in 1990. This rather strange contraption which isn’t in production for many years (although you might be able to find it online from time to time), has a magnification ratio of 3:1-1:1 and a focal length of 42-52mm (even more surprisingly for a macro lens it has an aperture of: f/1.7-f/2.8). The Minolta also has an integrated tripod collar with focus rail and to top it all – a motorized magnification system for controlling the focus precisely (which the user can control using a bottom like the one you can find on your compact and super zoom cameras). Definitely a one of a kind lens which no other company tried to imitate.
The Minolta AF 3×-1× Macro Zoom (Credit mhohner.de; published with permission)
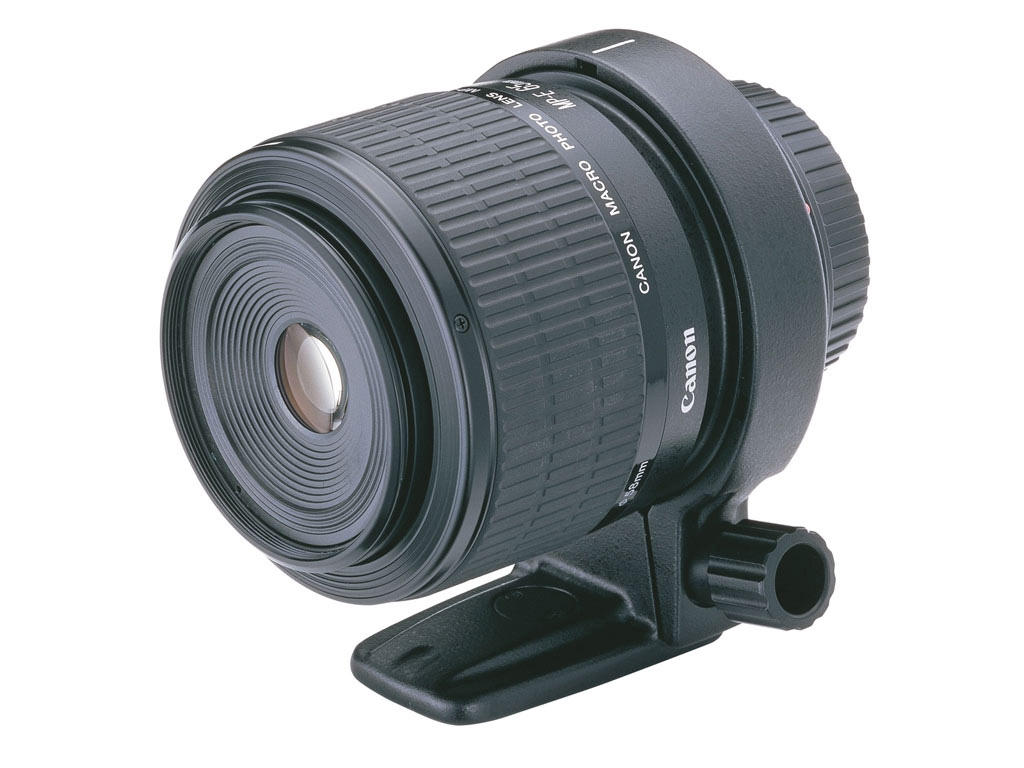
The most “well known” super macro lens is the MP-E 65mm f/2.8 1-5x from Canon which was announced back in 1999 and is still very much in production. The magnification “range” of this lens is the largest of any super macro lens we are aware of – starting from 1:1 up to 5:1. The MP-E 65mm covers a full frame sensor (which gives the user a considerably wider frame to work with than comparable lenses which only cover APS-C or smaller sensors like the Nanoha 5X). The lens isn’t small and it also extends during operation considerably (actually more than any lens we are aware of) and is not particularly “cheap” (typically sells for around $1000 these days).
The Canon MP-E 65mm f/2.8 1-5x – extending super macro
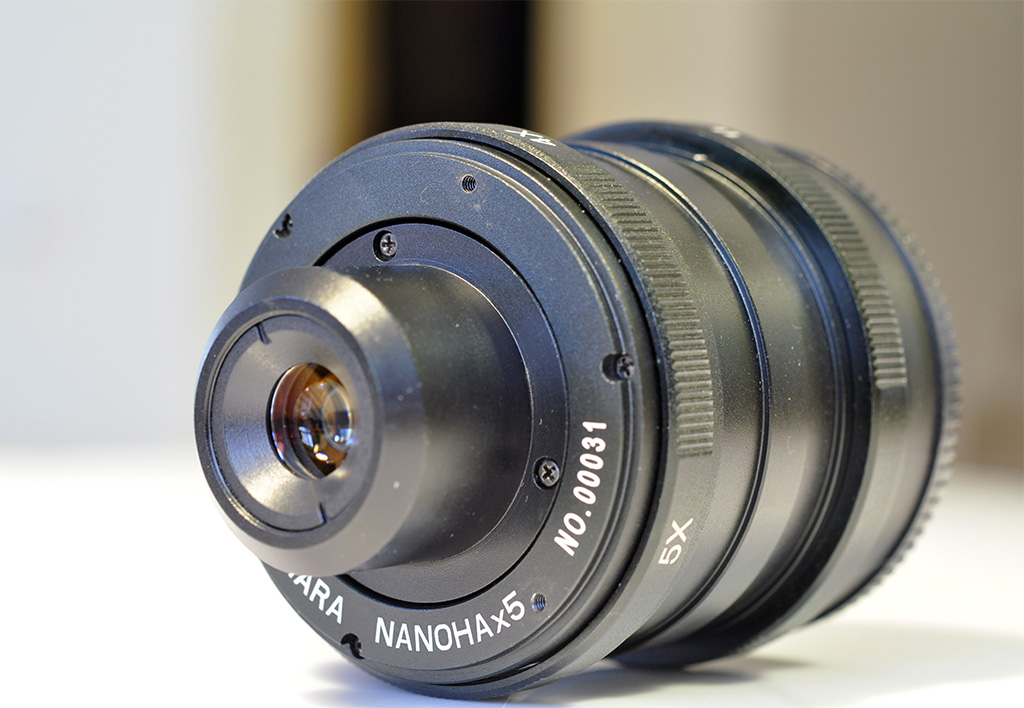
The Nanoha 5X is the most recent addition to the small super macro lens family. The lens was developed by the Japanese company Yasuhara and comes in two “flavors” – Sony E-mount and micro 4/3 (for Olympus/Panasonic cameras. More recently a new Canon EF-M mount was also added). Unlike the MP-E 65mm it has a constant length (84mm or 86mm depending on the version), is rather light (320 grams) and comprised of 10 optical elements in 7 groups. The Nanoha 5X aperture starts with f/11 and goes up to f/32 and is made out of 5 blades. The lens itself comes with a front plastic part containing 3 tiny LED lights which are used to illuminate the object photographed. The lens also comes with several plastic holders (all other pieces are made out of solid metal).
Yasuhara was founded in Japan in 1998. Its founder Shin Yasuhara, worked as a camera engineer for the Kyocera corporation for many years before he decided to start his own camera company. After designing two rangefinder camera models (the T981 in 1999 and AKIZUKI in 2003) at the end of the film area the company underwent some changes which eventually lead to the decision to move into optics, and to the creation of the Nanoha 5X which was introduced in 2011. Since then Yasuhara already finished a second lens under the codename MADOKA (circle or round in ancient Japanese dialect) which is a circular fisheye lens for mirrorless cameras.
The Nanoha 5X – unique lens (Credit: Ofir Iluz)

If you find Yasuhara’s decision to develop only lenses for mirrorless cameras puzzling, remember that the Japanese interchangeable lens camera market is already dominated by these type of cameras (about 50% of the interchangeable lens camera market in Japan is comprised of mirrorless cameras according to some estimates) and after talking to Mr. Yasuhara we understand that he and his company believes that this is the direction the photography market is heading towards in the next few years all around the world (recent numbers may tell a different story though).
A clip shot with the Nanoha 5X by the French photographer Jean-Baptiste Lefournier
[vimeo]https://vimeo.com/36937717[/vimeo]
Build Quality
The Nanoha 5X is made by hand in Japan. We actually received lens number 31, the number appears on the front of the lens and you can view it if you remove the front plastic part which includes the LED lights (caution is advised as the screws are extremely small and can get lost easily).
Apart from the detachable front part which is made of hard plastic, the entire lens is made of metal including the mount. The build quality is very good although it would be good to see a wider focus ring (like we are used to from more conventional Canon/Nikon macro lenses), however, the small size of the lens might not permit for this. The focus ring has a nice feel to it with some good friction and is definitely a joy to work with (a very important point since we are talking about a manual focus lens where the depth of field is extremely small and setting the right focus is imperative). The quality of the aperture ring is not as good but we hardly found a use for it as we used the lens mostly on f/32 (more on this later).
The Nanoha 5X – metal mount and body (Credit: Ofir Iluz)
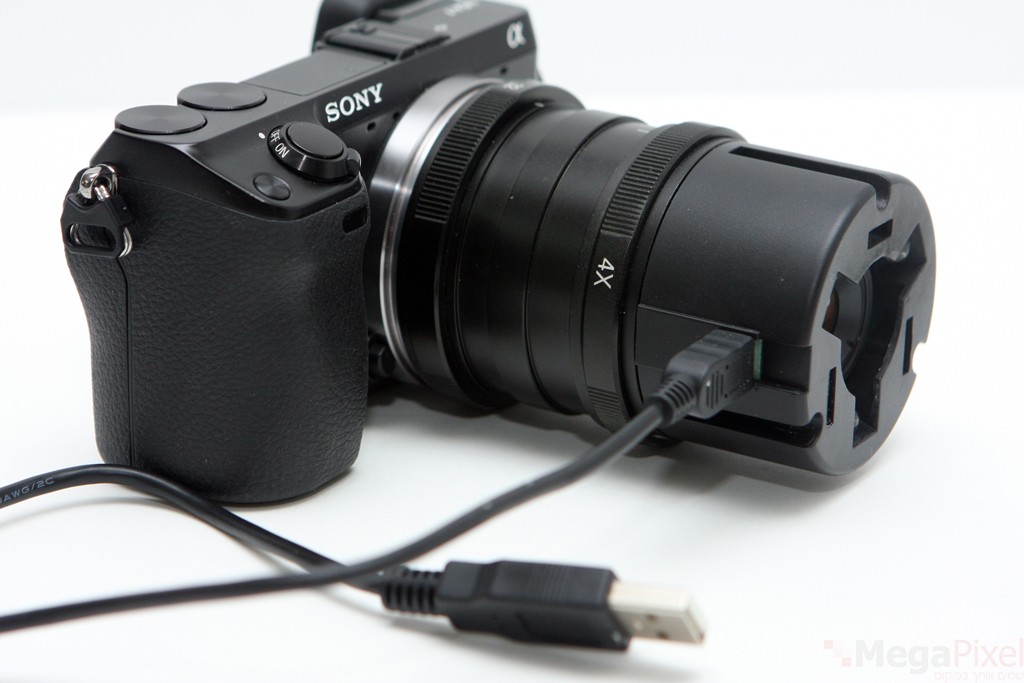
 Unlike the MP-E 65mm, the Nanoha 5X does not change its length (beyond the plastic part – it does extend a bit “inside it”) and stays constant at 90mm (with its plastic front part). The lens itself feels solid with some good weight in the hand (especially compared to the 18-55mm Sony NEX kit lens we were using at the time with our NEX 7 review unit). But make no mistake – at 320 grams it’s still lighter than most conventional macro lenses on the market (due mostly to its core design intended specifically for mirrorless cameras).
The Nanoha 5X magnification ratio varies from 4X-5X which is controlled by the focusing ring which makes a 90-degree turn. The Nanoha doesn’t allow for any filters and its front element is extremely small (and considerably narrower than the rest of the lens (something which becomes evident once you remove the plastic LED part of the lens). The lens doesn’t have a hood and as far as we know is not water/dust proof (not something that should worry you in any case as the lens is made mostly for studio work, as we shall discuss later on).
The Nanoha 5X does not have any buttons but it does include a micro USB connection on its plastic segment (a USB cable is supplied) for powering its LED lights.
Nanoha 5X number 31 without the plastic LED segment (Credit: Iddo Genuth)
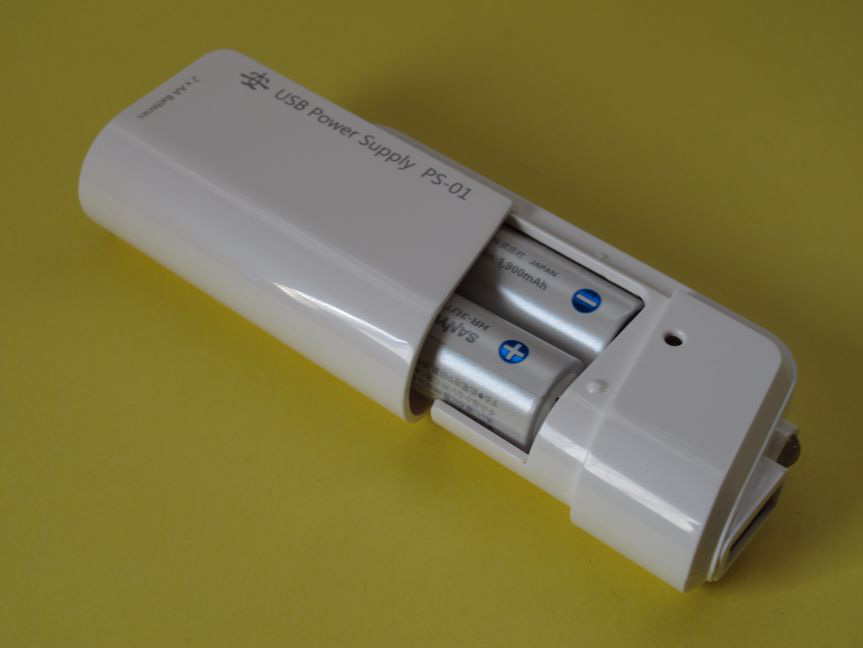
The power source for the USB can be a wall socket (using a USB adapter which is not supplied but can easily be purchased online; which is the method we used), a computer with a free USB socket or a special battery-powered USB unit (Yasuhara is going to sell those soon – you can see an image we received from the company below).
Using the Nanoha 5X
Unlike our normal lens tests, we decided not to go into too much of a deep technical analysis with the Nanoha 5X (with one reservation – see below). We didn’t do that because the Nanoha 5X is perfect optically and has no aberrations but rather because we felt, after several months of use, that these parameters are not the most important for this type of lens. This should not be understood to mean that we think that the Nanoha 5X performs bad optically, quite the opposite – as you will be able to see from the many examples in this article, but simply that there is much more to super macro in general than any technical analysis will provide.
That said, we did find it important enough for the purpose of this article to test which aperture of the Nanoha is the sharpest and how much of a difference there is between each aperture. The APS-C sensor on the Sony NEX-7 with its 24-megapixel resolution can bring even some of the best optics around to their limit so the results here should be very interesting indeed.
USB charger for the Nanoha 5X
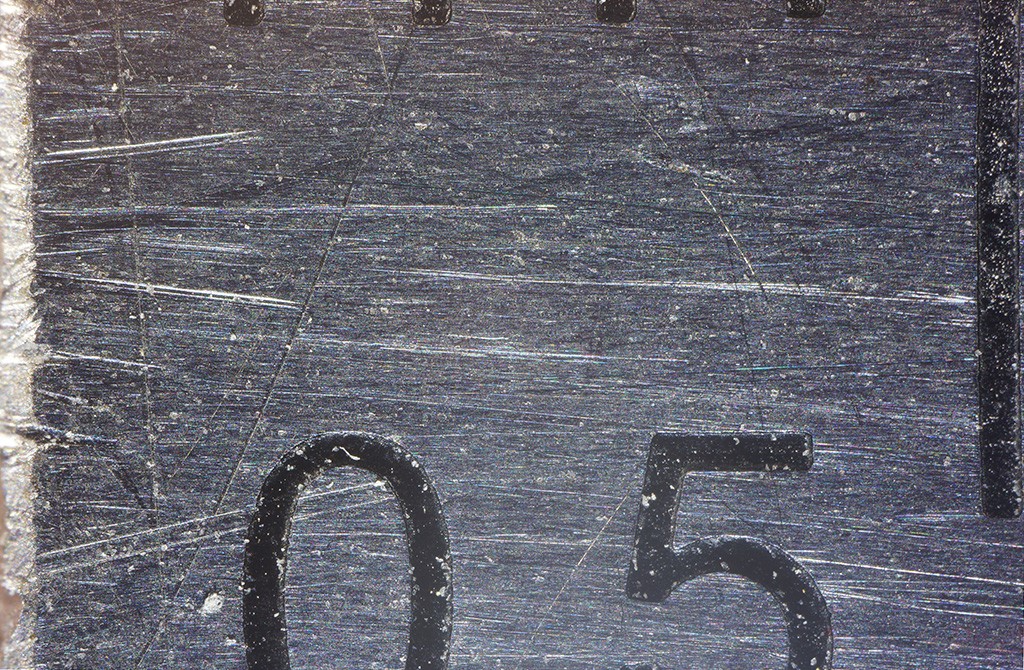
 As you can see clearly from the images below, the Nanoha’s lowest sharpness can be found on f/11. The sharpness improves when getting to f/16 and the optimal aperture seems to be f/22 with a small but perceptible decline in f/32. We decided to use f/32 for all our shots even with this slight loss of sharpness due to the DOF issue which we shall discuss in a moment.
What is much more important in our view then the exact sharpness of the lens is the way you use it. The following will be our attempt to describe our experience when using the Nanoha 5X. Although we are by no means new to macro photography, this was definitely our first serious attempt with super macro photography and we had to find many things for ourselves in the process (either on our own or after many many hours of looking online which in many cases turned out to be completely unhelpful). In general, we can say that whoever wants to try his hand shooting super macro seriously, should have good hands and a DIY spirit (we shall return to this point time and time again during this article). Although you might be able to find some super macro accessories here and there (we shall come to that in a minute), for the most part, we simply found ourselves spending hours improvising almost everything – sometimes with great success and in other cases finding ourselves wasting hours with zero results.
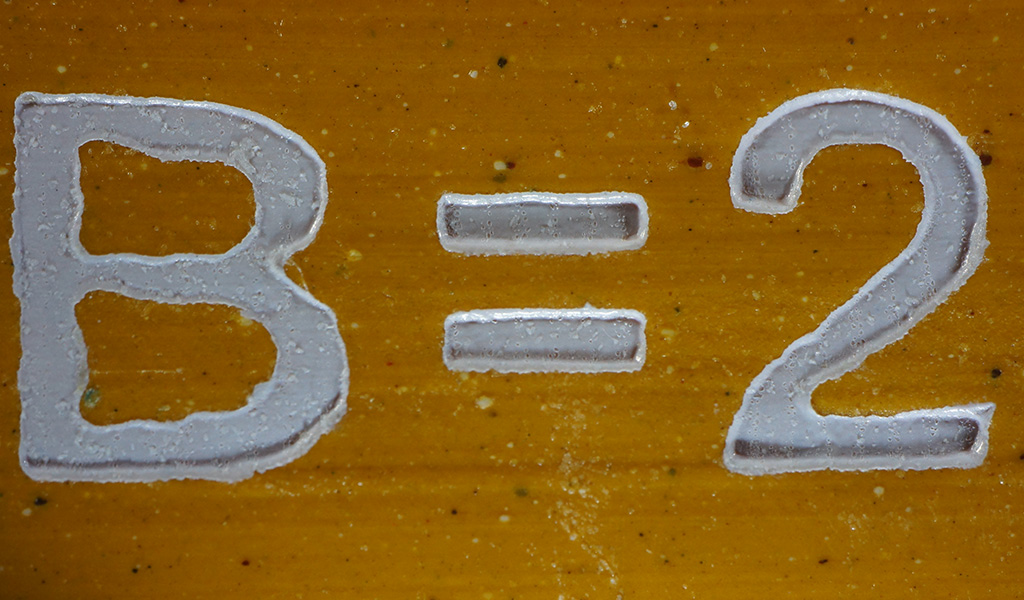
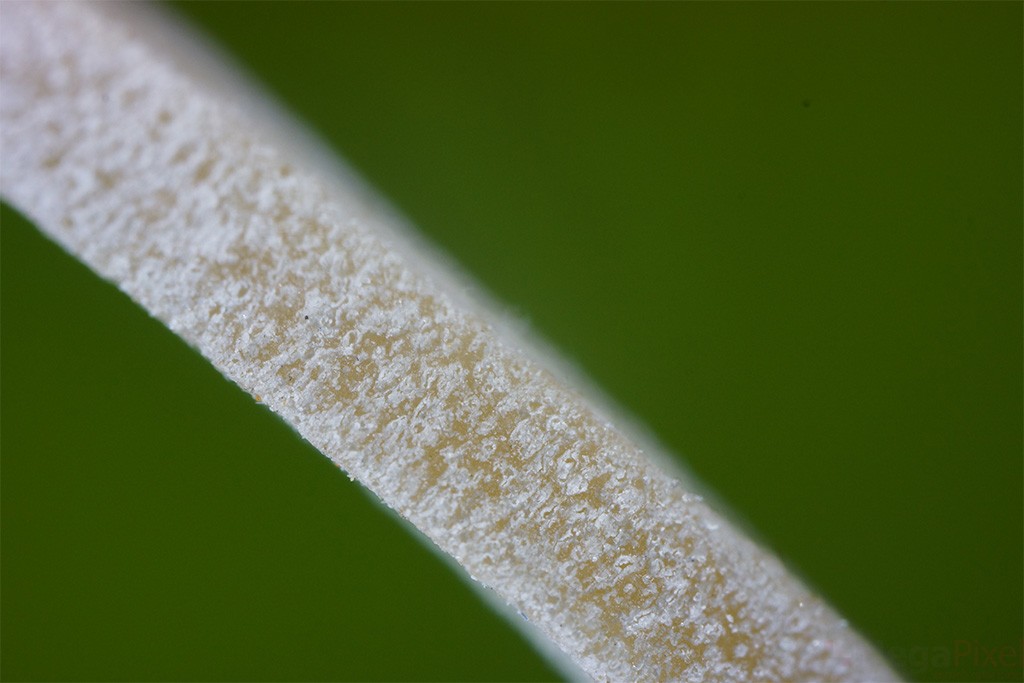
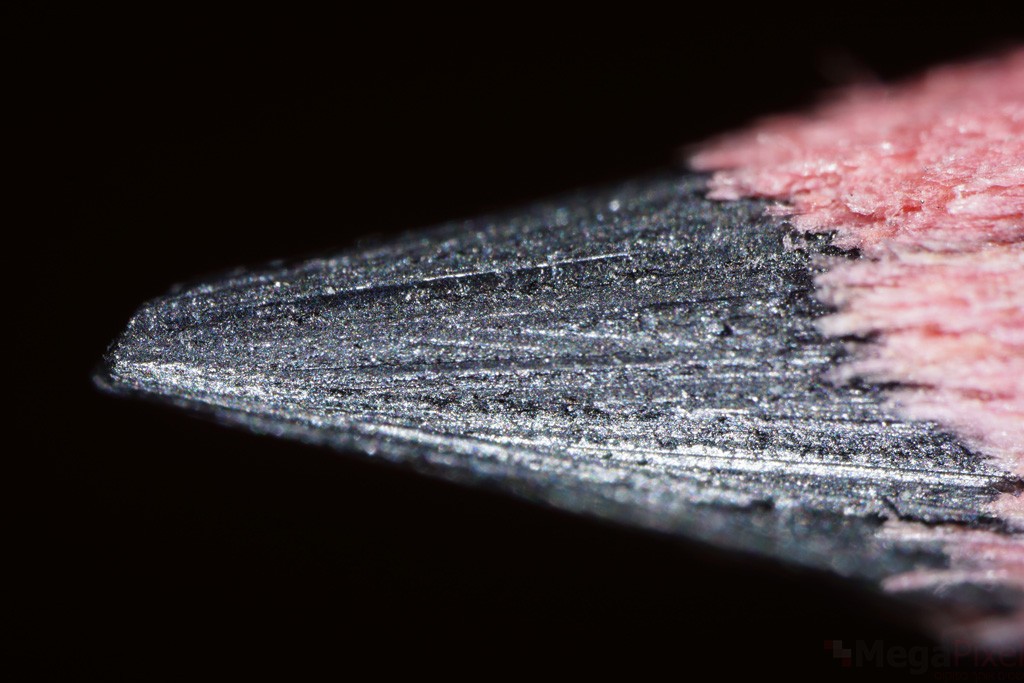
Writing on the side of a pencil
Sharpness test – f/11

Sharpness test – f/16

Sharpness test – f/22

Sharpness test – f/32
 We thought we shall start with some general guidelines and notes. The Nanoha 5X is what you can only call a studio lens. If you were thinking about taking this one to the field to shoot bugs and flowers, think again. When you shoot with 5:1 magnification even the tiniest of movements of the camera, lens or the object you shoot – translates into a blurred photos – super macro is extremely brutal this way. That said, there might be some exceptions to this rule and that is video. In many field tests that we carried it was possible to take short videos outside, given that you have a very stable tripod and there is zero wind, and even then you will be surprised how much movement there is from wind you do not even feel.
When we first got the Nanoha 5X we didn’t really think that we shall be doing a lot of videos, but eventually we found ourselves recording dozens of short clips, partly because there are interesting things to see in the super-macro world and partly because we found video to be more forgiving than stills when it comes to focus and DOF issues which are one of the main problems with super macro photography in general (it also made us feel a bit like shooting for a David Attenborough movie which is always fun). We edited a short clip from some of the videos we took which you can watch later in this article.
Nanoha 5X – preliminarily for studio work (Credit: Ofir Iluz)
 The most important thing one needs to realize when it comes to super macro is scale. In normal photography, we typically think of our frames in meters (sometimes dozens or even hundreds of meters depending on the lens and what we shoot). In macro photography, the size of our frame is reduced substantially to just a few centimeters, but as we mentioned at the beginning of this article, once we cross the 1:1 magnification ratio and enter the realm of super macro, the size of our frame becomes really small. How small? in the case of the Nanoha 5X (mounted on the NEX-7) using its maximum magnification ratio of 5:1, the size of the frame is an unbelievable 5 mm.
What can you shoot with a 5 mm frame (0.19 inches)? take a good metal ruler and look at the tiniest markings and mark the 5 mm line. This is going to be your entire frame from side to side. Now start thinking about objects that you can squeeze into this size or at least have an interesting part which can be shot in this kind of framing in an interesting way. This is actually harder than it sounds, and this is still the easy part…
The frame size of the Nanoha 5X on the NEX-7 – about 5mm (Credit: Iddo Genuth)
 After we discussed “what” to shoot, it’s time to talk about the “how”. As we mentioned we used the Nanoha 5X almost exclusively in a studio environment with a heavy Gitzo tripod. For lighting, we used the built-in LED lights of the Nanoha (which we connected to a wall socket using a USB adapter) as well as a background light (which we shall talk about in a second). It is important to note that we did get some occasional reflections from objects (metallic and others) because of the lighting but this should be expected when you have a light source only a few millimeters from an object. For the most part, however, the lights functioned just fine.
Nanoha 5X and its USB cable for the LED (Credit: Ofir Iluz)
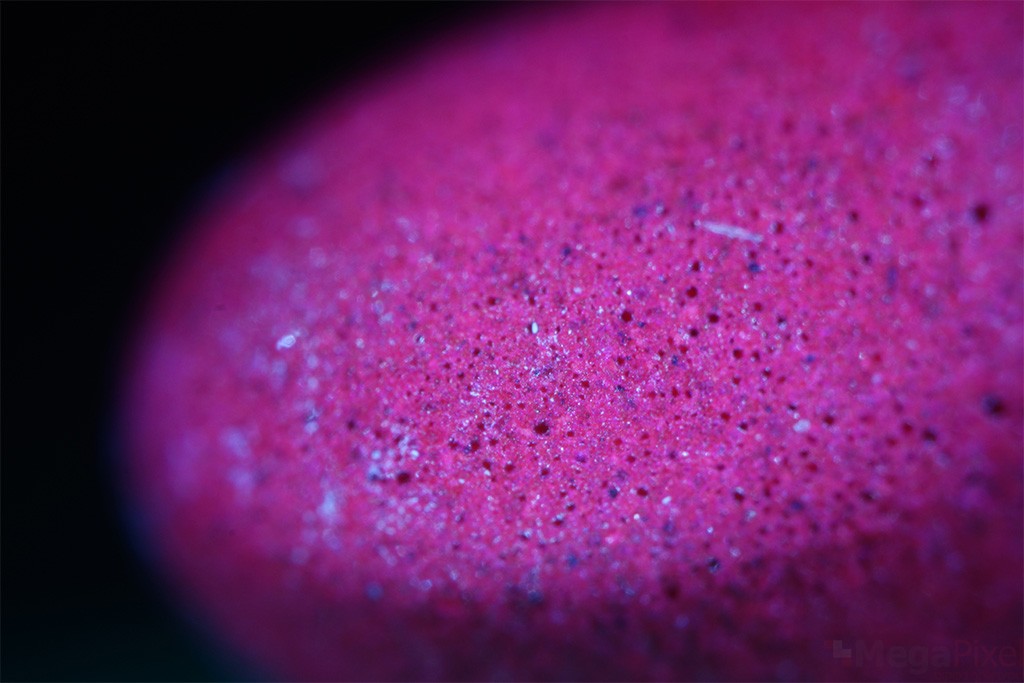
During the first few weeks, we shot without a background or any type of backlighting. The result was a rather unattractive monotonous black background. We then decided to add a background and some extra lighting to improve our results. We picked up a small LED lamp with a very flexible metal gooseneck which we choose for being cheap, simple, precise and easy to use, as well as small and also for producing no heat (something pretty important when trying to shoot insects as we shall see in a moment).
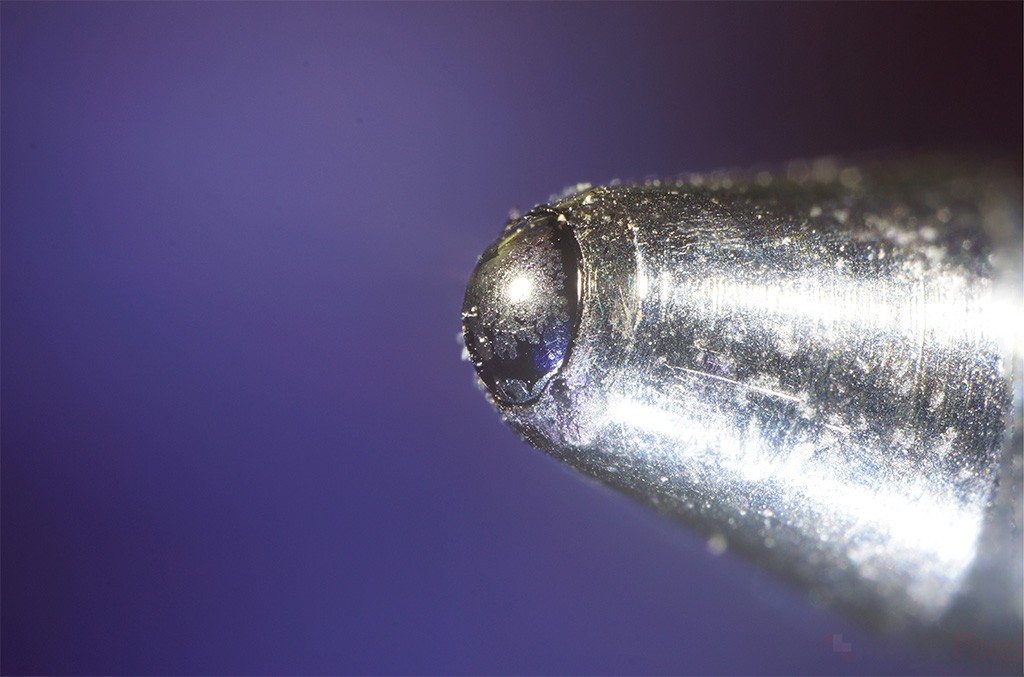
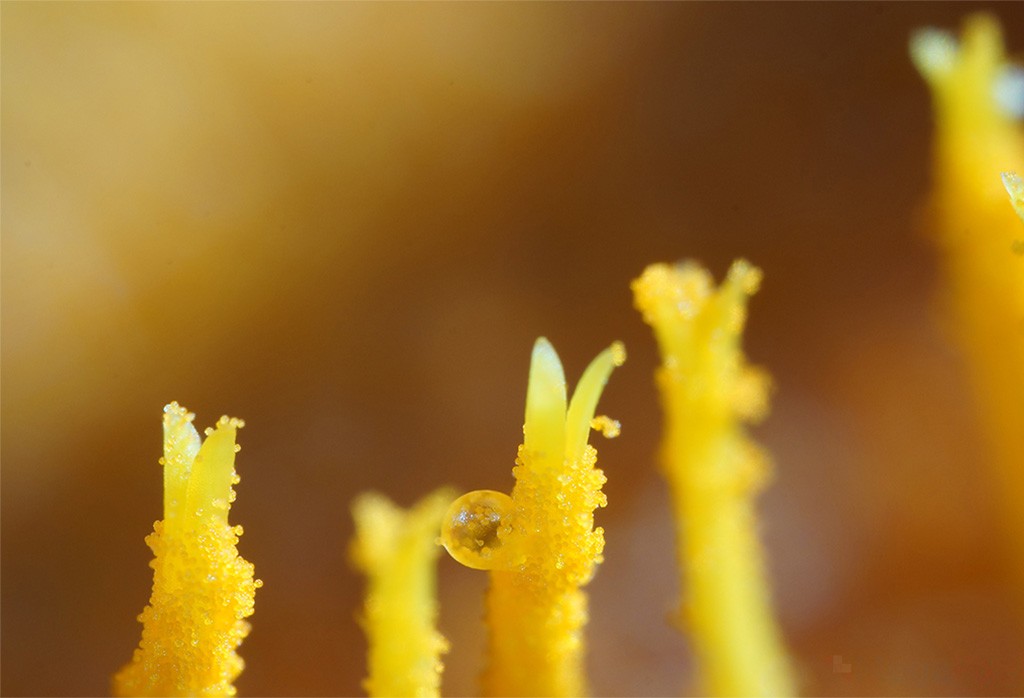
The head of a metal pen – metal reflects the LED light (Credit: Iddo Genuth)
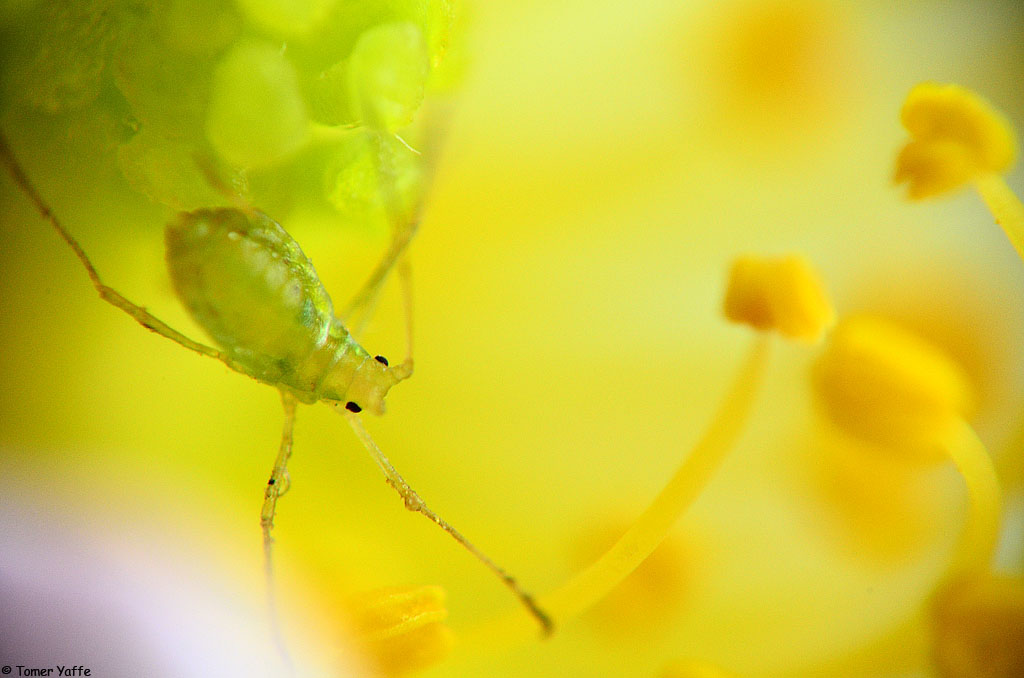
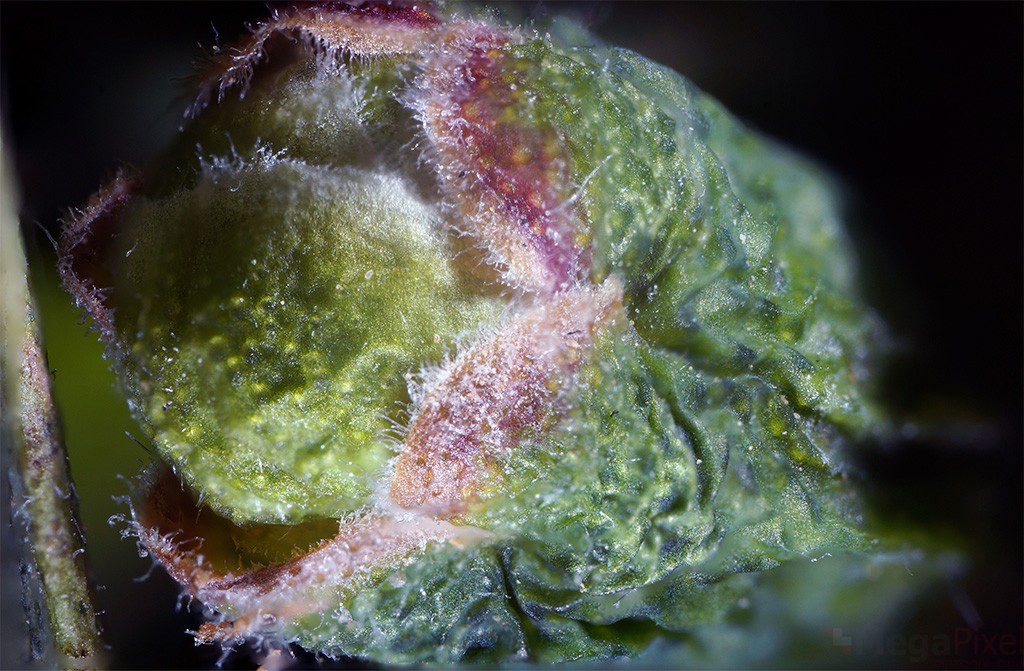
 After some trial and error, we found out that in many cases with the sort of weak and small backlighting we used we need to place the light very close to the subject and put the background on top or very close to the back-light in order to get an interesting background. In order to get an interesting background, we played around with dozens of materials (from color papers to leaves and flowers). Some looked better than others and some were more comfortable to work with (flowers, for example, wither very quickly so you can use them typically for a very short period of time). Aphids on a color flower appear to be fairly interesting, but not every subject can be shot on a flower and not every object we can or want to shoot from above (which is the way we shot aphids).
Now we reach the most intricate part of super macro photography – positioning our subject. This is indeed a complex problem and there are no real magic tricks here. When we are trying to position a subject which is a few millimeters across (at best) our fingers – with all their amazing sensitivity – turn into awkward giant claws (a good but somewhat unpleasant analogy will be to think that our fingers are just like a forklift trying to lift a baby). To counter this problem we tested all sorts of solutions including a wooden pick, a piece of paper (surprisingly efficient in picking up small creatures), and even a tiny watchmaker screwdriver, as well as many other improvised tools. Our bottom line is that none of them is truly ideal for the job of handling tiny objects.
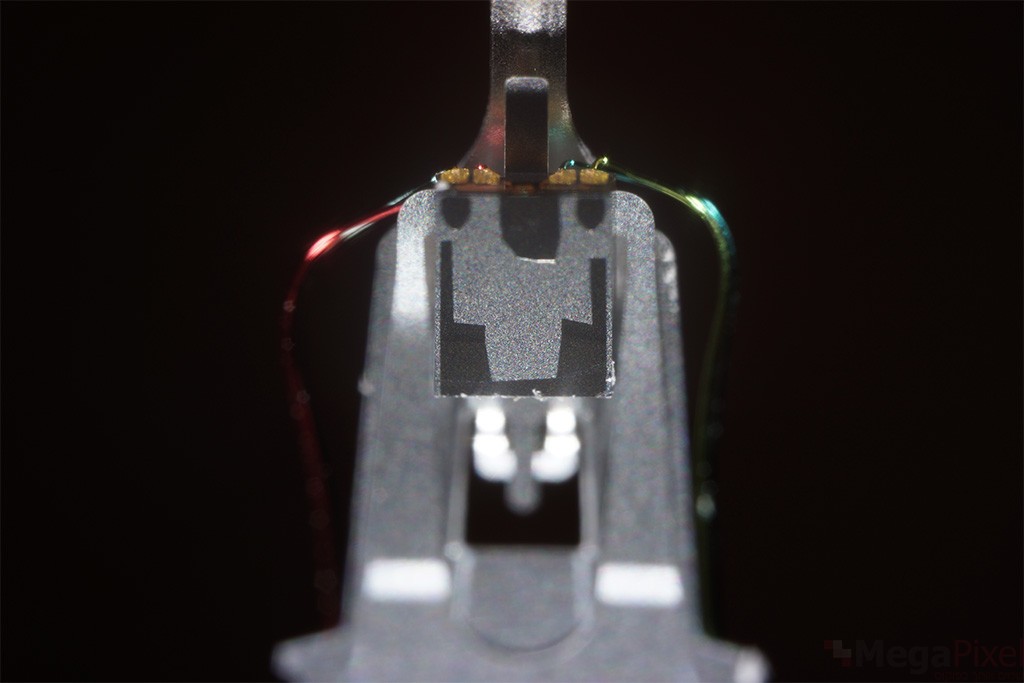
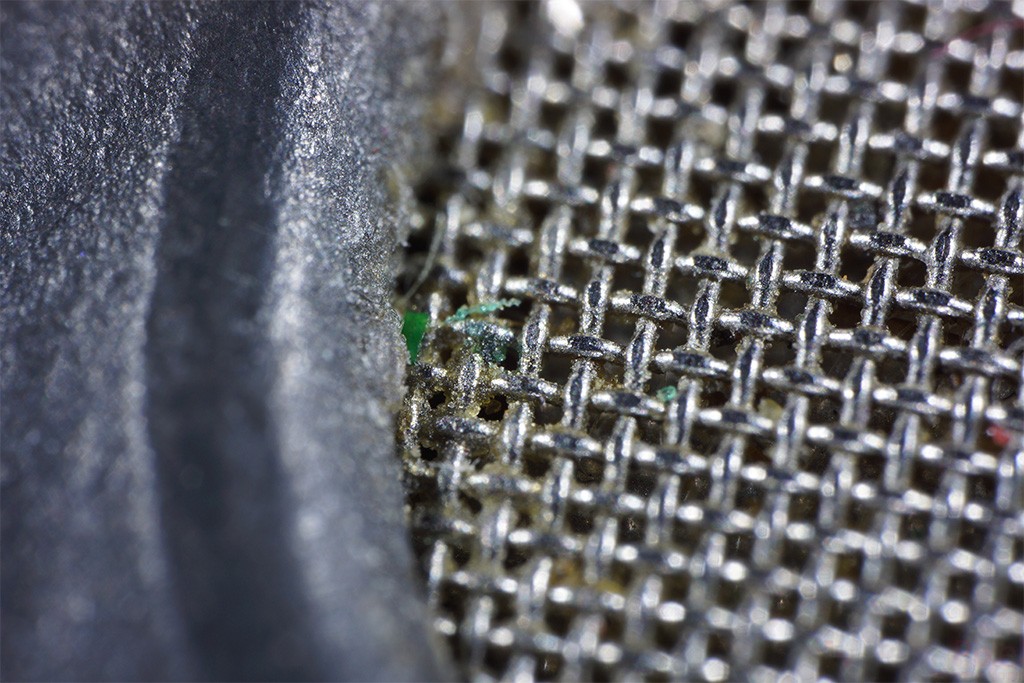
Hard drive head – notice the black background (Credit: Iddo Genuth)
 Insect collectors use special forceps which are extremely sensitive and apply very little pressure on the insect (or object). Prices are low (a few dollars on e-bay) but we didn’t have a chance to try one of them by the time we finished this article to say how effective they really are.
Even if you found a way to hold and move your subject, keeping it in the best position for a shoot isn’t a small feat. You will find yourselves spending minutes and sometimes even hours in failed attempts to position your would be “model” in the right angle just to find out that it fell or flew away. This is the right time to mention the obvious – super macro photography requires a huge amount of patience. If you are unwilling to spend hours dealing with things which are scarcely connected to photography (at best) it might be better if you look for another area of photography.
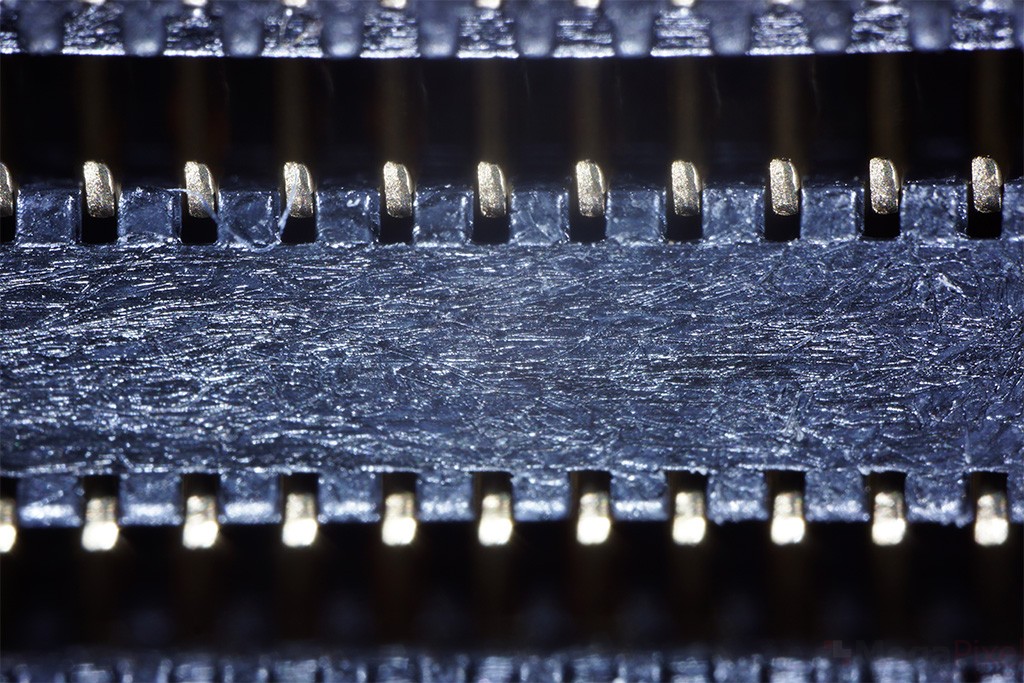
AMD CPU from the side (Credit: Iddo Genuth)
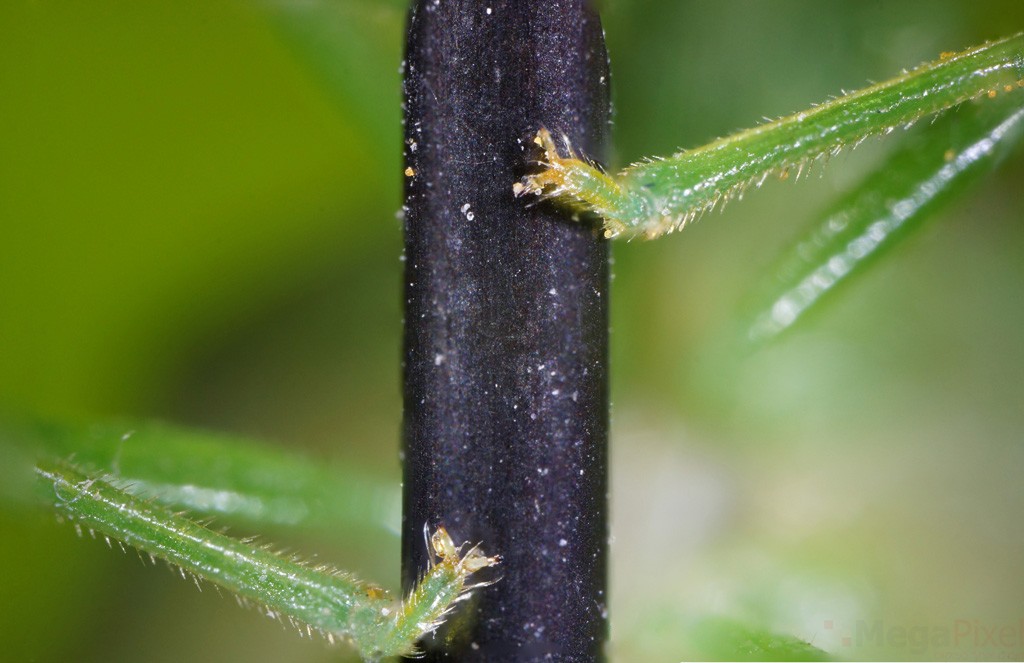
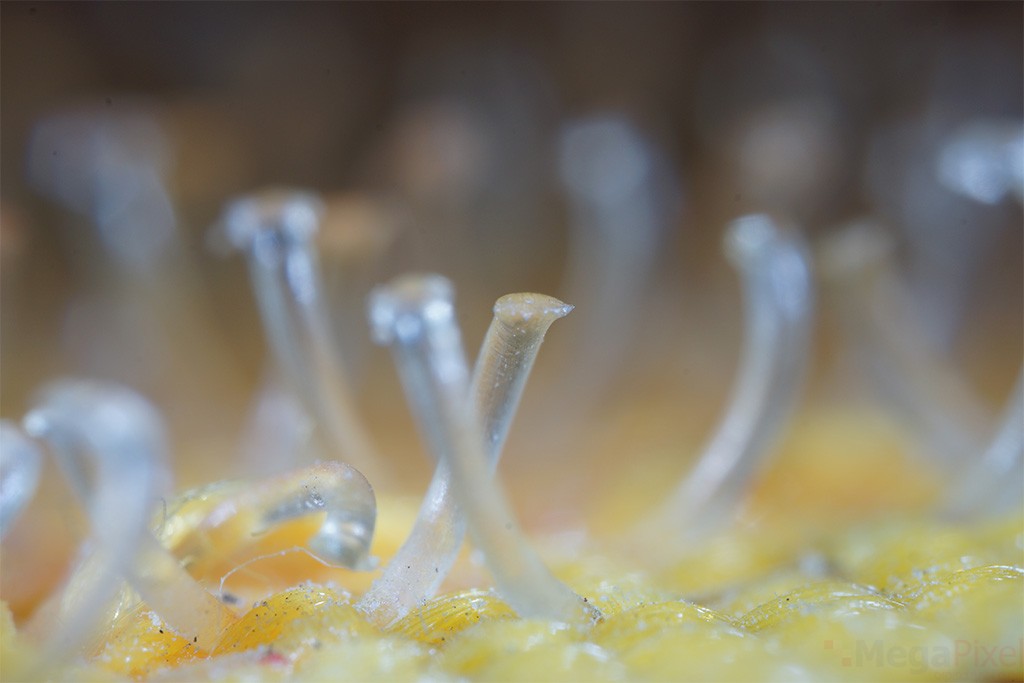
 Now we reach the most crucial part of our walkthrough – shooting live insects. Although shooting tiny inanimate objects can be fun and finding interesting textures and surprising surfaces is certainly enjoyable, the real thrill, at least for us, is shooting live animals – and when the size of your frame is 5mm, live subjects means only one thing – insects. However the main problem is that live insects tend to move, and when your frame is so small your chances of catching one of them is not that big (not to mention the fact that you can’t perform focus stacking on a moving subject – something we shall return to shortly). Nevertheless, you can find some insects such as aphids or some beetles, who stand still for long enough periods of time for some useful shooting, but keep in mind that with many insects this will not be the case.
One solution (although a fairly morbid one) is to shoot deceased insects. We “got lucky” to find a bee and a fly in this condition and shoot them. However, beyond the unpleasantness of shooting dead creatures (if you are sensitive to these sort of things), dead insects are not always the best candidates for a shot. Live insects are cold-blooded creatures and tend to move less when the temperatures drop. Macro photographers tend to exploit this trait and take pictures in the very early hours of the morning when temperatures tend to drop – we also used this knowledge to our advantage.
Do no harm – a flying insect – focus stacking from 8 images (Credit: Iddo Genuth)
 After we picked our subject and positioned it correctly with the right lighting and background it’s time to get to the actual shooting. At this point, we encounter one of the more intricate issues with the Nanoha 5X. While normal macro lenses such as our 60mm macro Nikon glass have a working distance (the shortest distance between the front of the lens to the focused subject) of about 4.5 cm (macro lenses with a longer focal length will have a longer working distance). On the other hand the distance from the front part of the Nanoha 5X to the subject is just over half a centimeter or 0.019 inch (note that this is not exactly “working distance since we are talking about the distance from the front plastic part of the lens and not the glass itself – but one way or another the distance is extremely short).
Of course comparing a 1:1 macro lens and a 5:1 super macro lens like the Nanoha 5X isn’t fair, but even if we compare the Nanoha to the Canon MP-E 65mm, we shall find out that while the Canon has a working distance of about 4.1 cm at 5:1 macro magnification ratio, the Nanoha 5X is still far off. The problem of this extremely short working distance is that it is hard enough to work with tiny insects on a normal environment let alone when you stuck with a lens millimeters away.
A bee magnified – the macro world is almost never “clean” (Credit: Iddo Genuth)
 Now we reached the main stage of our shooting – focusing. After we positioned our subject at the correct distance we need to find the right focusing plane (that is after we located the subject in the frame – not a simple task on its own). The depth of field the Nanoha 5X gives at 5:1 magnification ratio (even in f/32) is unbelievably shallow. Actually, from the testing we have performed we figured out that from 4:1 magnification and up to 5:1 magnification the lens covers a depth of field of about 5 mm. The DOF of a single frame in 4:1 magnification on f/32 is only 1/6 of a millimeter according to our test – about the width of two human hairs (!).
Since its almost certain that in most pictures we shall want a DOF wider than two human hairs, a question appears as to how we can accomplish this task. In other words, how can we create an image that is comprised of several focusing planes, such that the entire image (or at least a substantial enough portion of it) will be in focus. The answer is a post-production technique known as “focus stacking”. The are many good English articles on the subject such as this one for example.
We are not going to repeat all the stages here, but the technique is based on shooting several very slightly different images of the same scene, each with a slightly closer or further focus plane and combining them all using a software.
Of course, focus stacking is no magic. You can’t perform focus stacking on a moving subject since each frame will look different and the software won’t know how to combine them effectively. We were able to create complex focus stacking based images of live insects but only if they were kind enough to keep still for a long enough period of time (typically several minutes at least).
A beetle in front of the Nanoha 5X – very close focusing distance – the coin is for scale (Credit: Iddo Genuth)
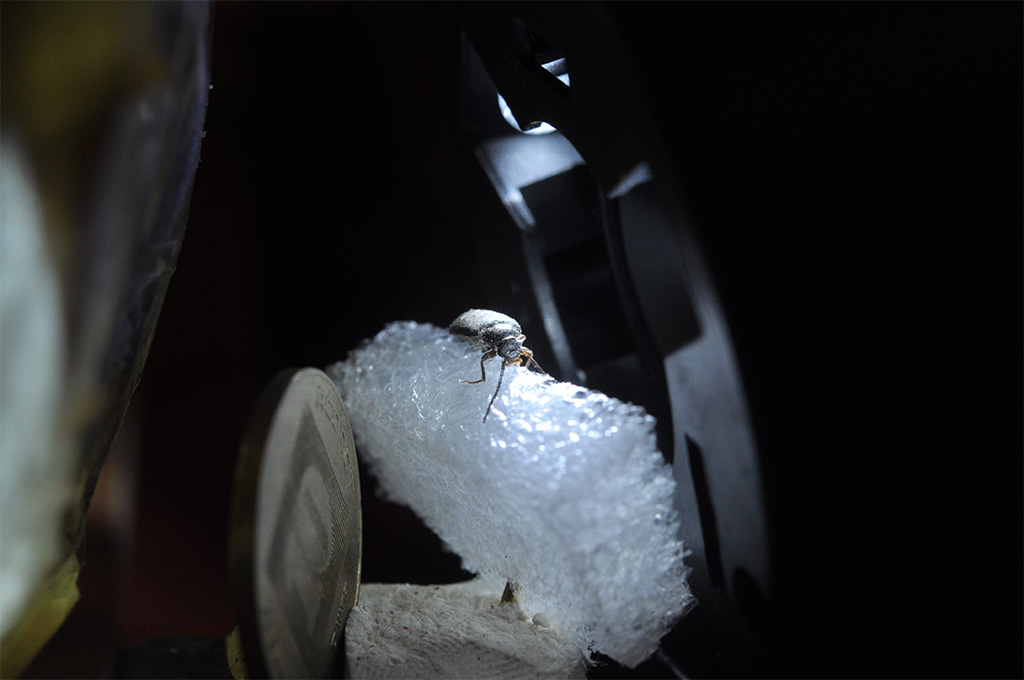 We received a lot of questions as to how many images are required to create a good stack focus based image. Actually, the answer is that it varies quite a bit. From our experience some images only require 3-5 shots in order to get a useful DOF in the final images while others can reach 30 and even that isn’t always enough (for example when shooting an insect with long antennas – a very hard task as those move almost all the time even if the insect doesn’t).
How can one reach the very accurate focus plane change from one frame to another which is so crucial for creating a successful focus stacking? Although there are a number of standard methods and tools for this task, we actually used a different less common method which is cheaper and simpler but far less accurate, although it does not require any extra equipment. We actually used the lens focusing ring itself to perform delicate adjustments to the focusing distance a tiny bit at a time and each shot was taken with a 2 sec timer so that the movement of the lens will not affect the shot.
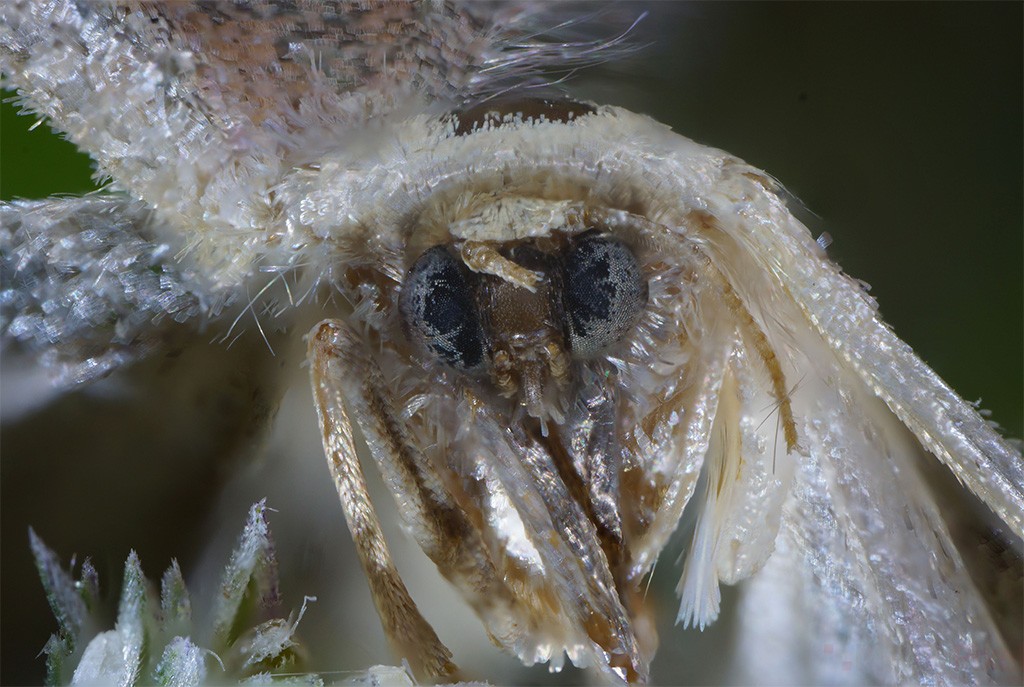
Large moth up close – focus staking from 20 images (Credit: Iddo Genuth)
 The Nanoha 5X focus ring is very accurate with good resistance so it was definitely up to this task but the accuracy levels we require in super macro are sometimes so demanding that even the most accurate focus ring will not help (not to mention the fact that using the focusing ring effectively changes the magnification ratio – something you do not always want to do). Despite the fact that we were able to use this rather crude method to create all the images you see in this article, we would definitely not recommend it to anybody who is considering super macro seriously.
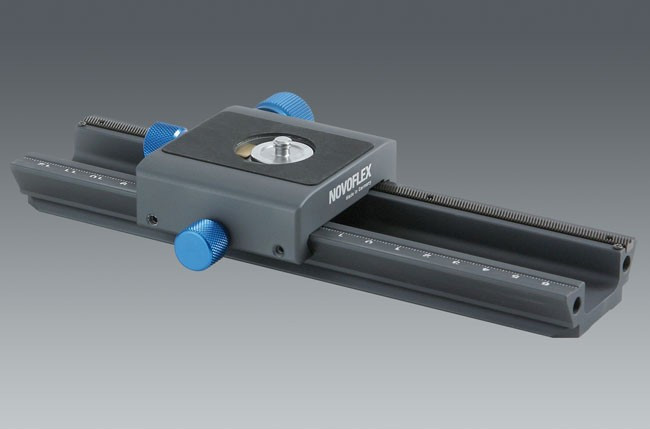
The more common method for shooting focus stacking images in super macro (and to some degree even in conventional macro) includes the use of a device called focusing rack (also known as focusing rail). This device is comprised of a long metal piece with distance markings and an adapter for connecting your camera as well as different sensitive knobs to move the camera on the rail in tiny increments. In this way, the user can keep the magnification ratio but change the distance to the subject ever so slightly.
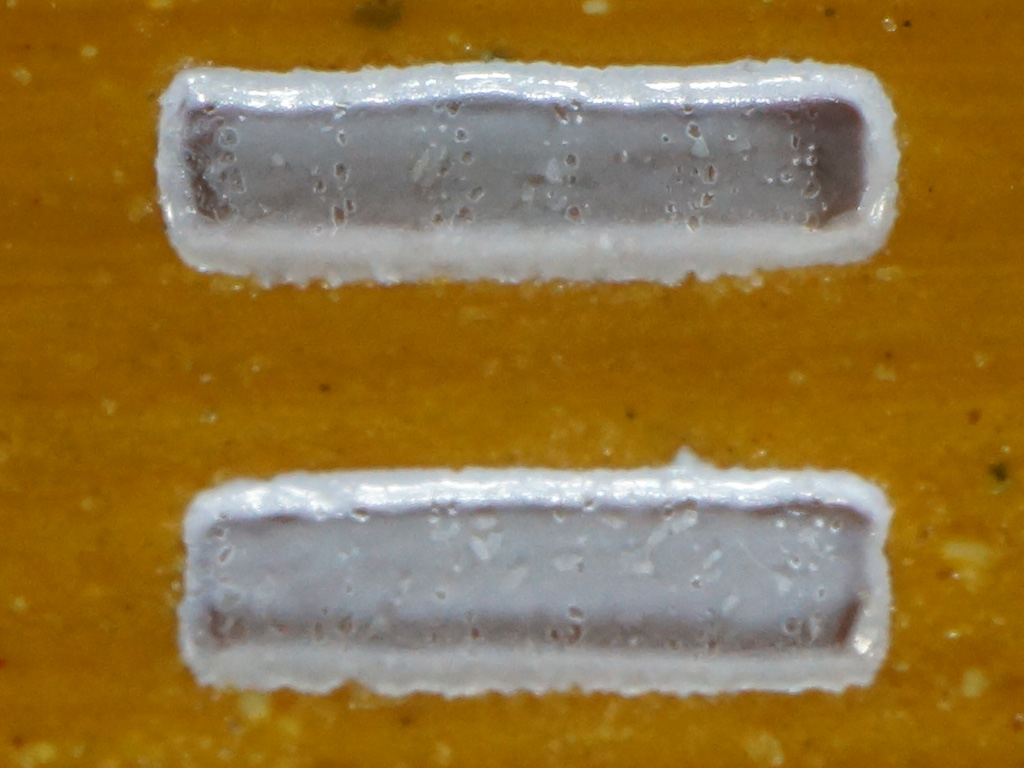
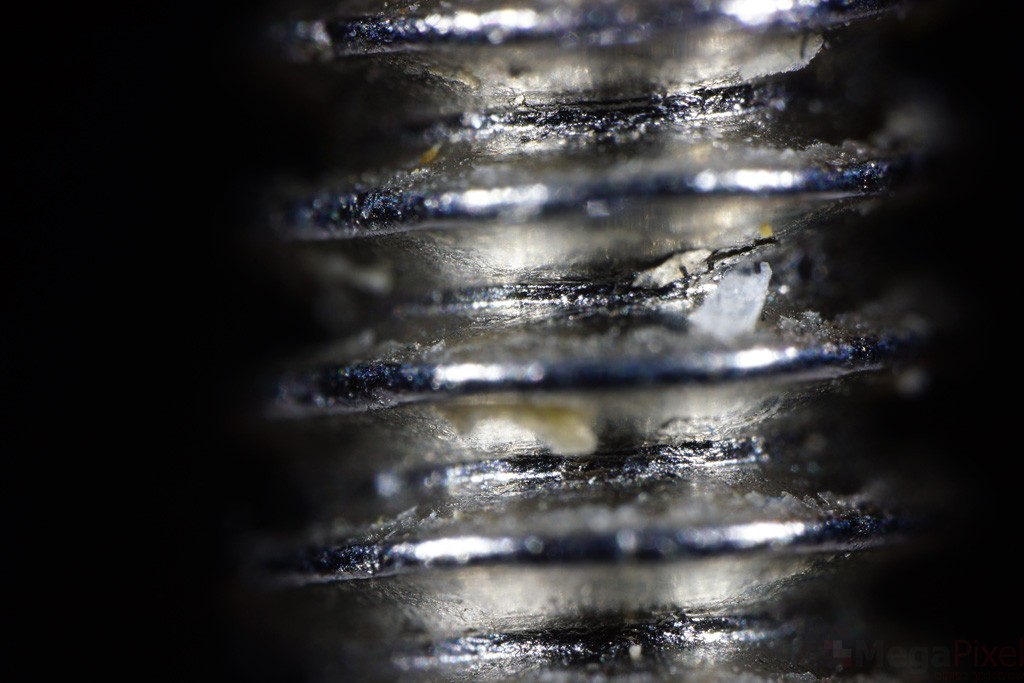
Razor blades – focus staking from 7 images (Credit: Iddo Genuth)
 The prices of focusing rails vary from a few dozens of dollars (for cheap Chinese rails on e-bay) and go up to hundreds of dollars for high-quality rails (such as the German manufacturer Novoflex rails). Despite the fact that macro rails are an essential gear for any super macro photographer (we lost quite a few pictures because of missed focusing planes due to a lack of a focusing rail), using a rail is still a manual process which requires careful and delicate (often tedious) repetitive work. A few years ago the U.S. company called Cognisys developed a special stack focusing robot which includes precise motor and a control unit for automatically shooting stack focus images. The StackShot robot as it is known can be configured to have a specific start and end point as well as information about which increments to set between each shot. The results are supposedly better and more accurate than any which could be achieved by a human being.
Razor blades – focus staking from 7 images (Credit: Iddo Genuth)
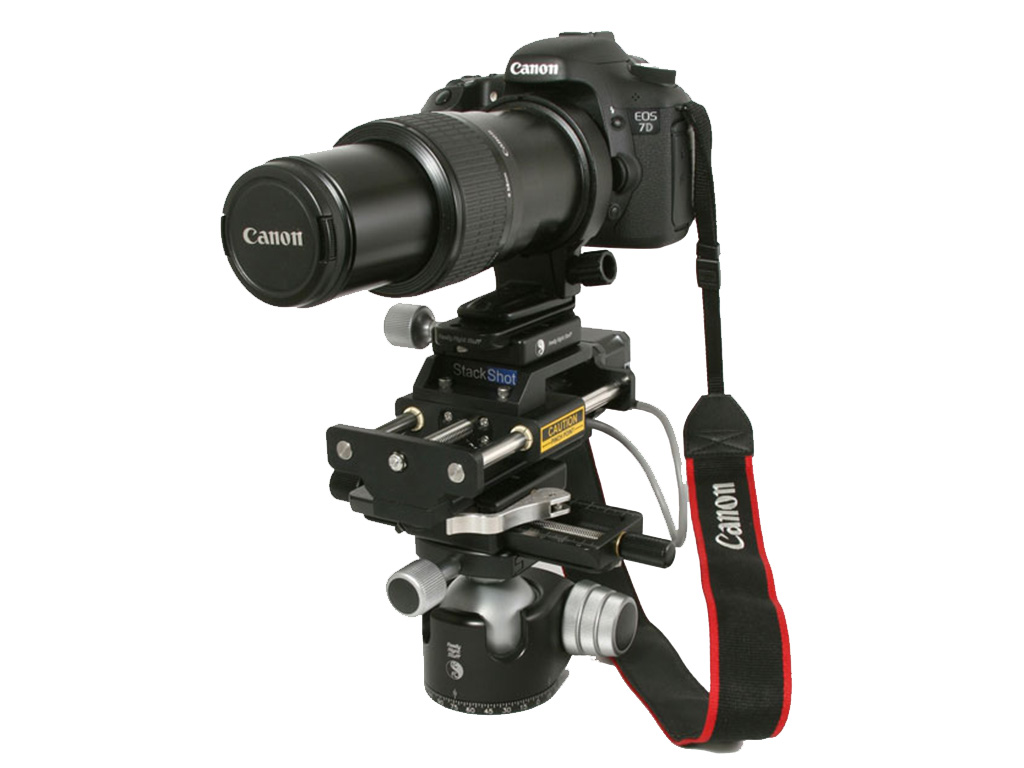
 Super macro photographers love to make all sorts of contraptions and strange DIY rigs including combining two focusing rails – one for the camera and one for the subject (as can be seen in the following example). These are more a matter of personal preference and work habits than anything we would recommend, but it proves one more time that when it comes to super macro there are no rigid rules and DIY is almost always the name of the game.
Canon 7D + MP-E 65mm open wide on top of a StackShot robot
 If we can return for a second to the question of the stack focusing software we mentioned briefly before. We used the beta version of Photoshop CS6 (Adobe Photoshop has stack focus capabilities since CS4 but the real improvement came with CS5). Photoshop typically did an O.K. job stacking the images together (we created a macro command to make the entire process quicker). The main problem we faced was the computing power required. We used a fairly powerful desktop (for the time) with a quad-core Intel processor, 8GB of ram, fast SSD, Windows 7 64bit and even then some images still took more than an hour to complete and in the process the task manager showed 95% memory usage and the entire system was basically unusable (we also faced a bug from time to time where the entire memory wasn’t clear after the process was done until we forcefully shut down Photoshop…annoying).
A moth – the wings are made of tiny scales (Credit: Iddo Genuth)
 Online you can find quite a few stack focusing software (Wikipedia lists no less than 15, some are free and some require purchase). We didn’t test any of them besides Photoshop but you can find reviews and comparisons online (such as this one for example) which can help you pick the one which is most suitable for your needs.
Before we conclude this article, a few words about shooting video with the Nanoha 5X. As we mentioned previously when we first received the lens we didn’t really think video is going to be something we shall touch upon more than briefly. Eventually, we found ourselves taking dozens of short clips (typically 1-3 minutes each, although in some cases we got the overheating sensor warning from the Sony NEX-7 – something which requires a separate investigation). Since you can change the focus during video it’s much easier to give the viewer a better “3D feel” of the subject you shoot than in any single image taken with such a low DOF.
A mosquito on a paper clip (Credit: Iddo Genuth)
 In super macro video even more so than stills photography, choosing the right subject is imperative. An insect moving too quickly will simply run away from the frame while an insect which doesn’t move at all (which is arguably ideal for still shooting) might seem boring (although skilled video editors can probably make even a fixed subject look interesting with some editing magic). This is why the most interesting subjects for super macro video are probably those who move very slowly and perform some sort of interaction with their environment (move their antennas, mouth, legs etc.). Aphids are again quite ideal for this task – they move ever so slowly and live in a tiny microcosm of creatures which includes ants and tiny Flies which typically move much faster and go in and out of the frame performing all sort of strange interactions with the Aphids. Beetles, spiders, and moths are typically much bigger insects, but if you can get them to stay in one place for long enough, you will find out that they keep moving their sense organs all the time, making for some potentially fascinating videos.
A video created from several short clips we took with the Nanoha 5X
[vimeo]https://vimeo.com/42612273[/vimeo]
Conclusion
After many weeks of daily use, we can definitely say that we got addicted to the tiny universe that the Nanoha 5X revealed to us.
Super macro and especially magnifications of 5:1 which are what the Nanoha 5X can reach are a very different than conventional (1:1) macro which many of us are intimately familiar with. It’s worth noting that almost all of the difficulties we encounter with macro photography are enhanced and new issues come up (such as the problem to see the entirety of the object you are shooting when just a very narrow slice of focus can be viewed at a time).
Nanoha 5X – enjoyable super macro (Credit: Ofir Iluz)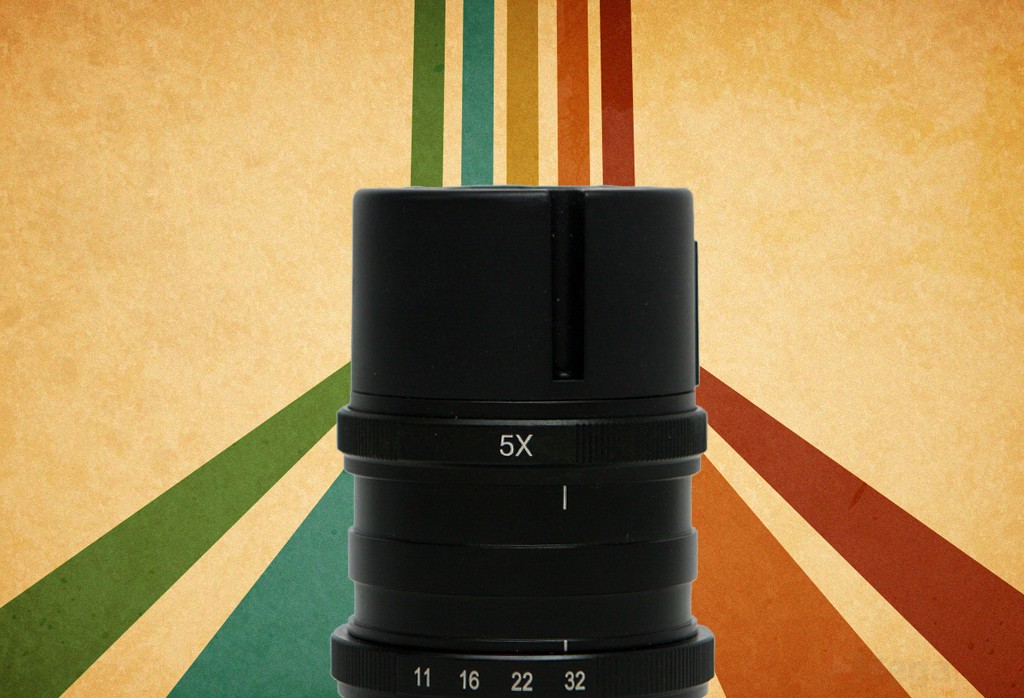 Super macro is a very technical field of photography requiring large doses of patience, the ability to DIY and improvise, some technical sense and of course basic photography skills. Beyond all of that, the ability to create focus stacked images seems to be almost a necessity if you want to make the most out of your equipment. During our months with the Nanoha 5X we also discovered the thrill of shooting super macro video clips and we even tried to shoot some video outdoors (stills proved to be impossible since even the smallest wind moves the subject quite considerably).
After we explained who might be interested in super macro photography, a few words about the Nanoha 5X itself. During our time with the lens, the Nanoha functioned exceptionally well. The build quality was very good, its small and relatively light and its optical quality was very good even at a closed aperture, as you can see from the images accompanying the article (as well as from our aperture sharpness test).
Adding the LED lights in the front element of the Nanoha 5X really helped counter one of the biggest issues of super macro photography – getting enough light with very closed apertures. There are some drawbacks to this method and we had some reflections especially when shooting metallic objects. We feel that this is something that might be resolved by changing the arrangement of the lights. Maybe by using many more LEDs in a circle or by using an arrangement where a number of LED lights will be mounted on flexible goosenecks or any other way that can soften the direct light of the LEDs (these suggestions have been passed along to the manufacturer).
Fun with Aphids – the background is everything (Credit: Iddo Genuth)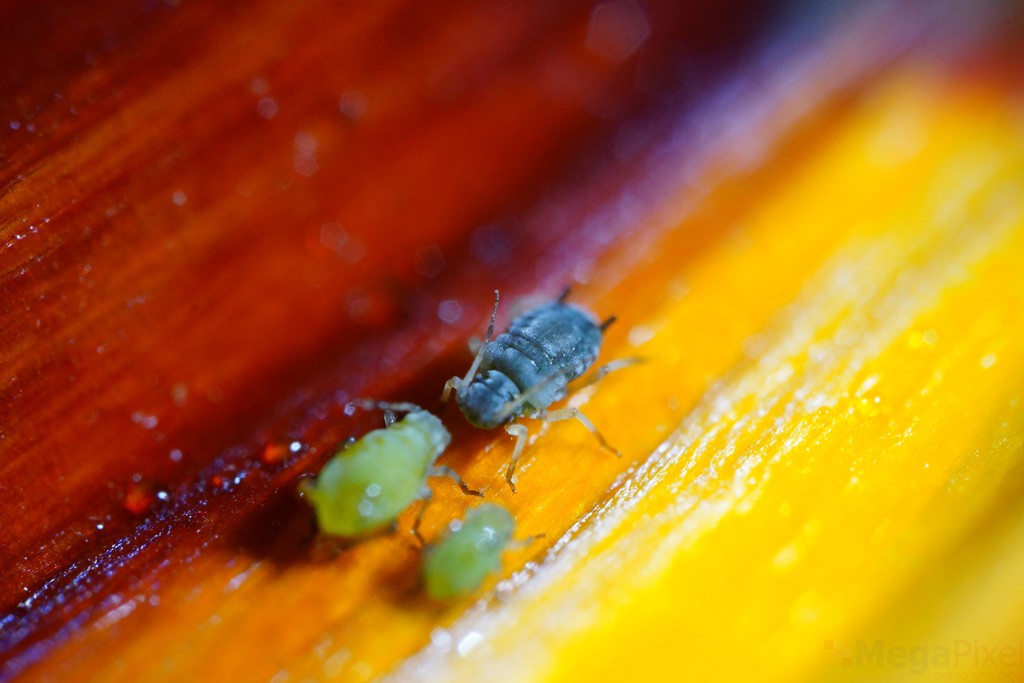 As a side note we would like to give some very good feedback on the use of the Nanoha 5x with the Sony NEX-7 camera (and more recently the A6000). The Sony’s 24-megapixel sensor really stretched its muscles with the Nanoha 5x and recorded some very detailed images. The focus peaking feature turned out to be super useful for shooting super macro and checking focus and the small size of the camera and general ease of use made our experience with it a very pleasant one. Our only two issues with the NEX-7 are the sensor warming message in video mode that rear its ugly head from time to time and the fact that Sony doesn’t have any camera control software which could have allowed us to take pictures directly from the computer which could be very useful for a studio work (something that both Canon and Nikon have been offering for a long time with their cameras).
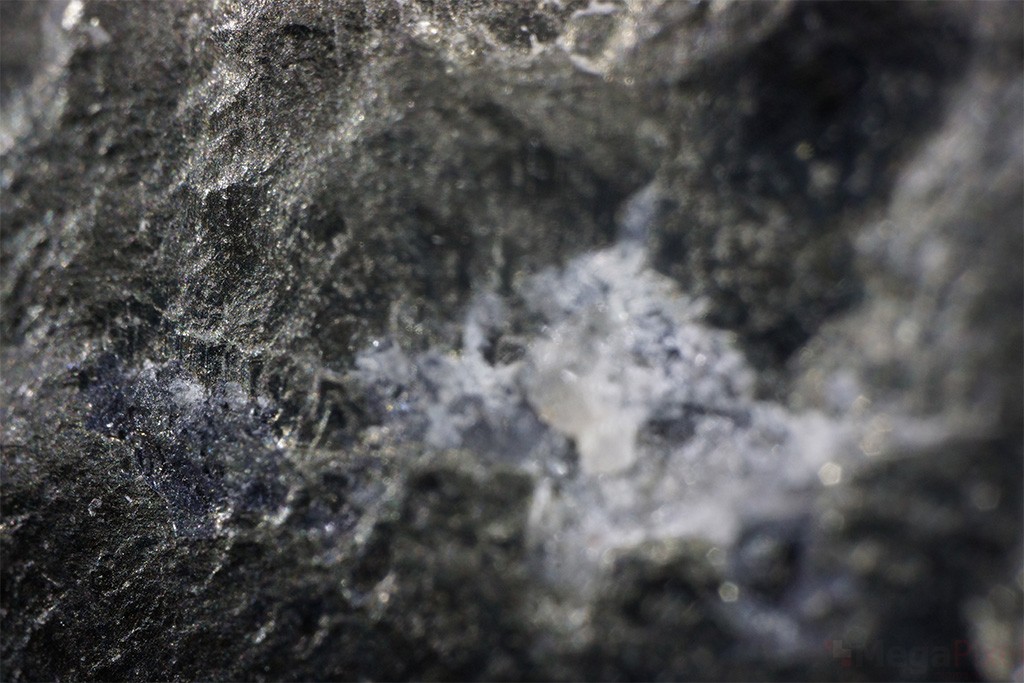
“Moon” rock – metallic looking stone up close (Credit: Merav Izhaky)
 Like more or less any lens, the Nanoha has some drawbacks as well. The most obvious one is its short working distance. If we measure from the front of the plastic element (where the LEDs are located) you get only about 5 mm to your subject. We definitely believe that this distance should be increased (4-5 cm is much more sensible). A second drawback, although arguably less important, has to do with the range of the macro magnification. While the Canon MP-E 65mm goes from 1:1 up to 5:1, the Nanoha 5X can only do 4:1 up to 5:1 – this gives the user fairly small flexibility when it comes to the size of the objects he or she can shoot. Evan a 3:1-5:1 would have changed things for the better in this respect and give users more control.
To sum things up, the Nanoha 5X is a pretty unique lens with a very specific target audience. If you already have some experience with super macro, reversed lenses, extension tubes etc. and anything beyond 1:1 macro magnification and you are using (or considering) going mirrorless, the Nanoha will be a useful high-quality option with a price tag that will not break the bank (it currently sell for around $500). People who would like to take their first steps in super macro photography and are willing to spend the time to learn this field will also find the Nanoha 5x to be a useful and fairly easy to use and will hopefully be drawn into this micro-cosmos just as we did.
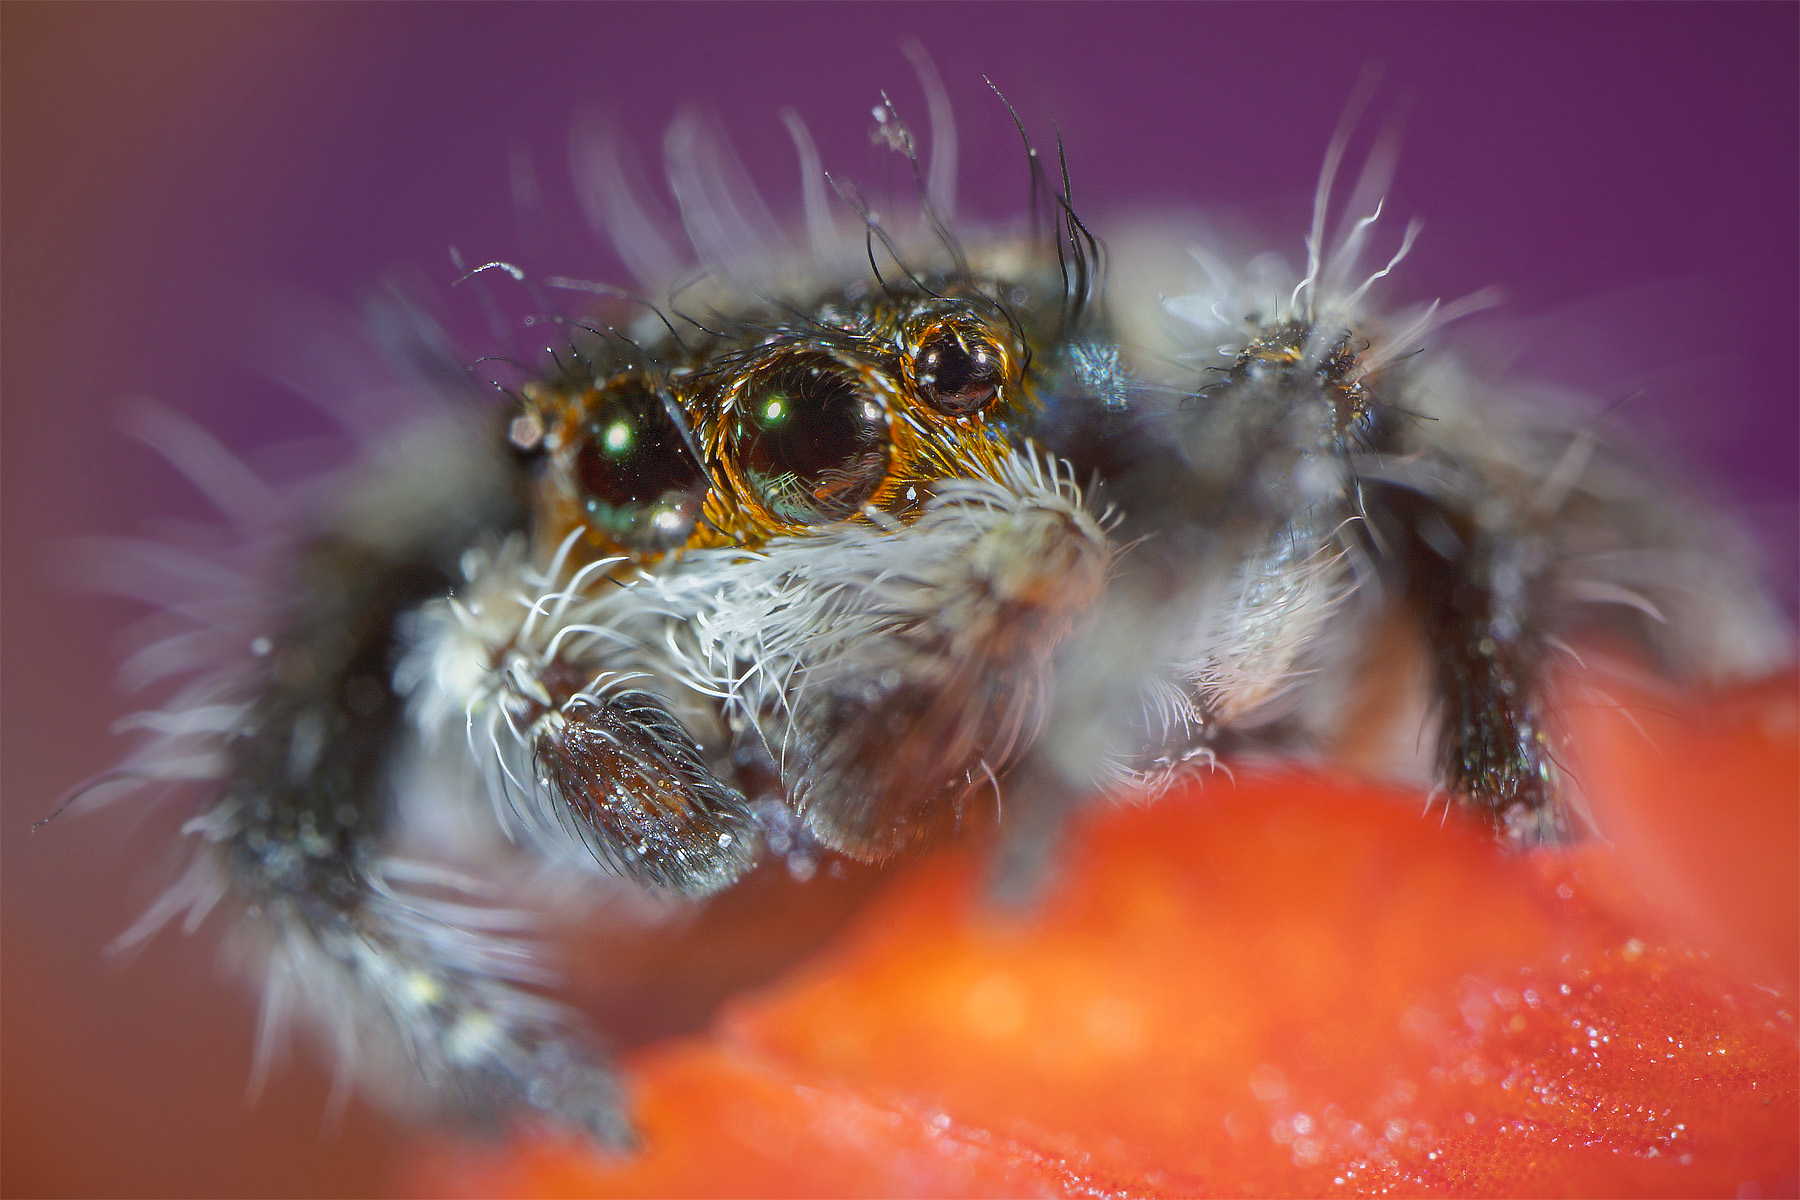
Spider – 5X magnification
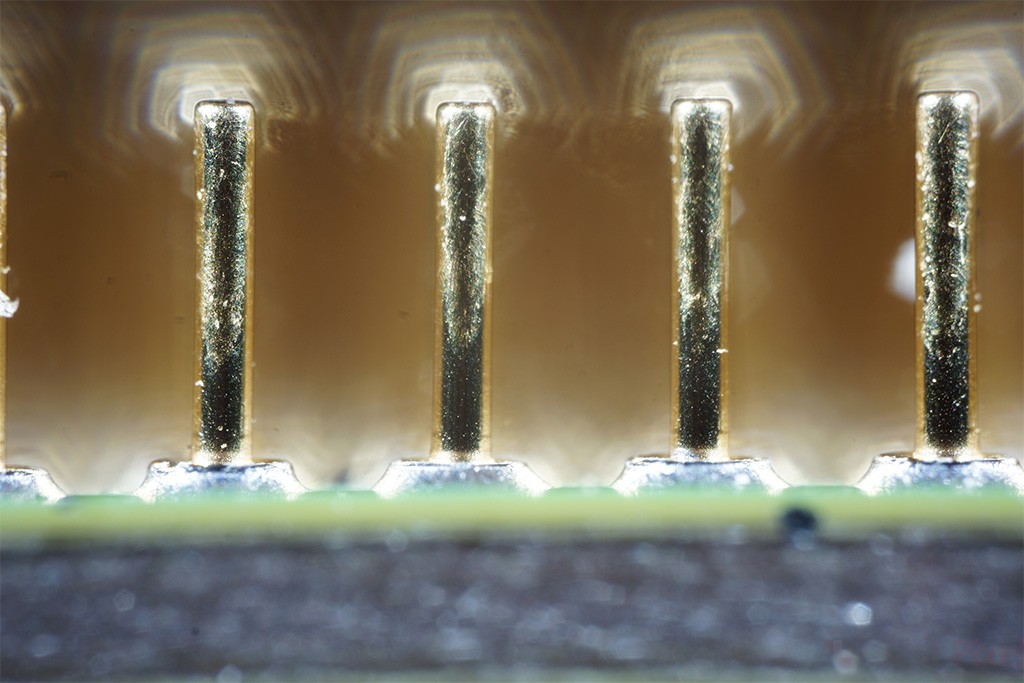
Incidentally, the Nanoha 5X is also exceptionally well suited for technical photography of very small products (tiny electronic parts etc.) where things like background are not as important. We actually believe that this was a major target audience for Yasuhara in the development of the Nanoha 5X, although this should not take away anything from the appreciation we have for the lens as a tool for creative photography.
Pros
- Unique capability to shoot super macro (up to 5:1 macro magnification) for Sony E-mount, Micro 4/3 and Canon EF-M cameras.
- Very good image quality (even at f/32).
- Compact and light with a fixed length.
- Very good build quality.
- Effective Built-in LED lights.
cons
- Very short working distance (less than 5mm from the front of the plastic front element) could make working with tiny objects a bit difficult.
- Somewhat limited macro magnification range – 5:1-4:1 (compared to 1:1-5:1 on the Canon MP-E 65mm for example).
We would like to thank Mr. Shin Yasuhara and the Yasuhara company for sending us the review unit and for their patience and willingness to help and answer our many questions and comments through the review.
This article is based on the Hebrew version of the Nanoha 5X Review published on MegaPixel.co.il website.
Gallery
We have included a gallery of additional images of a different type of objects we captured during our review process. Some of the images have been created using focus stacking technique in Photoshop.


 You can check out more LensVid exclusive articles and reviews on the following link.
This is an English version of an article originally published on the Israeli Photography website MegaPixel.co.il
You can support LensVid by shopping with our affiliate partners
Affiliates: Amazon, B&H, Adorama and E-bay.
Why should you trust us?
15 comments