Today we are doing our first Network Attached Storage (NAS) review and it comes from a company which is relatively new to the market but has a major heavyweight parent company.
ASUSTOR was founded in 2011 and is a subsidiary of the Taiwanese giant ASUS (pronounced AZUS if you were wondering), one of the largest computer and hardware manufacturers in the world. Unlike ASUS which has a whole range of computing and electronic products, ASUSTOR focus specifically on network-attached storage solutions.
Although it might not be as familiar name in the industry as Qnap and Synology, since its creation ASUSTOR became a viable alternative to those brands and the drive that we will be testing today called the AS4004T is not only competitive with some of the offerings from those brands, it is possibly a leader in its class – at least in some respects as we shall see later on.
Before we start, an important note. There is no way that we can cover all of the different aspects of this unit. Covering everything will require several lengthy videos and probably a lot more knowledge than we have about networks, so in this review, we will focus on what we have found to be relevant for us as photographers, videographers and content creators and we shall share links for more information for people who will want to dive deeper.
New company with a powerful back

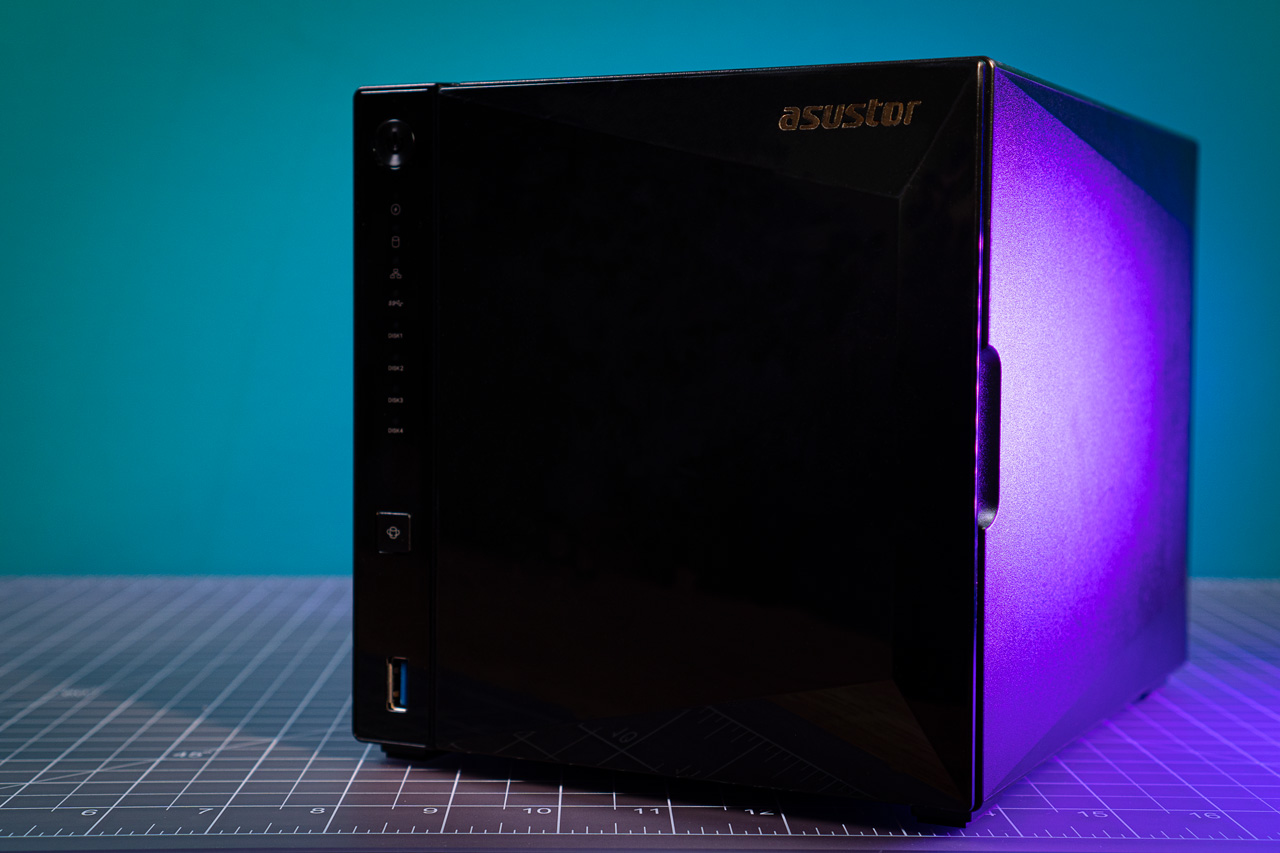
Let’s start by taking a quick look on the unit externally. The AS4004T has four 3.5″ bays and is quite compact, measuring 22cm (about 8.5″) deep over 16cm by 16cm (or 6.2″) in height and weight. It has a pretty substantial power brick which we connected to a UPS (which is highly recommended, but more on this later).
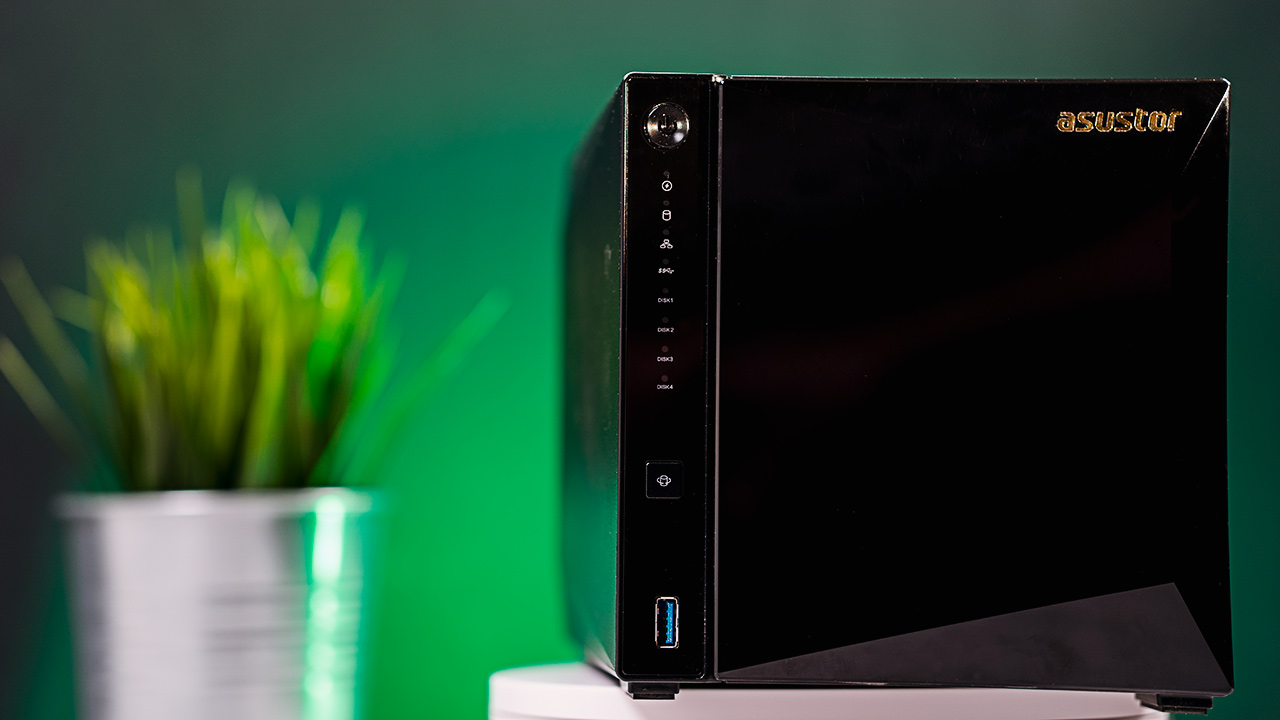
On the front of the unit, we have the four disk bays (we marked each disk and each bay), the user-configurable power switch, several indicator lights including a power LED, system status, network indicator, USB indicator and separate indicators for all four drives. You also have a USB 3.1 port. Finally, you have a magnetic plastic diamond-shaped cover for the drives.
On the back of the unit, you can find a Kensington lock, the power connector, a tiny reset button, dual 1GBs RJ45 connectors (which can be used for link aggregation) next to a fairly quiet 120mm fan, the all-important single 10GBe RJ45 connector and finally a USB 3.0 connector.
The back of the unit – 10GbE connector

The unit is sold without any drives and you can use whatever drives you want and you have several options on how to use them in the unit including Single, JBOD, RAID 0, RAID 1/2/5/6/10. We were somewhat conservative with our build and choose RAID 5.
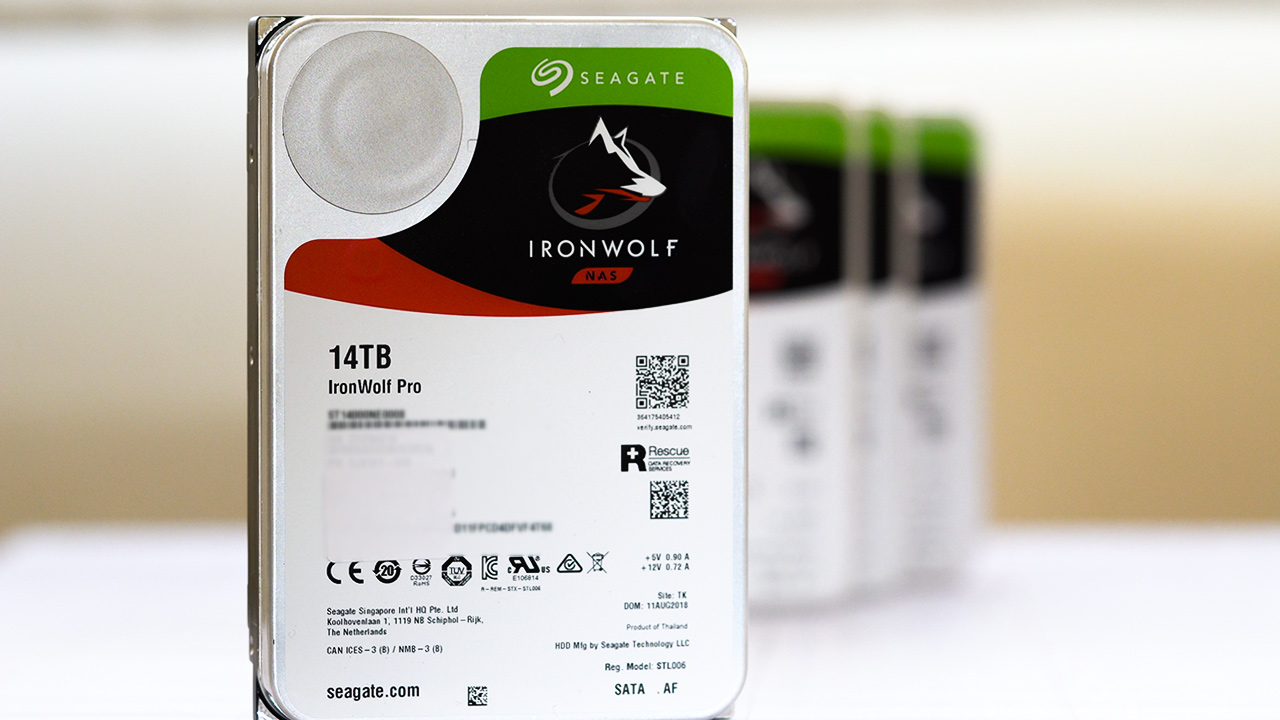
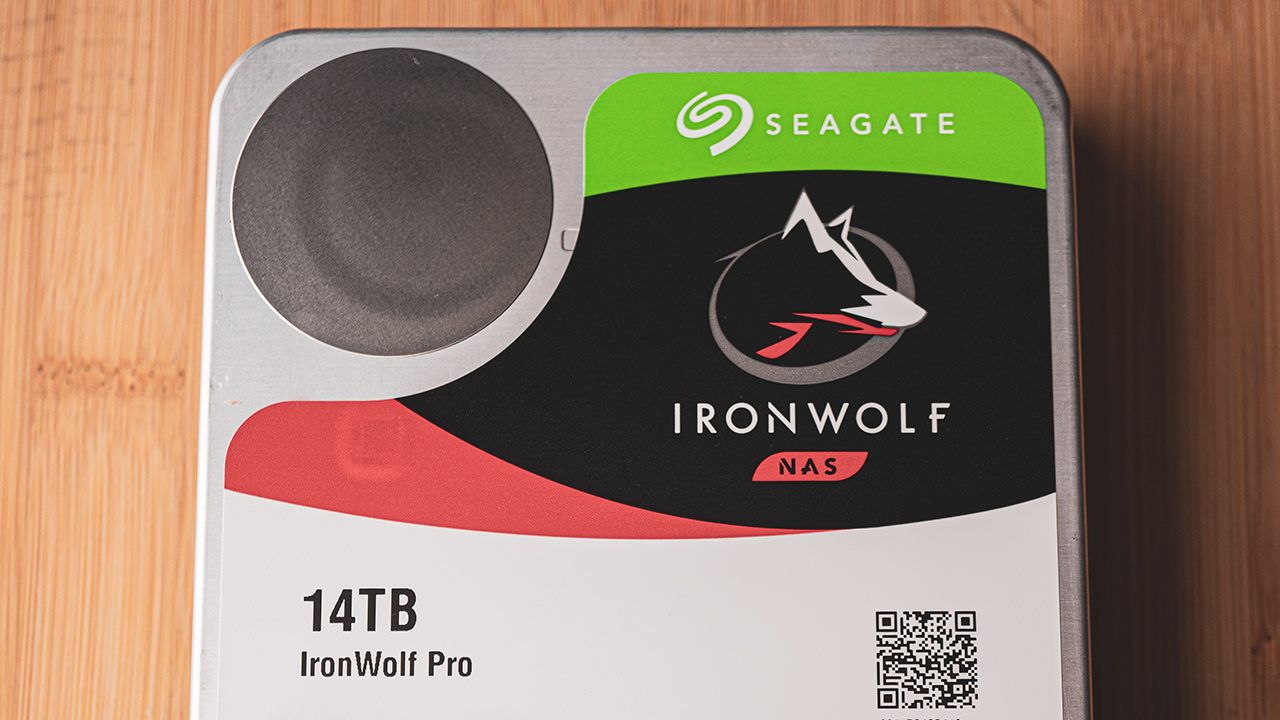
As for the drives we used for this build, we contacted the good people over on Seagate who hooked us up with four of their 14TB IronWolf Pro drives for a total of 38TB user-accessible storage in RAID 5 (they have now released an even bigger 16TB version). Unlike consumer drives, these units are designed from the ground up to work in a demanding network environment (handle high workloads, more heat, and vibrations with error recovery and specific NAS power management).
We used four high-end 14TB IronWolf Pro drives
Another huge benefit of the IronWolf Pro series is that it includes a Rescue Data Recovery Service Plan for 2 years in addition to a standard 5-year warranty on the drive itself which can save you thousands of dollars in data recovery if the worst does happen and your drive crashes, which is rare but can happen.
Dedicated NAS drives – Seagate IronWolf Pro
Now we want to share our installation experience. We do want to mention that we have been out of the NAS game for a long time and so some stuff which might be trivial to more experienced NAS users might be new to us.
Right out of the bet we made a mistake and used some screws to connect the drives to the holders that go into the unit. If we spent a few more seconds reading the instructions we would have realized that the unit has a tool-free drive installation (that is for 3.5″ drives, 2.5″ drives do need screws that come with the unit). Anyway, even with the screws, the physical installation went smoothly.
The initial software install was fairly quick although there are quite a few different pieces of software that you need to install and it would have been nice if there was a more simple way of installing all of them in one go (a wizard maybe?).
There are also a number of things that we needed to do to make the unit more functional and could have been great if they came as default. The first was to give windows access to the drive as well as creating a drive letter for the unit in Windows (again a simple wizard would be helpful for less technical users here).
A touch of light

Next, in order to significantly improve the performance of the NAS we needed to change some settings which we got from ASUSTOR including changing the MTU in the network interface on the NAS to 9000 and the Jumbo packet to 9014 on the device manager on each of our computers – this dramatically increased the NAS speed in our testing.
Now let’s talk about performance and here we measured several things and got some interesting results. First, we used two synthetic benchmark software – the Blackmagic disk speed test as well as CrystalDiskMark.
On the Blackmagic test we got a score of just over 200MB/s write which is quite mediocre for a fast quad RAID 5 array over 10GBe, but on the other hand close to 600MB/s read which is very respectable.
Our Blackmagic disk speed results in RAID 5

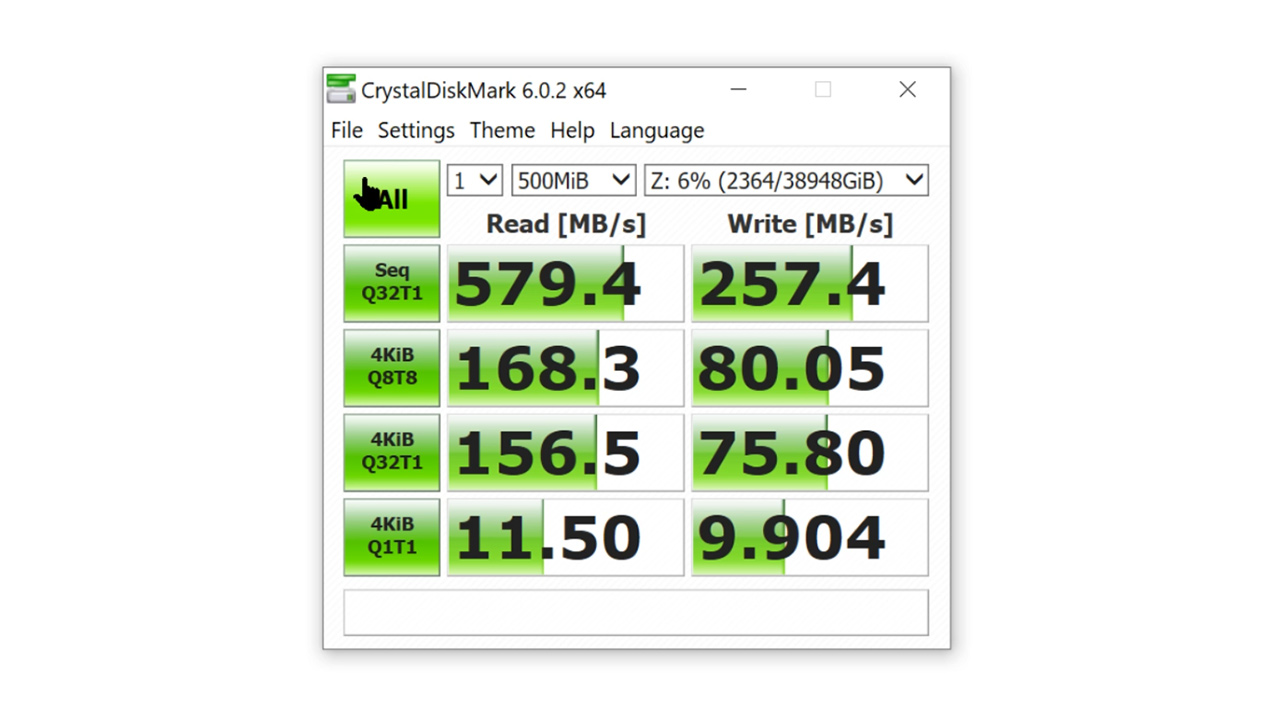
CrystalDiskMark produced a little bit different results with just under 580MB/s read but somewhat higher 257MB/s write.
Our CrystalDiskMark scores
For our real-world test, we transferred our 4.9GB test folders with video project files and got an average speed of 454MB/s from the NAS to our computer, and a speed of 217MB/s from our computer (using our Samsung 970 EVO NVME) to the drive.
We also did quite a bit of video editing from the unit in Premiere and so far so good – we had no issues or slowdowns working on 4K files from our Sony cameras although higher res or faster frame rates videos (we used 4k 24p at most) might tax the unit and so will probably working on large files at the same time from more than two different machines.
Diamond-shaped cover
![]()
Now we come to what we consider one of the weak points of the system and we say system here because we believe this isn’t ASUSTOR’s fault, and that is noise level. As we mentioned, the unit has a 120mm fan which you can control from the software.
The NAS is rated at 32 decibels and that seems very likely to us (we didn’t test the unit without the drives so it is hard to tell but it isn’t very noisy), however if you are going to use large capacity, fast-spinning drives like the 7200RPM four 14TB IronWolf Pro drives that we packed into the unit, you should be prepared for quite a bit of seek and other noises, there is just no way around this with these types of mechanical drives.
You can always go with solid-state drives (Seagate even has a new dedicated NAS SSDs called the IronWolf 110 SSD series), but at the moment you are limited to about 4TB per drive and pricing is significantly higher than comparable mechanical drives so this is not a viable option for most users.
What we have done, since we record all of our voice-overs next to our computer and need a noise-free environment, is move the NAS to another room. This is a fantastic solution (although one that isn’t an option for everyone), which you can do fairly easily since using a CAT 7 cable allows us to get the same speed from the drive even a few rooms away (in our case we just drilled a hole in the wall and placed the unit in a small storage room under our stairs – close enough so we can always check on it if we need to, but with a thick wall between us so that the unit isn’t heard in our room at all. This is something that you typically can’t do with direct-attached storage solutions based on TB3 like the ones we tested here last year as they are limited to about 2 meters or 6.5ft of cable at best.
Lets quickly discuss apps. Like most other NAS solutions on the market, ASUSTOR has an app store and although it might not be as rich as some of the competition it does have quite a few apps that you can download including ones which can sync to Dropbox or Google drive, create FTPs, use Flex for media and download managers, install different types of servers and programming tools and much much more.
We didn’t have a need for most of these apps so far and we only tried a small number and really had an issue with the surveillance center which could not find our cameras (we are still trying to figure this one out with ASUSTOR).
One important point that many users tend to forget is that on its own a NAS is not a backup solution (although RAID can offer some level of physical drive failure redundancy). We recommend that a NAS will be backed up to a different unit (if possible one which is off-site) or be used to backup data that is stored on your computer or on a different storage unit.
We are currently using the NAS as our main storage pool for two different computers (on two different floors connected using two 10GBe switches) and we backup to a DAS unit which we manually connect and disconnect every few days.
The unit does come with a large number of backing up options (for external storage) including:
- Remote Sync
- FTP backup
- Folder to Folder
- External Disk – To and from.
- Backup Now, schedule.
- One-Touch – Button on the front, USB to NAS, or NAS to USB, configure and then go.
- Sync app for computers to the NAS. Also, phones.
As well as cloud-based backup options:
- Dropbox
- OneDrive
- CrashPlan!
- OwnCloud
- NextCloud
- Duplicati
Besides regular backups, ASUSTOR has a relatively new feature called Snapshot. Introduced in late 2018 (in ADM 3.3) it uses the Btrfs file system and allows the user to manage, schedule, create and restore snapshots of their data on the drive (note that at the moment there is no way to save the Snapshots to an external drive which could have been useful).
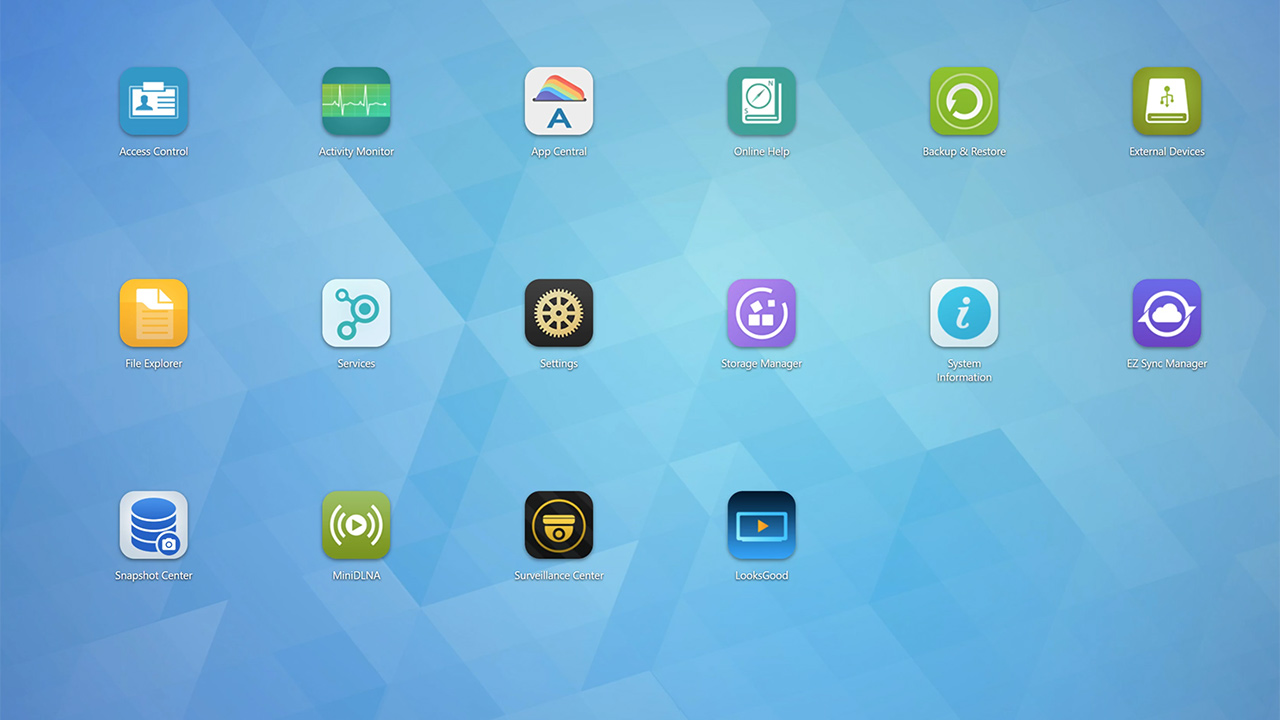
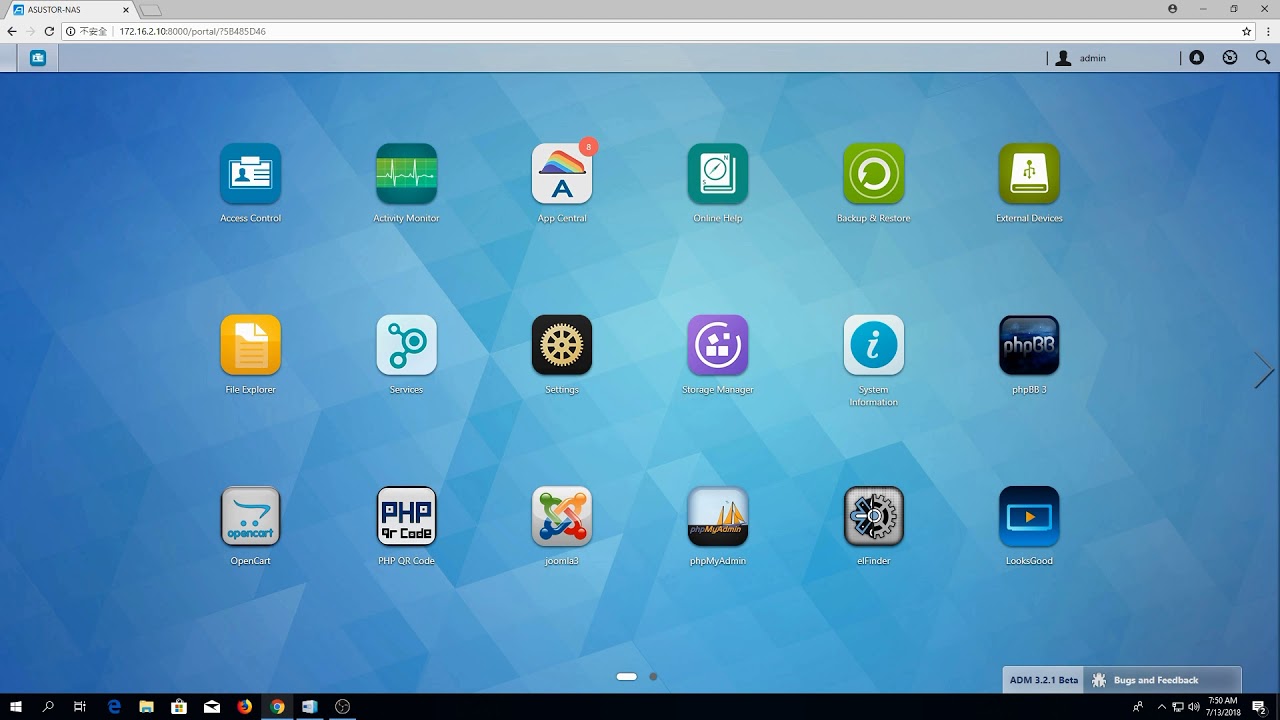
The ADM interface – simple to use (we would love fully functioning software version as well)
ASUSTOR didn’t invent this technology, incremental backup of this type have been around for a while and are offered by other manufacturers, but it is nice to have and we are going to reformat our system into the Btrfs file system soon to start enjoying the benefits of this feature.
As we have mentioned we highly recommend that you also protect your NAS using a UPS (we did that) and if you have one which has a USB you can also set up the NAS to power down if the UPS battery is getting low on power.
One of our favorite features of the unit is called EZ Sync. This was also introduced by ASUSTOR in late 2018 and it turns your NAS into a personal cloud storage similar to services such as Dropbox or Google drive (although not necessarily as advanced) but with one significant difference – you have the option to access all of your data from any device anywhere in the world without a costly monthly or yearly payments. As long as the NAS is up and running and the EZ Sync service is working – you are good to go.
EZ Sync can change the way you work
In our opinion, this service alone is a game-changer for many content creators, especially those who travel a lot and need access to large libraries of files which they can’t take with them and can’t place on a regular cloud without paying a LOT of money for.
We tried the EZ Sync in a number of scenarios working wirelessly on our local network to the ASUSTOR app on our Google Pixel 2 XL unit and we discovered that images and most videos from the server worked without any delays. Some larger 4K videos did have some issues though, but there could be many reasons for this that have nothing to do with ASUSTOR and we have been talking to ASUSTOR to see if there is a way to improve on this.
Trying to access our content away from our local network presented more of a challenge. On fast WIFI or with good mobile connection we had no issues accessing our images and smaller video files but higher quality, larger video files, and most 4K files didn’t really play without countless start/stops.
If you only want to view HD videos, stills images or files remotely through the EZ Sync this feature is a life-changing solution that can let you access dozens of Terabytes of data wherever you have an internet connection – something that in our view is worth more than the price of the unit itself to many professional photographers.
Just to be fair, ASUSTOR is not the first company to offer this type of private cloud solution, QNAP, and other companies have this feature as well, however, the EZ Sync in combination with other features of the AS4004T including the 10GBe connection alongside the price makes this unit really stand in our view.
AS4004T – Also a private cloud solution

One more interesting feature that we have not tried yet but we feel we need to mention is called MyArchive. It basically turns the NAS into a sort of an ultra-fast hard drive docking station. In this way, you can use hard disks as removable storage archives. Plug in an archive when you need it and swap it out for a different archive when you don’t and do all of this without turning off the NAS. This is a cool feature but for our uses, at the moment it isn’t necessary and we don’t want to sacrifice one of our current drives on the unit for this purpose. Luckily if we decide that we do want this – we can connect another ASUSTOR unit and use one of its drives for MyArchive. Talking about connecting another ASUSTOR unit – you can also do this to expand your NAS storage which is pretty cool if we ever need more storage than we have.
The AS4004T is an extremely versatile unit and we have only scratched the surface of what it can do in this review. We feel that the combination of good performance, rich feature set, 3 years warranty (which is above the norm for the category), the really useful EZ Sync private cloud solution and the extremely affordable price of around $360 for a 4 bay unit which supports 10GBe connection, make this a clear winner in our book (just don’t forget that in order to benefit from its 10GBe speed you will need supporting hardware which is still quite expensive although prices keep getting down).
There are very few drawbacks that we have found so far with the unit. The software still needs some polishing and it would be nice if there was an actual controlling software instead of the browser only ADM interface. We would love some sort of buffer for the EZ Sync when playing videos (this might also depend on the video player – we used VLC mobile), and of course faster write speeds from the drive would be highly appreciated although at this price level that might be the maximum that you can get from the hardware at this point in time.
Update: After talking to ASUSTOR about this it seems that using MX player (Android / iOS) can improve remote playback of videos. However, it is possible that playing large 4K video files remotely is simply a bit too much for the AS4004T – so keep this in mind if this feature is important to you.
Quality 10GbE solution at an affordable price
At the end of the day we can easily recommend the AS4004T for any photographer, videographer or content creator looking for a single quad bay, fast and cost-effective 10GBe NAS solution. It will even work fine for two simultaneous editors although we can’t really vague for more than that in a professional environment if you take into account its limitations it is possibly the most attractive budget option on the market in its class, at the moment.
Some of the gear that we used for this review:
- QNAP QSW-804-4C-US 8-Port Unmanaged 10GbE Switch (our main switch with four RJ45 10GbE ports) –
- NETGEAR Nighthawk SX10 10-Port Gigabit/10G-Multi-Gig Smart Managed Plus Gaming Switch (secondary switch with only Two 10GbE ports) –
- QNAP QXG-10G1T Single-Port (10Gbase-T) 10GbE Network Expansion Card – on both of our computers connected to the NAS.
- Cables – for 10GbE you can use CAT 6 (we even have one CAT 5E in the wall which seems to work well for relatively short distances) however if you have the option, go for CAT 7 cables (we used several different brands that got good scores on Amazon and they all work well) – these cables are faster (future proof) and not much more expensive.
Software downloads and more info:
ASUSTOR has a lot of useful information on its site about the AS4004T installation, optimization and its features, however, it isn’t always easy to find – we made a list to help you in locating some of the more relevant stuff
- AS4004T – full feature list – here (and extensive specs here).
- AS4004T – Quick Installation Guide – here.
- BTRFS – intro to iSCSI – here, snapshot center – here and here.
- Extensive user guide – here.
- All the main software downloads in one place (including ADM, EZ-sync etc) – here.
- All of the apps (Android) all of the apps (iOS)
- ASUSTOR college (videos on different NAS related aspects) – here.
How to set up a network drive using Windows
You can check out more LensVid exclusive articles and reviews on the following link.
You can support LensVid by shopping with our affiliate partners
Affiliates: Amazon, B&H, Adorama and E-bay.
Why should you trust us?