In this video, Unmesh Dinda from the PiXimperfect channel demonstrates how you can fix wrinkles and Iron Clothes in Photoshop. He shares two methods (one fast and one a little more time-consuming) which can also be used in conjunction.
Before you start
It goes without saying but you should do whatever you can to avoid wrinkles in clothing and other fabrics as much as possible when actually taking pictures (that is if you are the one doing the shooting and you have control of the situation).
Even though Dinda’s method can produce good results it is complex and time-consuming and there are no guarantees that you will end up with the result that you want to keep in mind.
Finally, before you actually start this tutorial you need to download the frequency separation action (it’s free).
Iron Clothes in Photoshop
To fix wrinkles in Photoshop – start by installing and applying the frequency separation action (double click and it installs and then just choose it from the action pane – we just used the FS master).
The simplest way and certainly the fastest is by using local gaussian blur over the wrinkled areas. Start by applying gaussian blur at a level that will make the texture of the fabric disappear but leave the wrinkles visible (we used an 8-pixel radius and it seemed to work fine but it depends on the size of your image).
Next, make a copy of the low-frequency layer (inside the FS folder) and you can use a selection tool like the lasso tool with a lot of feather (say 20 pixels) and choose filter>blur>gaussian blur (around 36). Go over all the wrinkles and you can use Alt+Ctrl+f to repeat the last action.
After using this method on a sample image we can definitely say that it is working but it isn’t perfect so you are going to see a significant improvement (depending on the image and how you apply it) but this will not make the wrinkles disappear completely (not the big ones at least).
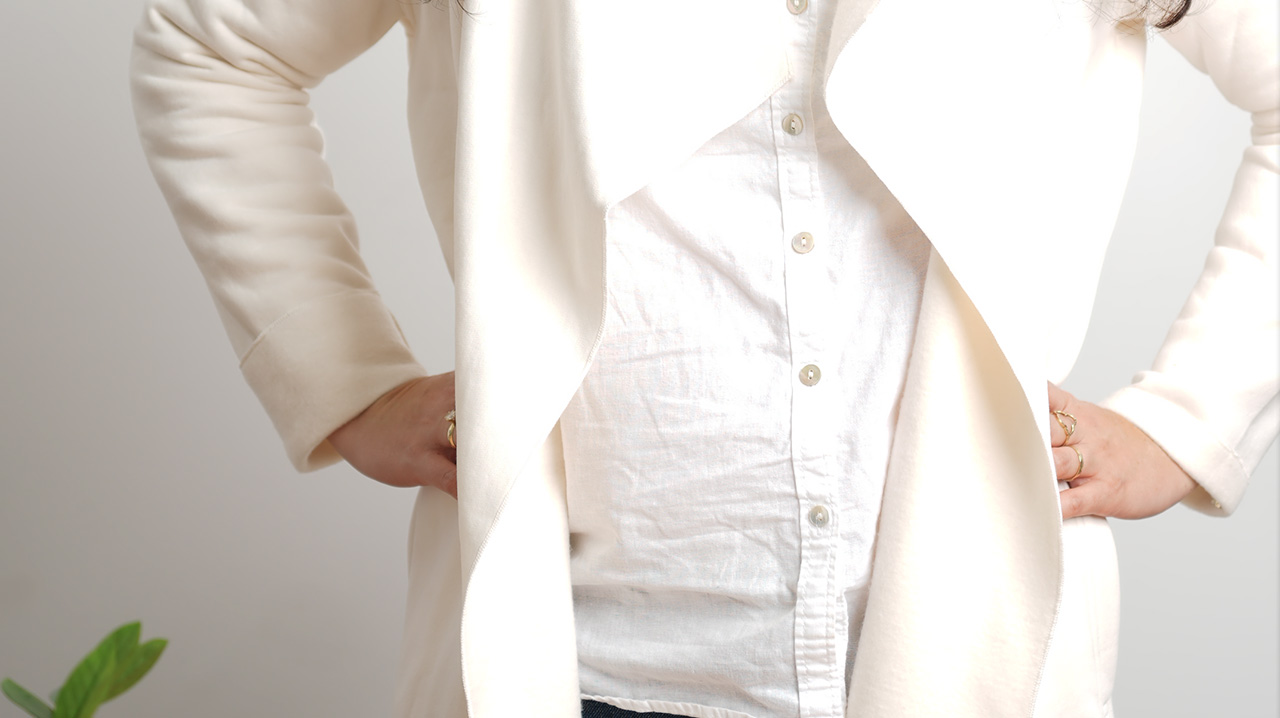
Our test shot fixed with the first method – the “before image”
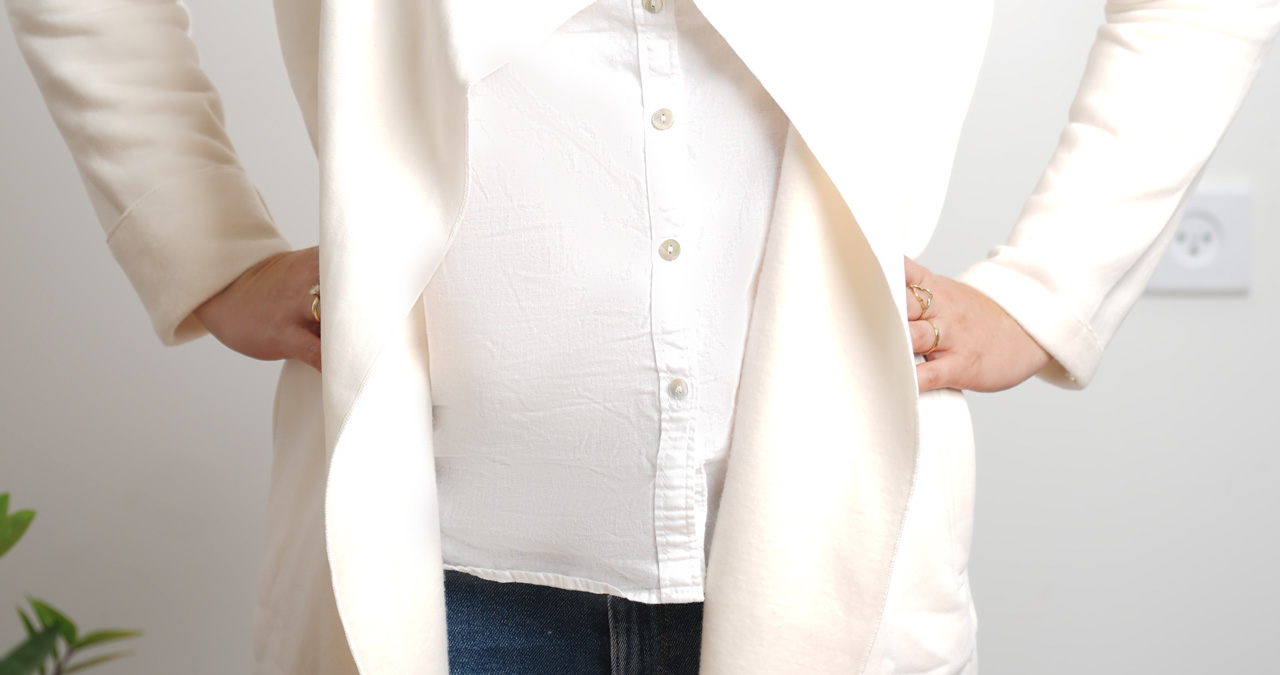
And after we applied the method (not perfect but pretty good)

As a side note – we tested this exact method on a wrinkle in a person’s skin and it did an amazing work of removing it – so feel free to experiment with removing wrinkles on the skin like this as well.
If you have more time to work on the image and want more quality results, the next method might be for you. Start with a copy of the low-frequency layer like before. The trick here is to use a tool called the mixer brush tool (just right-click on the brush tool to find it).
Now take your time and paint (make sure you use the defaults on this tool – we actually used 30% flow). We suggest a fairly large brush and working on larger areas.
Here are the results we got with the second method (you might be able to do better):
Finally, you can use the liquify tool to fix a few more things that did not resolve with the first or second method (but be gentle!) like straighten areas for example.
You can find a lot more photo/video editing-related videos and articles on our dedicated editing subsection.
You can support LensVid by shopping with our affiliate partners
Affiliates: Amazon, B&H, Adorama and E-bay.
Why should you trust us?
I really loved
reading this article because it was
really helpful for me.
The way you presented the topic
was well structured,
and it gave me a better understanding.
I was searching for information like this,
but this one was much better.
Thanks a lot for sharing such
insightful content.
Please keep posting.
this looks fake as can be. what a horrible tutorial.