Today we are doing an in-depth review of Zhiyun’s Weebill 2 video transmission system. We already posted an initial review of the Weebill 2 in July 2021, so you can refer to that video if you’re interested in the gimbal’s own functions.
Now that we’ve had more time to play with the production gimbal, transmitter, and the video controller unit, we are ready to tell you all about this technology that makes it possible to control the gimbal and compatible cameras remotely in a way that we have yet to encounter before.
Transmitter Design and build
Zhiyun’s transmitter is a lightweight unit that measures 9cm x 6cm x 2.5cm. It comes in a plastic enclosure with a proprietary metal mounting plate. On the left side, the unit comes with a mini-HDMI port and a USB-c camera control port. The right side USB-C port charges the 3100mAh internal battery. On the front of the unit, there are two antennas.
Mounting
In the kit that comes with the transmitter, Zhiyun ships a mounting rail that you fix to the bottom of the gimbal’s tilt plate to neatly tuck the transmitter away underneath the rig.
Optionally, Zhiyun includes a cold-shoe adapter that you can attach the mounting rail to, and use on the camera or somewhere on the cage (as we noted in our initial review of the gimbal, we would really like to see this transmitter integrated into the gimbal in future Weebill versions).
The Zhiyun’s Weebill 2 video transmission system under the camera
![]()
Functions
The transmitter creates a WiFi network that allows you can connect different devices in order to get the live feed from the camera, control gimbal movement, and camera functions through the ZYplay app. Additionally, the transmitter allows you to monitor the audio feed, but this is only available through the Visual Controller.
The transmitter can be connected to a maximum of 3 devices, including mobile phones, tablets, and the Visual Controller. Zhiyun advises making sure that the distance between the connected devices is more than half a meter. (In our testing, the gimbal had a few glitches and would float around on its own when the controller was too close.)
We tested this function, connecting the transmitter to Webill’s onboard monitor, the visual controller, and a tablet at the same time. We tried different android phones, and for some reason, they weren’t able to see the transmitter’s WiFi network.
Using the transmitter on the Weebill 2 to view the camera’s live feed on the gimbal’s screen

Setup
Once you install the mounting rail, slide the transmitter into position with the antennas facing forward. Connect the included HDMI cable and camera control cable to the camera. The other port has a dedicated cable included in the kit with a yellow label to charge the transmitter from the gimbal battery. Connect this cable to the bottom port on the front of the gimbal.
To power on the transmitter, long-press the power button on the front, until the green light comes on.
Non-gimbal use
The transmitter works independently from the gimbal, which means that it can give you a wireless video feed and limited camera control when using the camera off the gimbal. In this case, you can mount the unit on the camera using the provided cold-shoe mount (or you can DIY a connection to a cage for example).
Using the App
In order to receive the live video feed on a device other than Weebill 2 on-board monitor or the Visual Controller, you need to connect to the transmitter through the app.
In the app, scroll across to the transmitter page. Tap the connect button. The app will instruct you to change your WiFi network to connect to the transmitter. Once you’re in, you will see on-screen controls.
Here you can control the gimbal movement by using the on-screen joystick. Tapping the recenter button acts a bit glitchy for some reason, surely it’s just firmware but that will get fixed soon. There is a separate control slider for the roll axis on the right side of the screen. (Gimbal controls are disabled when the app and the controller unit are connected to the gimbal at the same time.)
In the menu there are gimbal settings and a few extra features, like control options, choosing between joystick mode and mimic mode. There is also an attitude mode that we couldn’t really see a lot of use for.
The app offers a number of video assist tools under the “image” menu item. Here you can toggle on and off zebras, focus peaking, false color, markers, and LUTS. There is also a histogram with different views in the upper right, but it’s a little too small.
Another advanced feature in the menu is the follow-focus control. It’s a nice touch, but it’s really hard to use because it’s really small. Since it’s not tactile, you always have to watch the controller, and it distracts from pulling focus. Not really useful, in our opinion.
The most useful feature in the app is controlling the camera to start and stop video and take photos. The app also allows to record the screen.
Live view
When it comes to receiving video feed from the transmitter, the Weebill 2 connects automatically, and you can see the live view by swiping down from the main menu on the onboard screen. The screen doesn’t give you many options, other than previewing the feed and setting the Smart Follow speed.
One thing definitely missing from the live view is a telly light. When the camera is recording, there is no indication of it on this screen. Hopefully, Zhiyun can include this feature soon.
Smart Follow overview
The Smart Follow mode is a great addition to this gimbal. It allows the user to work without an operator, or it can simplify recording from difficult angles.
Setup
The Smart Follow feature works in regular mode or selfie mode. To set the gimbal up to follow you, hit the trigger button once and draw a frame on the touch screen around your face. The gimbal immediately reacts as you move away to tilt and pan to follow you.
There is another option to initiate the Smart Follow mode, but we haven’t been able to get it to work. Zhiyun included gesture control to instruct the gimbal from a distance to follow you, automatically starting the recording. To stop recording and exit Smart Follow mode, you would use the same gesture again. This could be a great feature, and hopefully, Zhiyun will fix this in an upcoming firmware update.
App setup
You can also set up Smart Follow mode from the app. There is a dedicated button in the left bottom corner of the screen. When you tap the button, the screen displays a frame that you drag around the object to follow. To exit Smart Follow mode from the app, tap the button again.
In use
We tested this mode extensively, and it consistently worked really well, as long as the indicated follow area stays in the frame. In our tests, the Smart Follow would continue working even if there were obstacles in the follow area. At times, it did lock on to an obstacle if it was bigger than the follow frame.
We feel that this feature can be very useful since it gives you freedom of movement the full 360 degrees around the gimbal. When combined with the app, so you can preview the frame and start and stop video, this mode is even more useful.
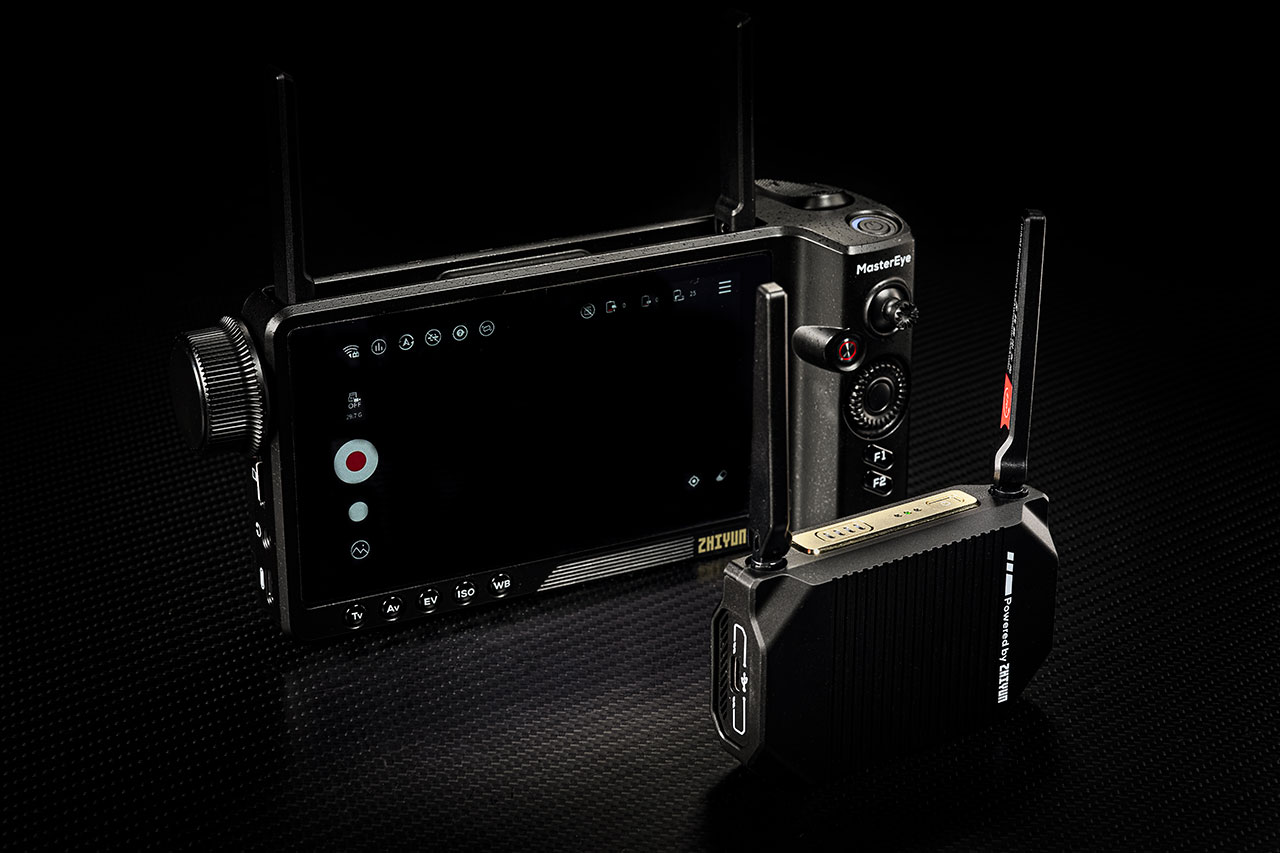
MasterEye Controller Specs
Zhiyun’s MasterEye VC-100 Visual Controller is an impressive device. It’s well made and feels hefty in the hand. It weighs 450g and features a bright 5.5’’ screen (1000 nits compared to Ipad’s 450 nits), a 2200 mAh battery, and multiple power options (USB-c and L-type battery).
Zhiyun’s MasterEye VC-100 Visual Controller

Build
The controller is a pretty complete device with a lot of buttons and controls. It’s meant for two-handed use, or you can mount it on a tripod using the ¼’’ hole on the bottom of the unit. There is a focus wheel on the left side of the device.
The right side features a hefty grip and a number of controls, including a joystick to control the gimbal movements, video, and photo buttons, a scroll wheel for menu controls, a screen record button, and a mimic mode button.
Because of its position on the grip, the mimic button gets in the way, and we’ve unintentionally hit it a few times, causing the gimbal to jerk into position. One option to avoid doing that would be a feature that locks the physical controls, and only uses the touch screen controls.
Actually, clicking the power button on the top of the unit is supposed to do this, but strangely, it disables all the controls, including the on-screen buttons, while the F1 button remains active. Looks like a firmware issue, and hopefully, Zhiyun can address this as well soon.
The power button also features an LED color ring that can inform when the battery is low and shows charging status when plugged in. Next to the power button is the zoom rocker to control the electronic zoom on compatible cameras.
The bottom of the front panel of the controller features camera control buttons. These only work with compatible cameras, so we weren’t able to test these (Sony cameras seem to have limited support at this point). On the back of the device, there is a camera parameter set wheel and an L-type battery mount with a lock mechanism. The unit comes with a protective plate that covers the battery mount terminals when not in use – a nice touch.
Pairing
To start using the MasterEye you need to pair it with the transmitter unit. Power on the image transmitter first, and then power on the MasterEye unit. It takes a few seconds for the controller to power up.
Look for the Wi-Fi icon in the upper left corner of the screen, select the Zhiyun Wi-Fi name, and enter the default password 12345678. There will be a message on the screen when it’s successfully paired. To get the live feed, tap the “live” button on the screen. (Check the transmitter Wi-Fi name on the “USER ID: XXXX” sticker)
After the initial pairing, the unit will save the transmitter’s Wi-Fi information and will automatically connect in future use, unless a future firmware update changes the Wi-Fi password, in which case, perform the pairing procedure again.
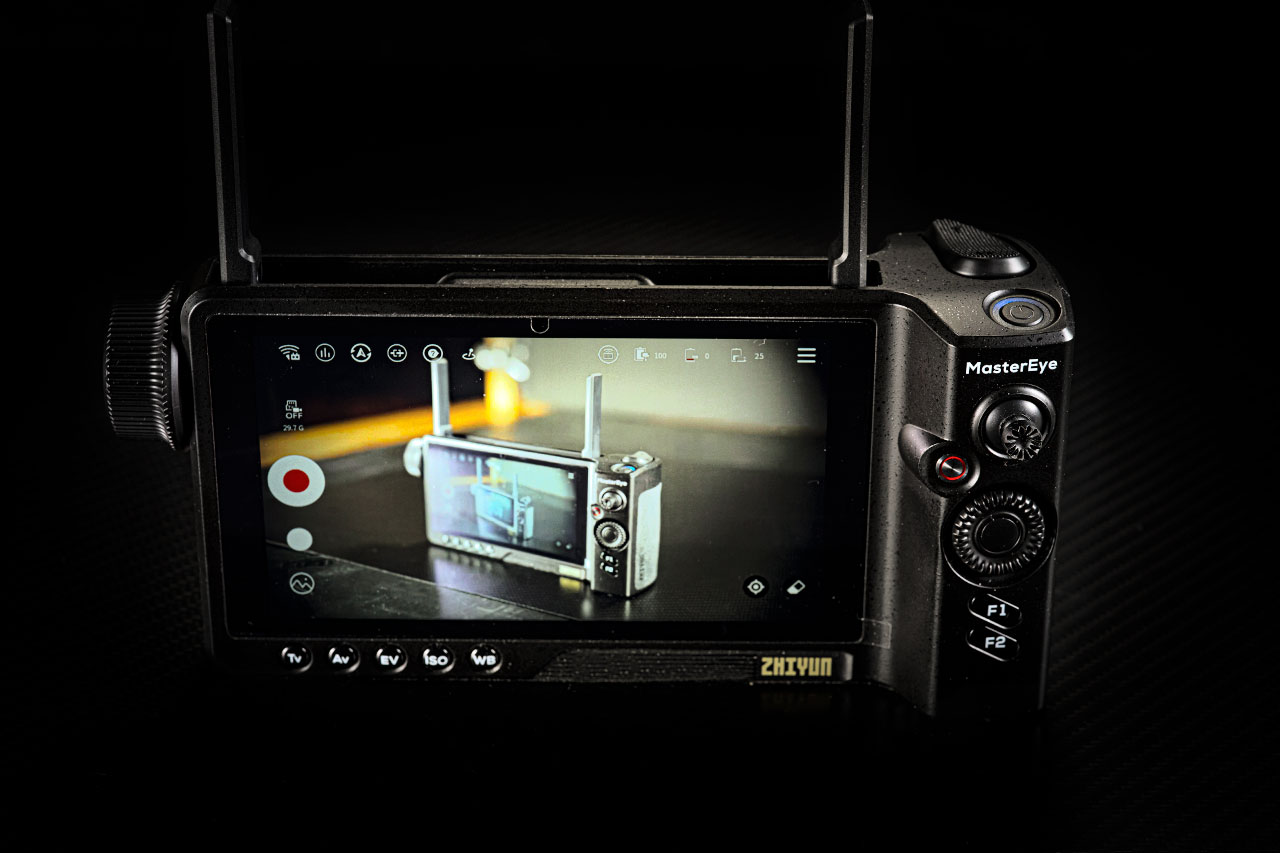
On-screen controls
When connected, the controller displays a number of on-screen controls and status icons. Here you can see the WiFi status, camera mode, gimbal control mode, and battery levels. There is also a handy record timer that serves as a telly light. You can toggle live-view on and off.
The left side of the screen features the record and photo buttons, micro-SD card indicator, and screen recordings interface button. In order to use this feature, insert a micro-SD card. These lower resolution videos can be used as proxies in post-production.
You can also control screen brightness and audio level by swiping up and down on the left and right sides of the screen.
In the top right corner of the screen, there is a menu. We feel that this is something for Zhiyun to work on because it’s very limited. Unlike the app menu, which allows to customize the gimbal movements and use assist tools, this menu doesn’t have many options.
The MasterEye on-screen controls
In use
In testing the Visual Controller, we found it to be relatively quick and easy to connect, but not without glitches. Once you get it going, it works fine, but sometimes it had trouble connecting to the transmitter. It did perform more reliable, than the app, which would lose video feed at times.
It’s certainly very useful, as it allows the director, assistant, or focus puller to remotely control gimbal movement and preview the frame. The limited camera feature compatibility is a downside, but hopefully, it can be fixed through future firmware updates.
When Zhiyun figures out a way for all of the camera controls and gimbal functions to work seamlessly from the Visual Controller, it will be an unbeatable device. For now, you can replicate most of the controller’s functions from the app (although it is far less convenient).
We tested the controller’s connection by moving behind obstacles to see the latency and connection strength. We were pleasantly surprised when the video feed wasn’t lost even though a couple of walls and metal doors.
The MasterEye Visual Controller in use
Potential
The combination of these two devices has a ton of potential. Remotely monitoring and controlling video has many applications for any size of production large or small. The Video Controller is missing some important features, but potentially Zhiyun can add them in future iterations.
We’re really looking forward to this device being able to fully control the camera settings, focus, and gimbal movement, as well as offering video assist tools.
Conclusion
In conclusion, we were pleased to see that Zhiyun’s technology works so well. There were some problems, but once we updated the firmware and the app, we found it to be mostly reliable and fairly seamless in operation.
There are some camera control limitations and some issues with the button placement on the Visual Controller, but there should be easy solutions for these in the near future and there are a number of things that Zhiyun needs to fix in future firmware versions.
The gimbal rig with the wireless transmitter gets a bit messy with all the wires needed to get everything synchronized. But in all, this ecosystem is very powerful and shows a lot of promise.
Pricing
As for pricing, the full kit of the Weebill 2, including the gimbal, follow focus, transmitter, and Visual Controller with a carrying bag for $1100 only from the Zhiyun store (you can get the MasterEye controller alone for $360). The Weebill 2 sells for $550, the combo kit with the sling handle and carrying case for $650, the Pro kit with the video transmitter and follow focus for $900.
You can check out more LensVid exclusive articles and reviews on the following link.
You can support LensVid by shopping with our affiliate partners
Affiliates: Amazon, B&H, Adorama and E-bay.
Why should you trust us?