Today we are going to take a look at a new feature recently introduced by Adobe called super-resolution and aimed at intelligently increasing the size of an image using AI algorithms.
This new feature already received quite a bit of coverage from other channels online with varying results (based on what each user was comparing to). We have our own take and we decided to perform somewhat of a different set of testings.
In order to test the new Adobe super-resolution feature, we’re going to compare the results to another option that we can produce in-camera on our Sony A7R IV called pixel shift (it is only partially in-camera as we do need the Sony Imaging Edge software to combine the images). Somewhat similar options are also available on some Fujifilm, Panasonic, and Olympus cameras. Our goal here is to test the image quality and file size against a simple upscale and sharpening process in Photoshop.
Two ways of increasing resolution
On the A7R IV “Pixel Shift Multi Shooting” mode you have the option to shoot 4 or 16 uncompressed RAW images while the camera shifts the image sensor one pixel at a time for each of the frames. This allows you to generate images with more details in the same resolution (with the 4-image mode) or a higher resolution (260MP with the 16 images mode).
The new Super Resolution feature in Adobe Camera RAW essentially upsizes the image by a factor of four using Artificial Intelligence (AI) by interpolating RAW files with a high degree of fidelity, resulting in images with supposedly crisp details. While simply enlarging a photo often produces blurry details, Super Resolution uses an advanced machine learning model trained on millions of photos to intelligently enlarge photos while maintaining clean edges and preserving important details, or at least that is what Adobe is stating.
How we Processed the images
As we have mentioned, shooting Pixel Shift images is done in-camera, but you need Sony’s software to export the image. Let’s take a look at that process.
In order to compile the series into a single image, you need to select them, right-click and choose the option create and adjust pixel shift multi shoot composite image. It takes a few moments to compile the images.
When you click on the option, this processing window pops up. Once done processing, it creates an ARQ file that you can save for later adjustments or export. Here you have different options to adjust contrast, brightness, and all the other raw processing components.
We’re not going to play with that right now, since this is just a test image. You do have a slider here to control the pixel shift processing. Once done, you export the image. There are two file type options, JPG and TIFF, and you can choose 8bit and 16bit. We’ll do both just to compare file sizes. I’ll also repeat the process for the 16-file composite and export the results.
Creating a pixel shift image using the Sony’s Imaging Edge software
![]()
Now that we have those files ready, let’s jump over to Adobe Camera Raw to check the Super Resolution feature. Adobe promises to include this in Lightroom as well, but as of now, you can only access it through the Camera Raw Plug-in.
We’re running the newest Adobe updates that provide support for the apple M1 chip on our new M1 Mac mini. This test will also let us see how the Mac Mini handles these huge file sizes.
Going into Adobe bridge, let’s take a look at these test files. The A7R IV RAW files are around 60MB per shot. We’ll be processing the raw file, but Super Resolution also works with JPEGs, PNGs, and TIFF files. All the sample images here were shot with our ultra sharp Voigtlander 65mm f/2 Macro lens at f/10 for maximum sharpness.
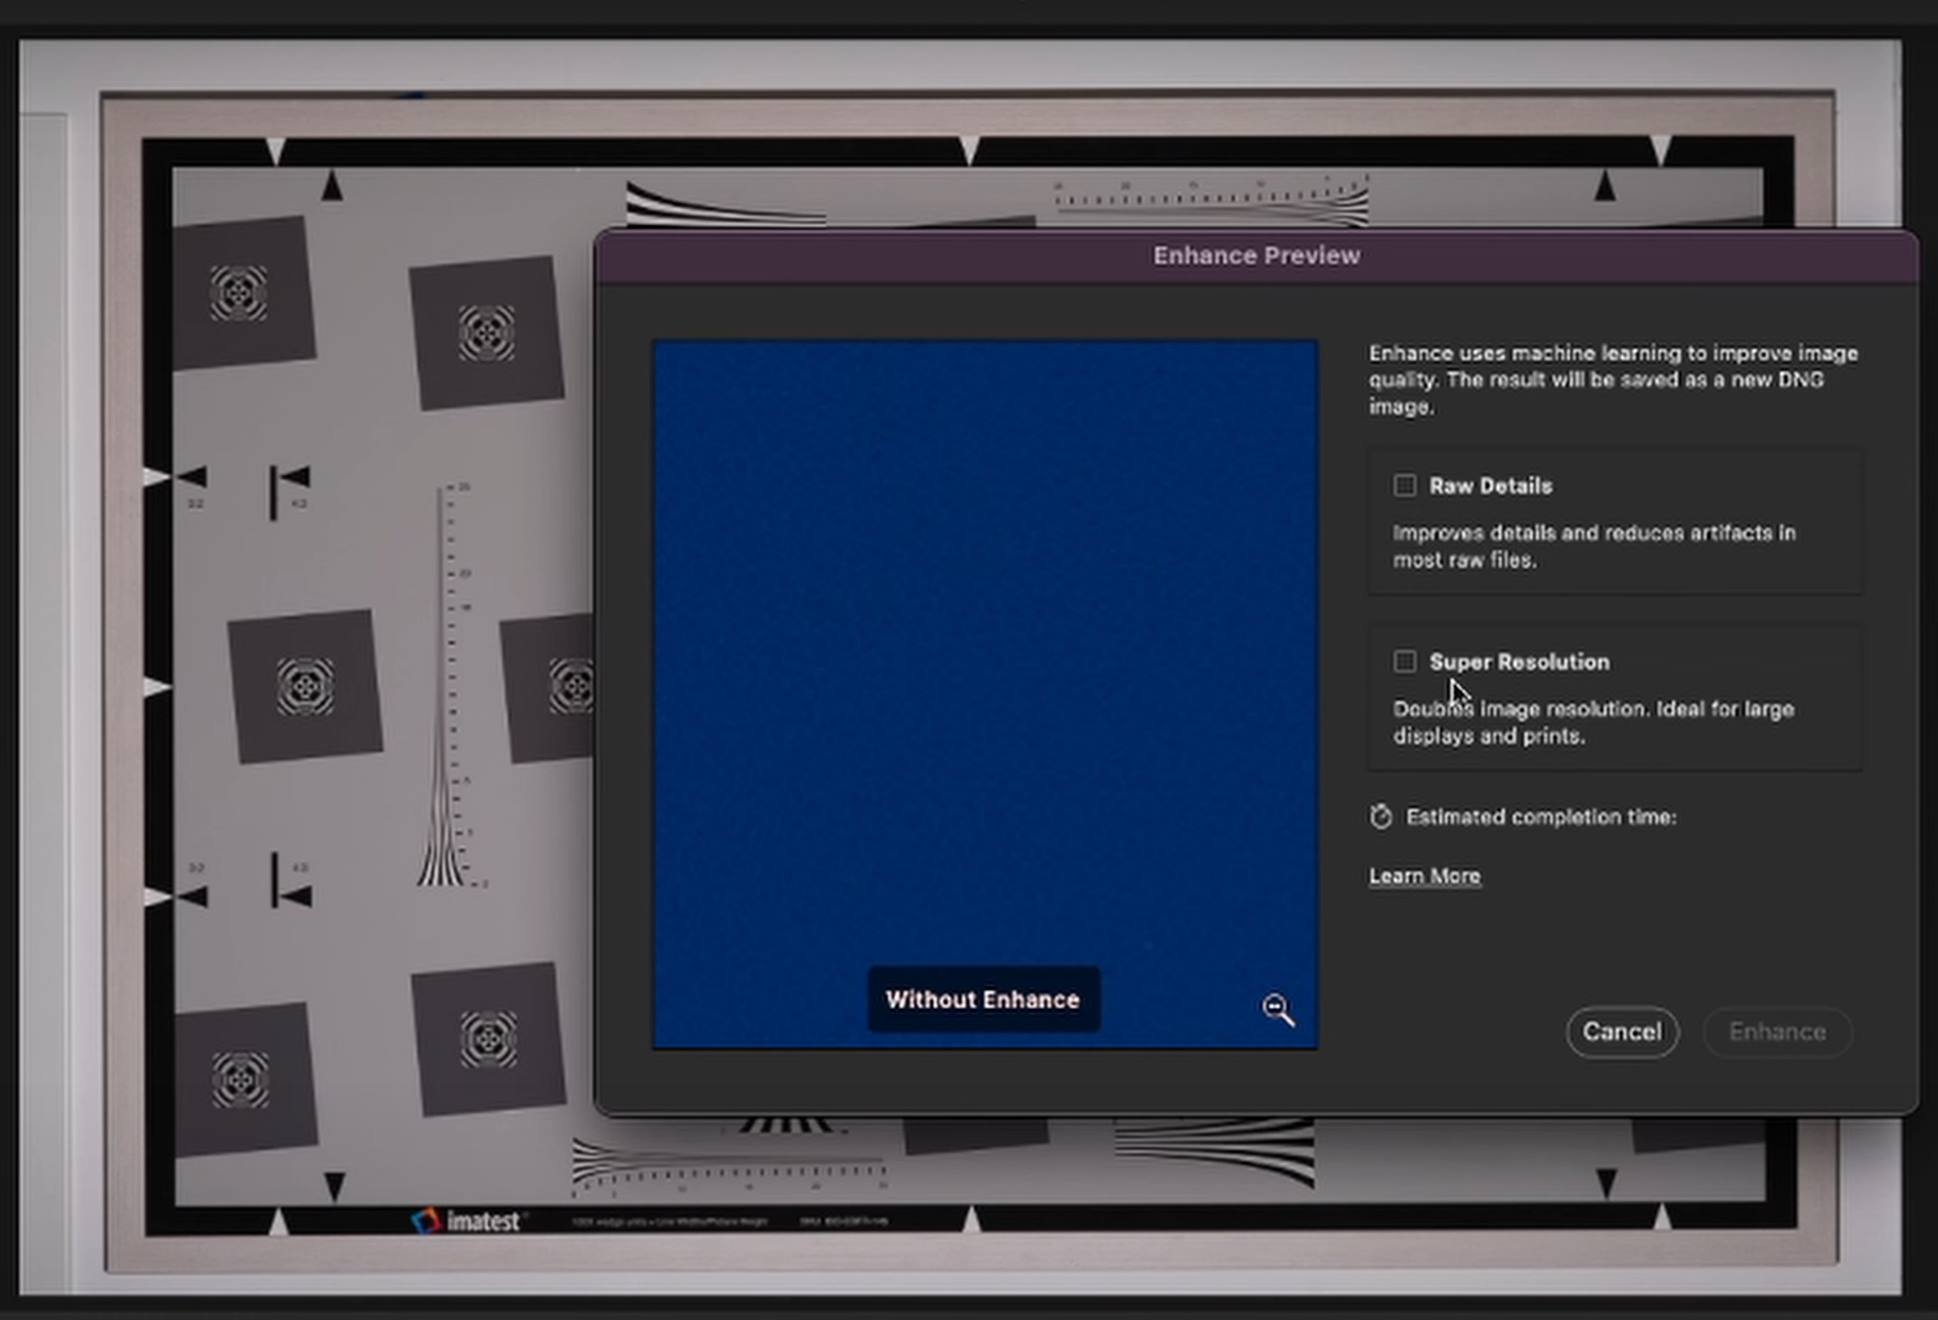
Once ACR loads the image, you right-click on it to bring up the menu and go to the enhance option. This opens up a window with the processing options. The two options here are Raw Details and Super Resolution. Once you choose Super Resolution, the Raw Details option gets checked automatically.
You get to preview the results by clicking on the image and ACR calculates the processing time. Once you click on Enhance, the software produces a DNG image, which you can export to another file format.
Creating a super-resolution image in Adobe Camera RAW
Looking at the results
We’re back in Adobe Bridge and we labeled the resulting test images (which you can see below). We have two sets of 5 images and we will be comparing image quality and file size:
- The original A7R IV 60MB RAW image.
- The enlarged original image with unsharp mask added.
- The 4-frame composite pixel shift image.
- The 16-frame composite pixel shift image.
- The original with Adobe Super Resolution applied.
Original vs. Enlarged Original with Unsharp Mask
After applying an unsharp mask filter with 50% amount and 2.6px radius, there is definitely a change in resolution and sharpness. The result looks good, without apparent artifacts or banding. The file is more than twice the size, but still manageable at under 100MB.
Original [left] vs. Enlarged Original with Unsharp Mask – 4 times the scale (25MB vs. 82MB files sizes)
![Original [left] vs. Enlarged Original with Unsharp Mask - 4 times the scale (25MB vs. 82MB files sizes)](https://lensvid.com/wp-content/uploads/2021/04/original-vs-original_enlarged_sharpened-scaled.jpg)
4 Pixel Shift vs. 16 Pixel shift
The overall image quality is very similar, and it’s hard to see any difference between the two. A closer examination of the details, though, there is a definite difference. The 4-frame Pixel Shift image actually looks more contrasty in the fine details. There is not a clear winner between the two, but we have to give preference to the 4-frame Pixel Shift image.
4 Pixel Shift [left] vs. 16 Pixel shift – notice the color shift in the 16-pixel shift image (46MB vs. 221MB)
![]()
Enlarged Original with Unsharp Mask vs. 16 Pixel Shift
The Pixel Shift gives a different hue and doesn’t look as good overall. In all fairness, the Sony Imaging Edge does offer color controls. So, it is possible to tweak these images some more (we just used the default settings of the software). In general, there seems to be more definition in the grain, but not in the contrast. The Pixel Shift file is more than twice the size of the enlarged original (82MB vs 221MB).
Enlarged Original with Unsharp Mask [left] vs. 16 Pixel shift (82MB vs. 221MB)
![]()
Enlarged Original with Unsharp Mask vs. Super Resolution
Surprisingly, the enlarged original wins again. We had to review the results several times in disbelief, but the Super Resolution result is just not as contrasty overall, with some light spill in darker areas. As for the file size, Super Resolution produced a slightly smaller jpg than the enlarged original (73MB vs 82MB). When exporting both processes in TIFF format, the file size is not very manageable and the two produced identically big files of around 700MB.
Enlarged Original with Unsharp Mask [left] vs. Super-Resolution (82MB vs. 73MB)
![Enlarged Original with Unsharp Mask [left] vs. Super-Resolution (82MB vs. 73MB)](https://lensvid.com/wp-content/uploads/2021/04/original_enlarged_sharpened-vs.-super-res-scaled.jpg)
Pixel Shift 16 images vs. Super Resolution
After careful review of the results, the 16-frame Pixel Shift image isn’t as good as the Super Resolution image. This process gives a different hue and an overall more saturated image. The pixel shift 16 results is not as contrasty as the Super Resolution image. The JPG export of the Pixel Shift is already pretty large (221MB), but the TIFF export is a whopping 1.35GB, which makes it very hard to manage. The export of this big file takes a long time, and our M1 Mac Mini often failed at loading the preview.
16 Pixel shift [left] vs. Super-Resolution (221MB vs. 73MB)
![]()
Enlarged Original with Unsharp Mask vs.Pixel Shift 4 images+Super resolution
Just for fun, we wanted to see what kind of a file we would get when combining the two processes. We wanted to do Super Resolution on a 16 Pixel Shift image, but there is an output size limitation in the Adobe software at the moment. The 230MB file was too big to process. So, we exported a 4-image Pixel Shift composite that resulted in a 50MB (JPEG) file and processed it with Super Resolution to get a 128MB image, still quite manageable and with decent sharpness, but still in a lower place than the enlarged original with unsharp mask.
Enlarged Original with Unsharp Mask [left] vs. Pixel-Shift 4 + Super-Resolution (82MB vs. 121MB)
![]()
What did we find?
According to these tests, we see that the enlarged original with unsharp mask takes 1st place. It’s important to note that we used minimal processing settings in the unsharp mask filter, so it is possible to make it even sharper, even though there is a risk of some artifacts appearing. In second place we would put the Super Resolution image, because of its quality processing and no color cast. The third-place goes to the 4-frame Pixel Shift image, since its finer detail than the last-place 16-frame Pixel Shift image.
In conclusion, the Super Resolution at this point feels like it needs more tweaking, but it is a nice addition to the Adobe software and we can’t wait to see how it will evolve in the future.
Test for yourself
You can download the images (of both sets) from the following link (just be mindful that some of these files are really huge in size).
You can check out more LensVid exclusive articles and reviews on the following link.
You can support LensVid by shopping with our affiliate partners
Affiliates: Amazon, B&H, Adorama and E-bay.
Why should you trust us?
I appreciate the work you put into this. Some interesting results worth considering. But I see two flaws in your methods that hurt your results:
1. You shot the CV 65mm on a Sony a7r4—a terrific combination. But you shot it at f/10 “for maximum sharpness,” you said. However, maximum sharpness for that camera-lens combination is estimated by others as occurring at about f/2.8, though with shallow depth of field. By choosing f/10, you threw away the amazing sharpness and clarity and color fidelity of that lens. DIglloyd.com’s 20-or-so aperture-series tests in this combination usually go from f/2 to f/5.6 for that reason. The lens becomes relatively ordinary at f/10 compared the wonderful results you get at wider apertures. He’ll go to f/10 or f/11 with most inferior lenses to see if lens problems are stubbornly still there.
2. Also, uprezzing completely artificial images like your lens-testing pattern were likely not high on Sony’s or Adobe’s sets of images for AI. Sony and Adobe were focused on imaging real-life scenes. Dan Margulis has techniques for uprezzing completely artificial images like your lens testing images, by the way, and ordinary Photoshop enlarging before sharpening is a great start. It shouldn’t be surprising that a subject with two colors, pure black and pure white, might uprezz best in a different way that for real-life subjects with fine detail.
Hi Jerry,
Thanks for the comments.
1. We shall have our own test of the CV 65mm (with another 65mm lens) soon so we shall see how sharp it is (in general – it is an amazing lens all-around).
2. We used two sets of images – one of the chart and one of the plant which is a natural object with very fine details just to avoid claims that the chart alone is an issue somehow.