Our favorite Audition tool is finally coming to Premiere Pro and it’s a big deal for anybody working with background music for their videos and a possible huge time saver. The upcoming Remix feature (currently only in Premire Pro 2022 beta) was until now only a part of Adobe Audition but Adobe decided to implement it as part of Premiere Pro in one of the next software updates.
In the video above video editor, Josh Olufemii explains in a quick and easy way the new Remix tool in Premiere Pro works and how to best use it and shows several examples of how it performs on different audio clips.
Audition Remix feature finally coming to Premiere Pro
Way back in 2017 we published a short video by photographer Peter McKinnon recently published a short video explaining a technique that we have been using ourselves for some time using Adobe Audition.
Using artificial intelligence algorithms the Remix feature can take any music clip and “remix” it to almost any length that you want with surprisingly good results.
Of course, this isn’t magic and music with vocals might be much more problematic, but for instrumental background music like the one we use for our own videos on LensVid and commercials we prepare for our clients – this feature is a huge time saver.
The Remix function in Adobe Premiere Pro 2021 beta
How to use Remix in Premiere Pro
At the moment (November 2021) as we have mentioned, you will need to download and use Premiere Pro 2021 beta (which you can do alongside the official Premiere Pro version if you prefer).
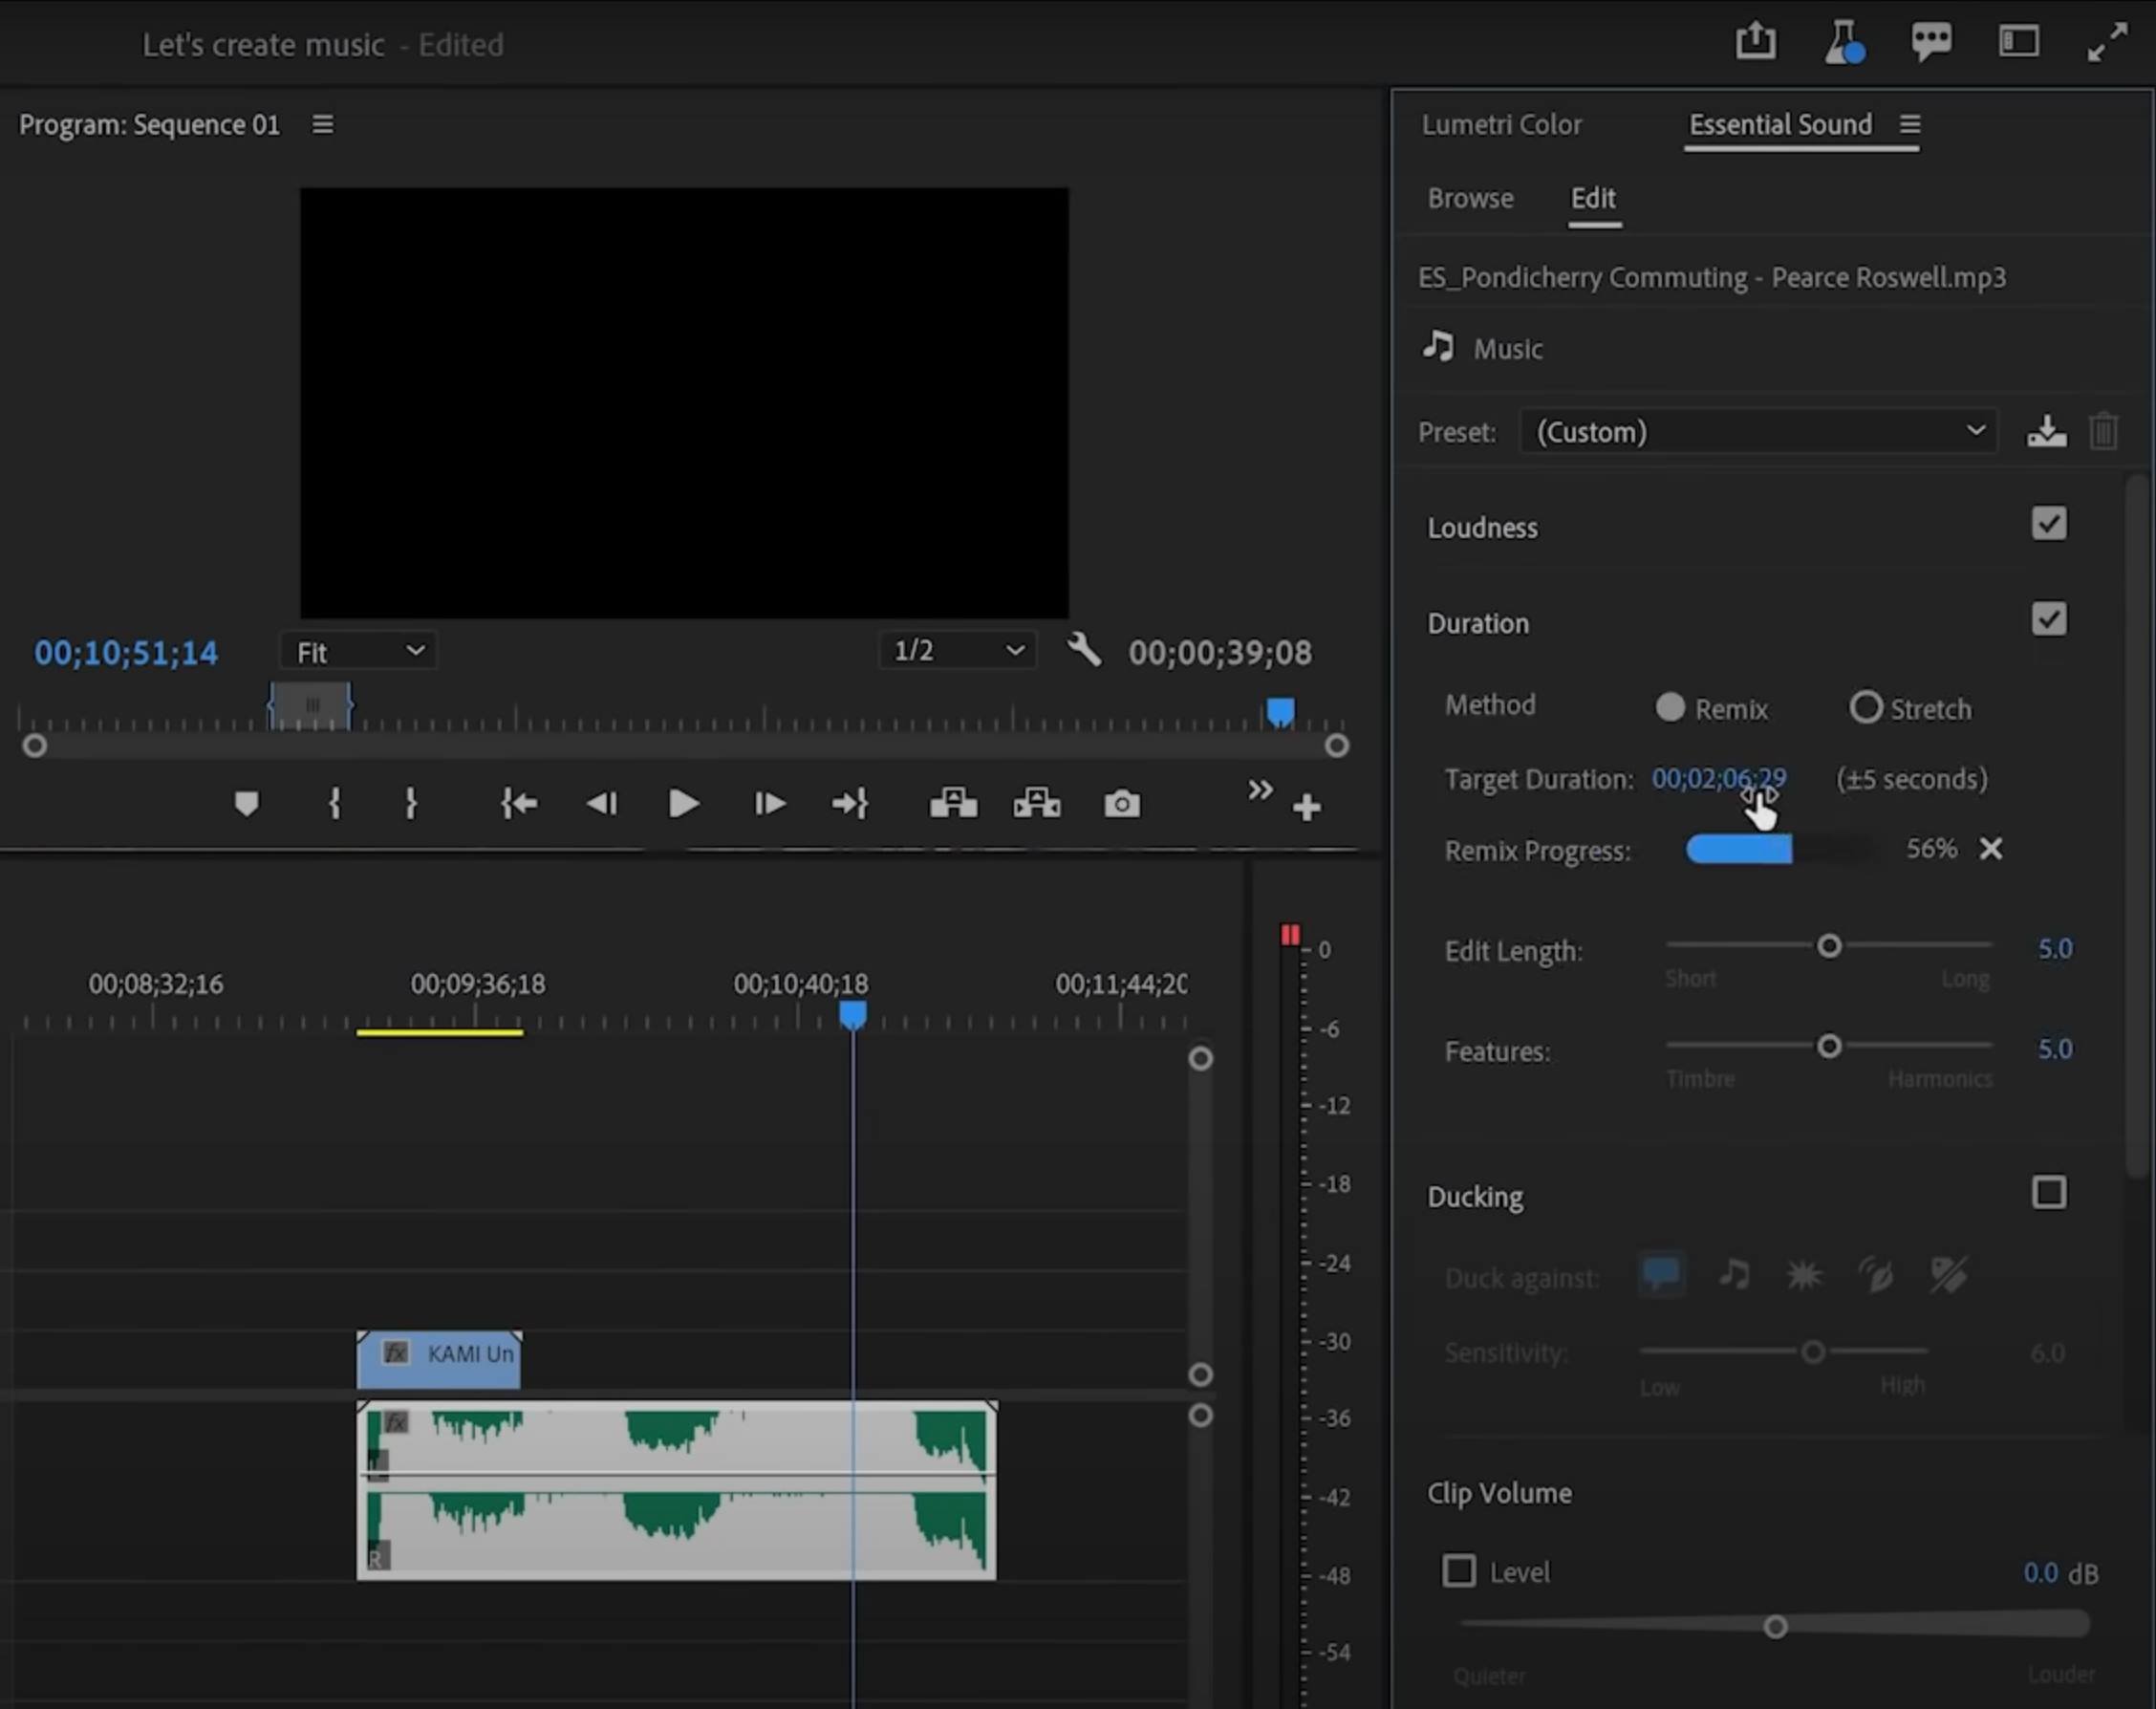
Next, go to Window>Essential sound, choose the music clip that you want to lengthen or shorten and click on the Remix button and choose the length of the music clip that you want to create (please note that the software can match this to around plus or minus 5 seconds so this is not 100% precise but typically close enough).
Usually, the results of the automatic algorithms are good. However, you can tweak them to a degree using two parameters called “Edit length” and “features”. These are actually easy to understand – by increasing the number on the “Edit length” slider you decrease the number of cuts the algorithm uses.
The “features” slider has to do with the number of instruments found in your musical clip. The more instruments the higher the number you want in your slider and vis versa.
Again, this isn’t magic but from our long experience with this tool on Audition it is a huge time saver and it typically works very well in the default settings. We also recommend that you play with the exact requested clip length as you sometimes need to choose a bit more or a bit less than what you actually need to get closer to your desired time.
If the length you got is still not 100% precise one option is to speed it up or down. We typically feel that a 1-2% change in audio speed is almost unnoticeable for most instrumental background music but it depends on the musical bit and music with vocals might not work at all in this case.
Bonus video: a quick look at the new Simplify Sequence in Premiere Pro 2021

Make sure you check our sound recording for video productions link which covers both equipment and techniques on LensVid. You also can find more Premiere Pro videos and tutorials on our dedicated section here on LensVid.

You can support LensVid by shopping with our affiliate partners
Affiliates: Amazon, B&H, Adorama and E-bay.
Why should you trust us?