Today we are looking at another light by Godox. We’ve been using Godox lights and other products for a while now, and have been impressed by their quality construction and light output. The S60 is daylight focusing LED light with an interesting specialty attachment for creative lighting.
Background
In January of 2021, we reviewed the Godox ML60, which is another small daylight LED with great portability and accessories. The S60 is not as small, but it’s geared for a different purpose. While you can use it in general lighting scenarios, the added projection attachment allows for lots of creative lighting control.
In the Box
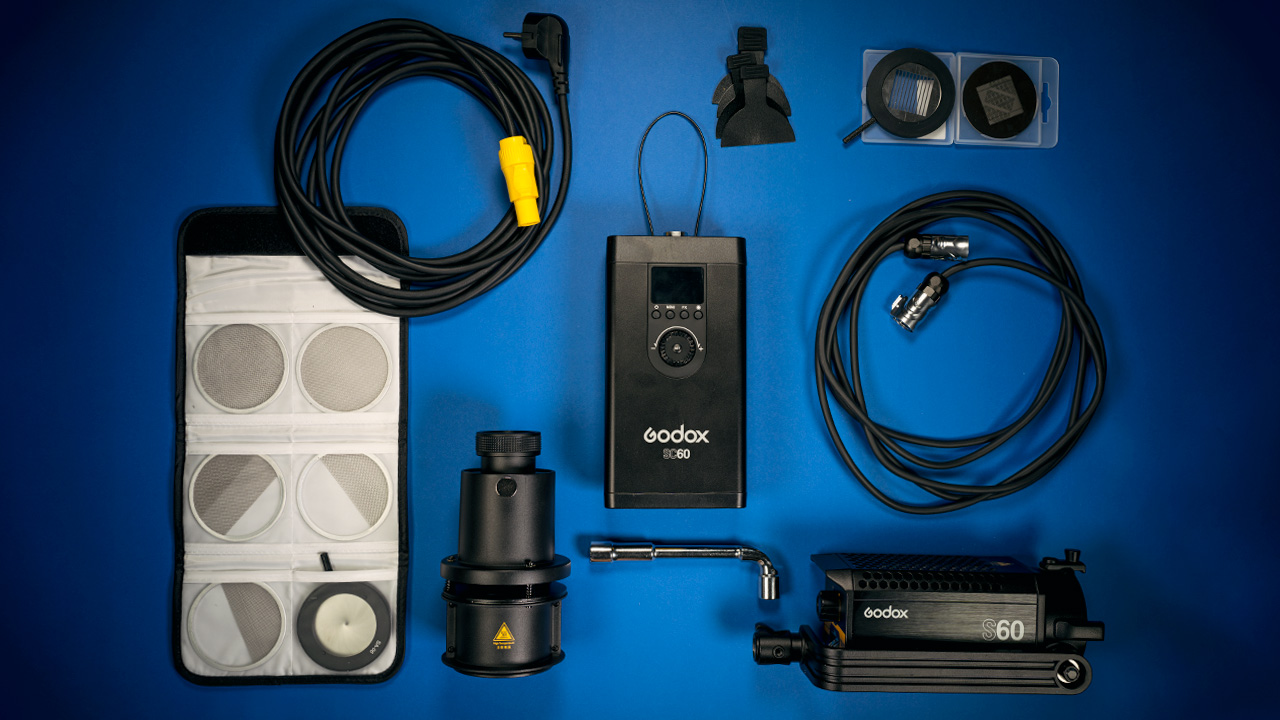
In the kit, this light comes with a bracket, a control unit, projection attachment, and different light shaping accessories. There are options of modifiers and focusing lenses available, so make sure you know what you’re ordering.
Our Godox S60 + projector kit
Build and Design
As we’ve already come to expect, Godox lights are very well made. The S60 comes in an all-metal fixture with a pretty simple tension bracket that you adjust with the included wrench. The body of the unit has an extra mounting hole on the other side, in case you need to change the position of the bracket.
Unlike the light fixture’s build that’s pleasant to work with, the attachment accessory is questionable. It’s metal construction, but the implementation and the general design choices don’t feel very well thought-out.
As we will see in this review, it does the job. It’s a simple accessory that doesn’t require much, but it’s just not the quality that we’ve seen Godox consistently deliver in all their other products that we’ve worked with.
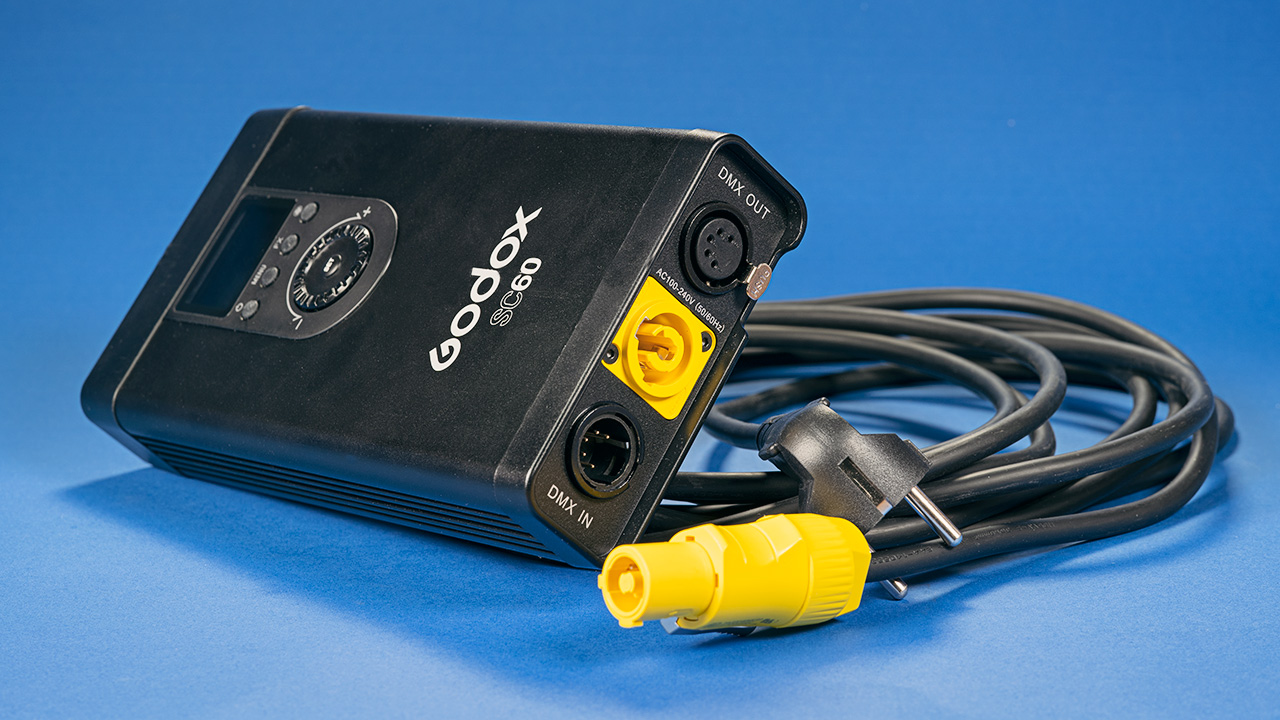
The ballast control unit that comes with the S60 is a well-made metallic enclosure with a simple-to-use interface and a small footprint. It comes with heavy-duty cables with sturdy connectors. The power cable features a bright yellow Neutrik connector.
The S60 power connector and zoom control

There’s an integrated retractable cable on the top of the control unit. This allows us to easily hang it on the light stand, but we would prefer a sturdier support mechanism that would keep the unit from swinging around, especially with the battery attached to the back.
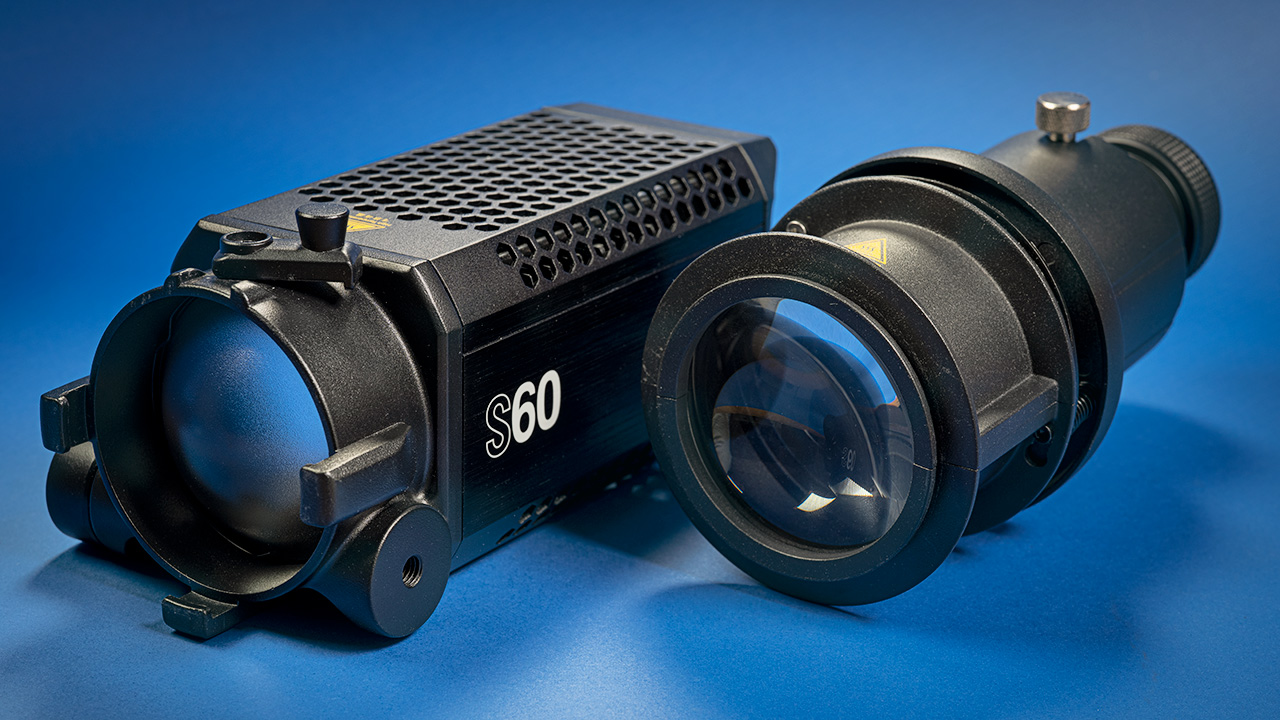
Metal build: Godox S60
Features
Having a battery option on this light makes it portable and versatile. The back of the control unit comes with a V-mount battery plate. When you connect the power cable with the battery in place, the unit cuts the power to the battery to avoid overheating.
One of the prominent features of the S60 is focusing the light beam. The knob on the back of the unit controls the beam angle, changing from a 6-degree spot to a 55-degree floodlight.
The light comes with a fan to keep it from heating up. The fan is pretty quiet even very close to the light, but in case you need a silent operation, there is a silent mode that limits the light output to 50%.
To operate the light, Godox offers the optional RC-A6 remote. This is a simple device that allows to change intensity and power the unit on and off. Using the app, you have more control of the light. Here you can quickly go from low to high output and control the effects.
The control unit of the S60 with DMX in and out
We’ve been using the Godox app for all of the other Godox lights that we have in the studio, and it works great. The only improvement we would suggest is customizing the interface for each light.
The S60 is a daylight-only light, but the interface has the HSI controls and RGB effects active on the screen, even though the unit doesn’t have that functionality.
The attachment features a specialty mount with a simple drop-in design and a top latch. There is a dedicated slot in the middle of the accessory to install different light shaping tools.
Godox offers different gobos to shape the light. To install these, unscrew the adapter top and place the gobo inside, replacing the top. We feel that this operation could’ve been a lot simpler. As is, the process isn’t very quick, and it’s not really a one-handed operation.
Once the gobo is in, slide the adapter into the slot, while pulling back on the spring-loaded tab. Again, we feel that the implementation here isn’t that great, but it does the job. The effect is what’s important here, and this accessory can give you lots of interesting effects by shaping the light.
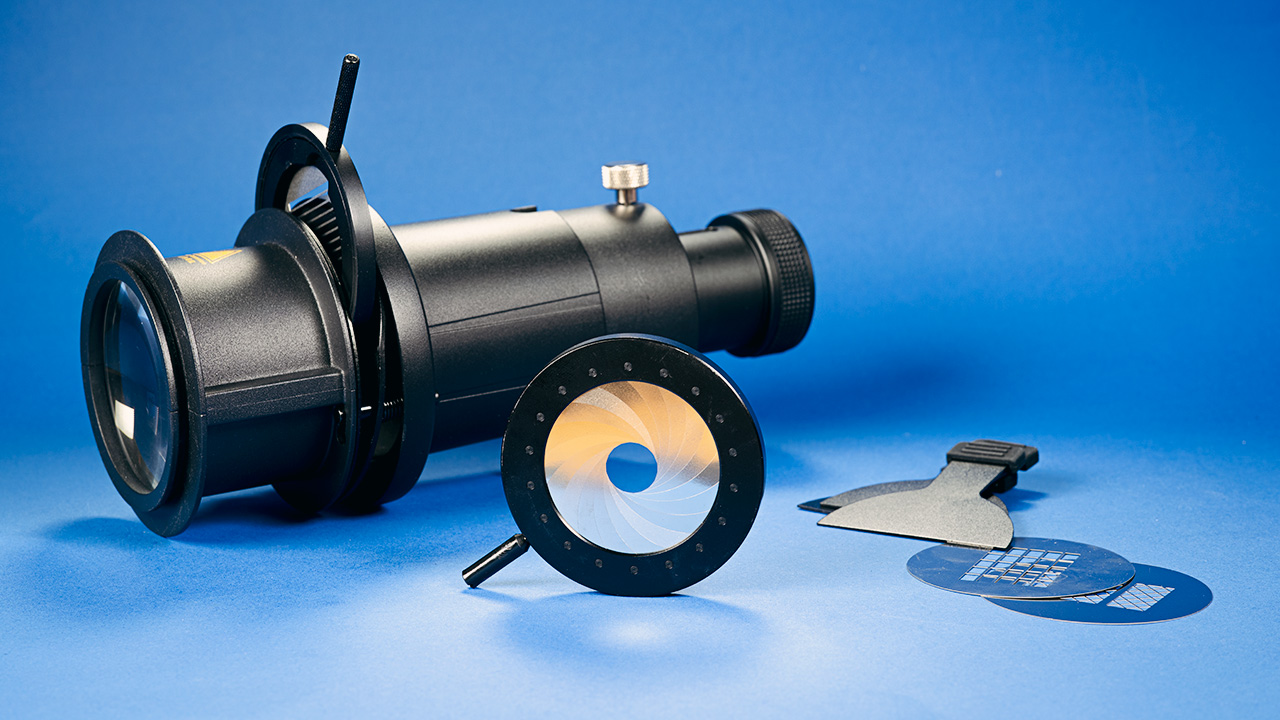
A similar accessory that can quickly shape the light beam is this iris that you install just like the gobo adapter. By turning the lever, you control the size of the light circle. This can be useful for lighting effects in videos.
Another light shaping tool is a set of metal flags. These come with some handy rubber grips on the ends. There are four of them, and these allow to make interesting shapes, like lines, rectangles, and even custom shapes. This process is kind of a guessing game, but the results are pretty spectacular.
One more optional accessory available for this light is a set of mesh modifiers. These come in an organizer pouch. They offer two levels of light reduction. There are also half circles to partially reduce the light beam intensity and a gradient reduction from one end of the beam to the other.
Light shaping accessories
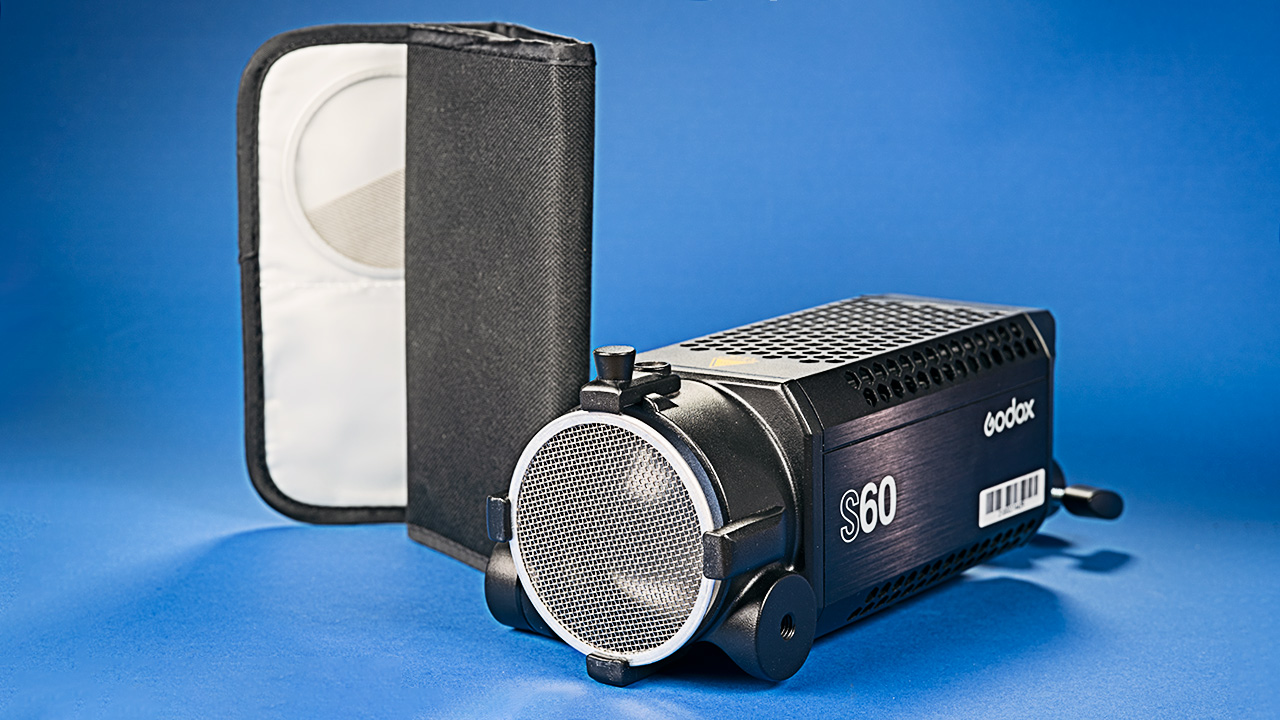
You can use these modifiers with or without the projection attachment. To install, just drop them into the light’s front mount and secure with the latch. These can be stacked for an added effect.
Another interesting optional accessory from Godox is a Bowen’s mount adapter to connect this projection attachment to different lights. We tried this with our Godox AD400 flash, and it worked great.
One light that this adapter didn’t work with is the Godox SZ150R because the dome that covers the LED doesn’t fit inside the adapter.
The Godox Godox SA-17 Bowens Mount projector adaptor

Control
The control unit features a small screen, four menu buttons, a jog wheel for intensity control, and a parameter set button.
The menu isn’t very extensive and is pretty intuitive. Here you can control the light’s channel and group, ID, and DMX control. There’s an effects button that accesses the 8 different lighting effects and a Silent Mode button to turn the fan off and on.
Performance – and quality measurements
We tested the S60’s quality of light and intensity with our Sekonic C-800. Here are the results at both ends of the beam focus with and without the projection attachment and with a small softbox:
S60 output @1m distance
- Flood (no projector attached) – 3170 Lux.
- Flood (projector attached) – 3160 Lux.
- Spot (no projector attached) – 26,300 Lux.
- Spot (projector attached) – 12,100 Lux.
- Flood (softbox) – 1150 Lux.
- Spot (Softbox) – 526 Lux.
Color accuracy
The S60 is a 5600K daylight and here are the readings we got from it:
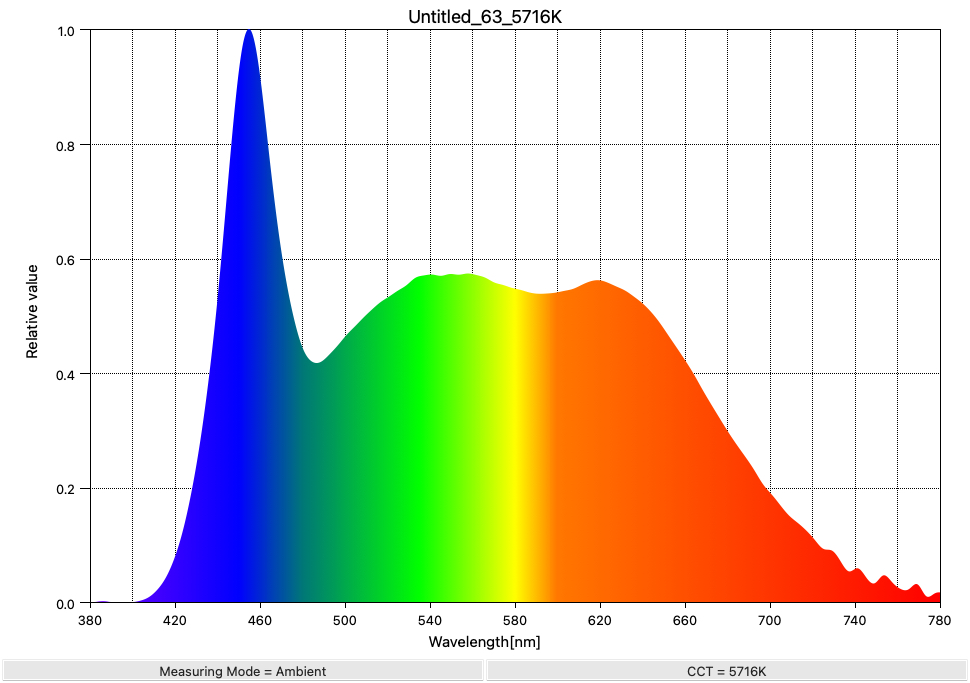
- Tested light color temperature – 5716K (as measured).
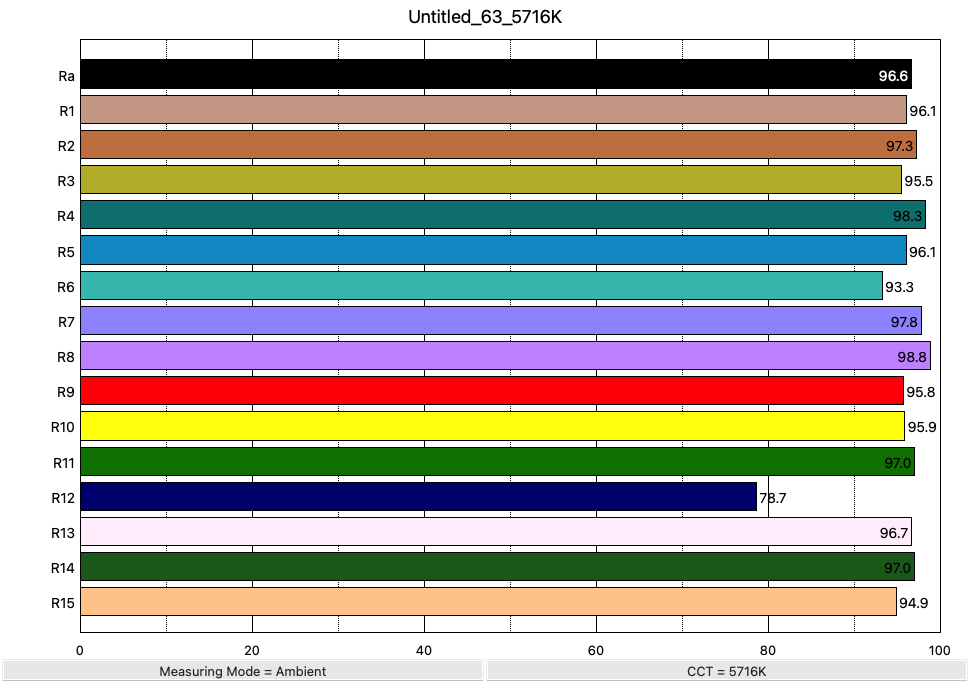
- CRI – 96.6 CRI [95.8 / R9 and 78.7 / R12].
- TLCI – 96
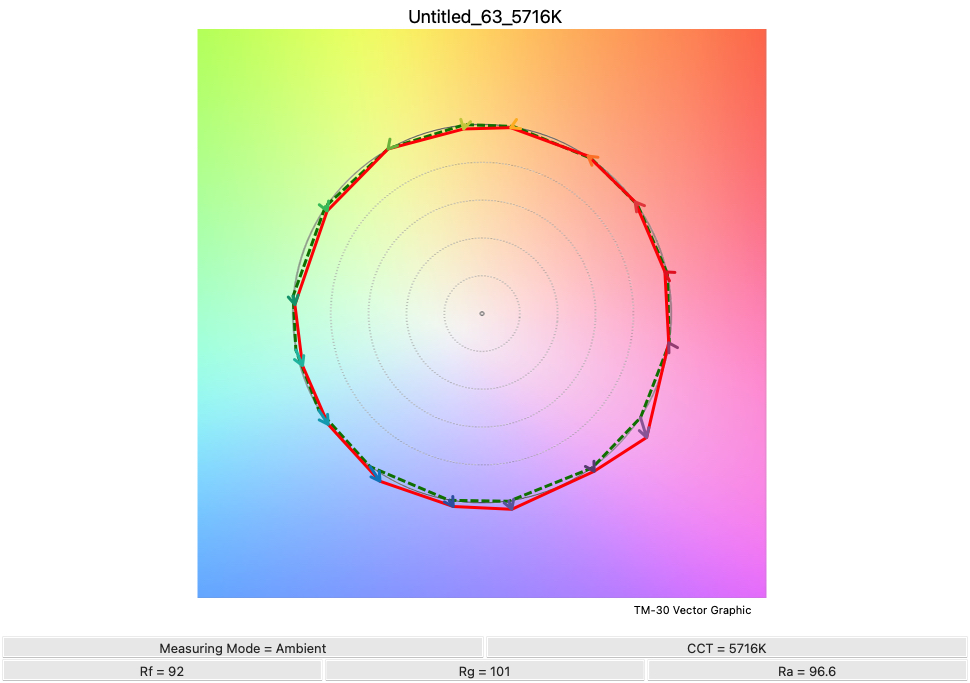
- TM-30 18 – 92 RF / 101 RG.
- SSI – 74.
CRI S60 color readings from 1m, flood with no projector attached
Spectral graph S60 color readings from 1m, flood with no projector attached
TM30 S60 color readings from 1m, flood with no projector attached
Battery Life & Heat
In using this light, we found our 98wh battery to last over 2 hours at 100% intensity. Even at full power, the light body didn’t get very hot, even though there’s a warning label. The only part that gets pretty hot is the glass front element, so be careful handling the mesh modifiers.
Some demonstrations
Here’s a demonstration of the focusing feature of the S60. By turning the knob on the back of the light, you can change the light beam coverage from a soft floodlight to a directed spotlight.
Here’s how the projection accessory works in practice. It simply drops into the front mount and locks with the top latch. The projection is achieved by placing a lens in the front of the unit. Godox offers a choice of three lenses (60mm, 85mm, 135mm) that let you cover a larger area with light, depending on how close you need to position it.
There’s a telescoping lens in the front of the fixture that you move in and out to focus the light circle. Once in position, use the thumbscrew to lock it in place. There is a secondary telescoping section with a thumbscrew lock to further control the light shape.
Here’s a look at the mesh modifiers and how they affect the light beam. The wide mesh reduces the light intensity from 3720lux to 2200lux and the tight mesh limits the intensity to 2110lux. Stacked together, the two mesh modifiers limit the intensity to 1240lux.
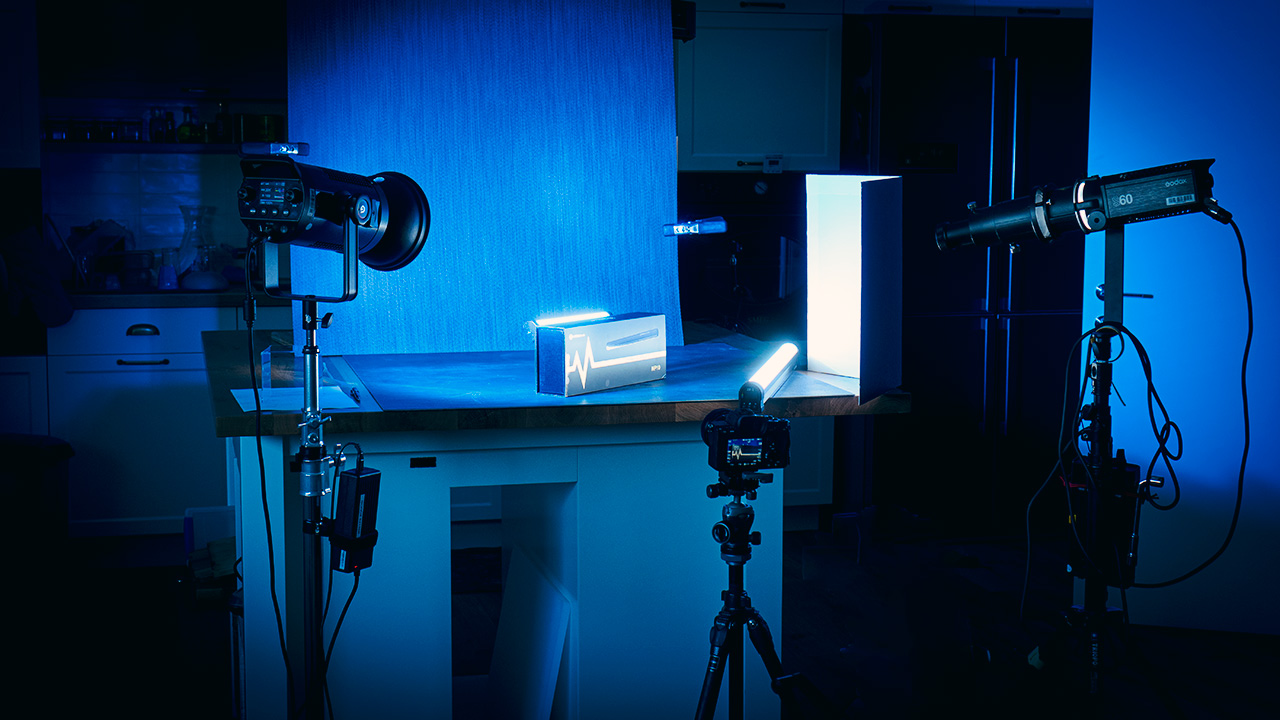
A behind the scenes of one of our recent product shoots with the S60 and the projector unit
Conclusion
In conclusion, the S60 is a quality light with powerful output and great portability. Coupled with the projection attachment, it becomes a versatile specialty light with a lot of creative lighting control.
We would love to see a future remake of this accessory, though — a better-designed unit that’s easier to use and with tools for more precise control of the light beam. One suggestion that we have is adding a focus ring on the lens and implementing a drop-in system for gobos, similar to a behind-the-lens ND filter system.
In all, we feel that the effects that are possible with the help of this projection attachment are what’s most important, so we find it very useful.
Godox projector and accessories
Pricing
As for pricing, the S60 sells for $360. The Bowens mount adapter is $40. And the projection attachment with light shaping tools are around $100, depending on what you want included in the set.
You can check out more LensVid exclusive articles and reviews on the following link.
You can support LensVid by shopping with our affiliate partners
Affiliates: Amazon, B&H, Adorama and E-bay.
Why should you trust us?