Today we continue our studio tour (see our first, more general article in this series here) and we want to concentrate on one particularly cool rig that we created that we feel has a lot of potential and has already proved to be quite handy.
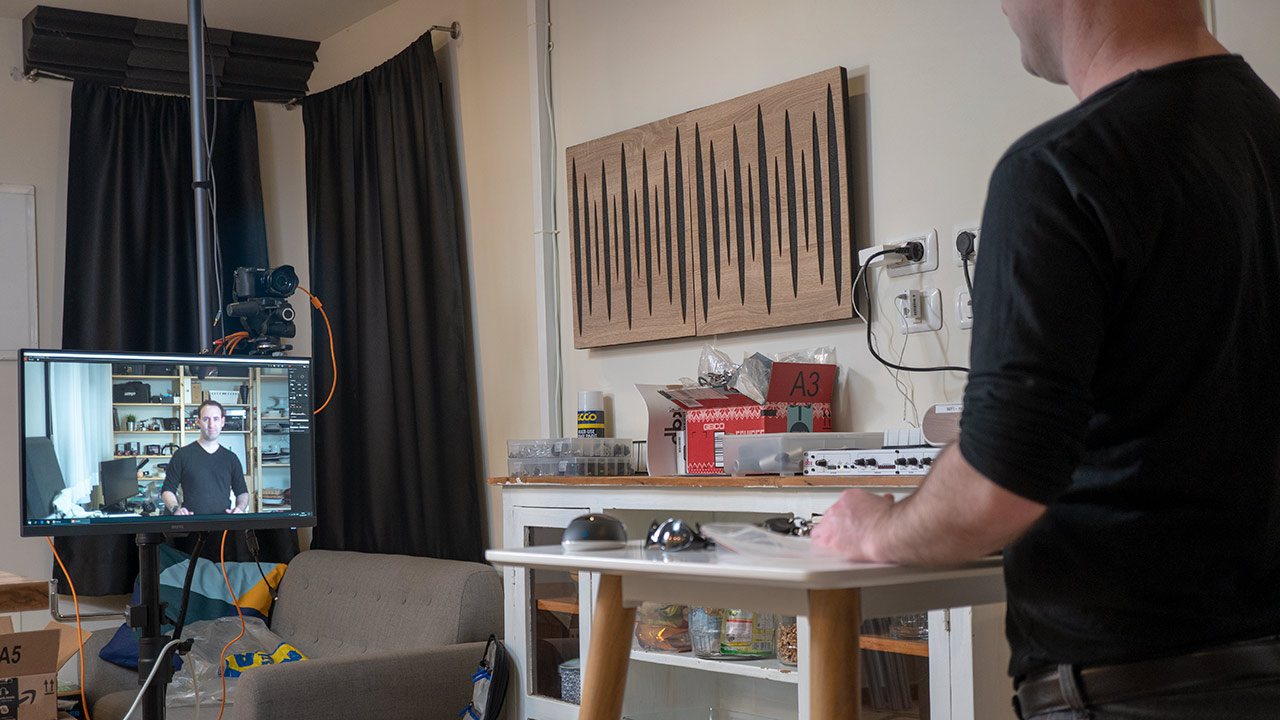
We are talking about a compact yet powerful computer with a large high-resolution monitor connected to a mobile rolling platform that we connect to our camera when we shoot videos both for monitoring and for actually controlling the camera in real time. So let’s break down the components that make our rig.
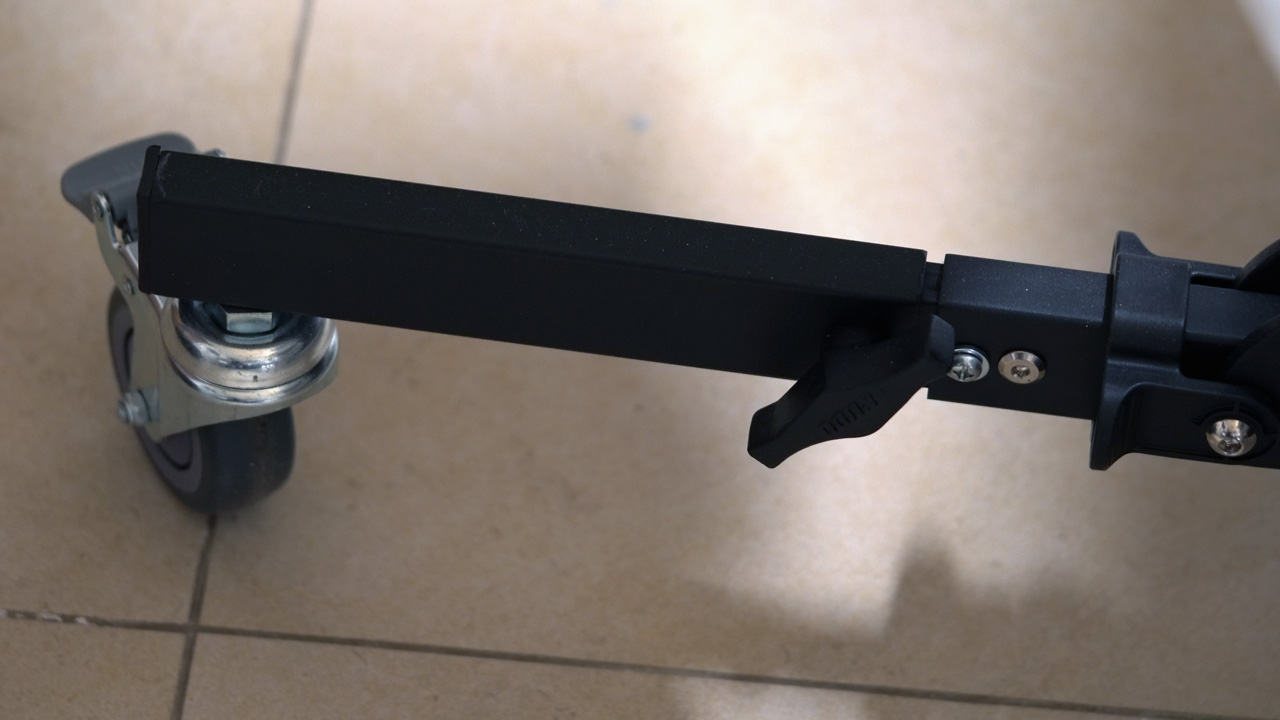
- Stand – for this project we received the 322M wheeled monitor stand from Kupo along with a number of other accessories. The 322M is a super robust stand with 2 risers that can go up to 1.9 meters or 75″ or down to 95cm or 37″. It has 3 wheeled legs which you can fold for storage with one leg that you can extend from 75cm to a full meter (almost 40″) if you want more stability on one side.
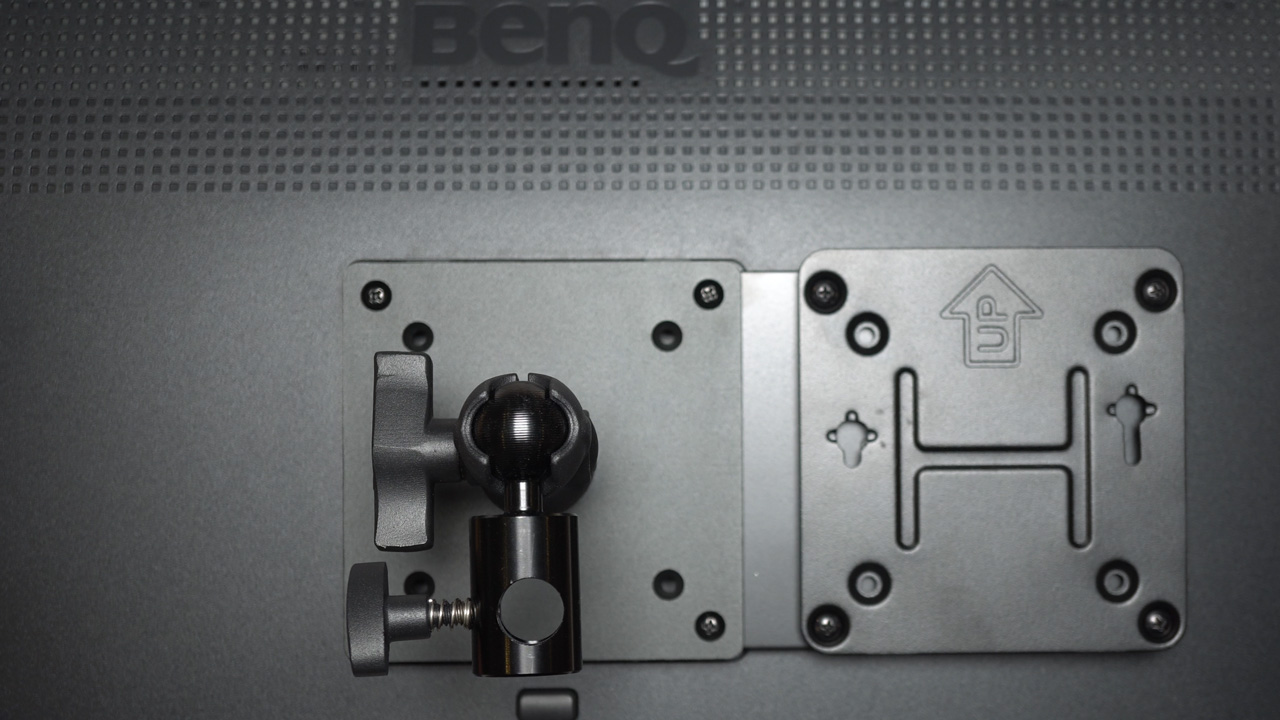
- Like most stands it has a male stud at the top so in order to connect the monitor we also got from Kupo the KS-429 VESA mount kit – think about it as a very robust ballhead that can hold your monitor (if it has a 75x75mm or 100x100mm Vesa connection) and allows you to change its position. It can hold up to 8kg (17.5 pounds) and if you want to use a heavier monitor like a TV for example, Kupo has a different model, but for our purposes, this unit works fantastically well just like the stand itself which glides on the floor.
The Kupo the KS-429 VESA mount kit and VESA splitter
- Computer – The second major component is the computer that we are going to use. We wanted something small yet powerful enough that we can possibly do some other stuff with in the future – but if you are only looking to control your camera and view the camera feed live you can get by with far less powerful setup. We choose the Intel NUC 8I5 BEH computer with Samsung SSD 970 NVMe drive and 16GB of RAM. This is a powerful yet very small and compact setup which is basically silent.
- Monitor – Although you can basically pick any type of monitor for this task, as photographers we wanted a quality monitor, with good colors, 4K resolution, Vesa mount of course and a reasonable price. We decided to go for the BenQ PD2700U 27 Inch 4K HDR IPS monitor, for some reason our other studio monitor didn’t seem to play nice with NUC HDMI out, but BenQ works fantastically well.
- VESA splitter – In order to mount the computer onto the screen while it is itself mounted onto a VESA mount to a stand we needed a dual VESA bracket. This was a little bit of a challenge to install but we eventually were able to connect the SilverStone Technology NUC/Monitor Arm Extension Bracket with VESA Mount to both the NUC and the monitor and stand.
- Side Arm – Alongside the stand Kupo sent us a number of connectors and adaptors. We will discuss some of them in a later video but the two that we have been using for this project are the KS-031 Sanp-in Right Angle Baby Pin connected to the stand via a super clamp. This is a very sturdy combo and we use it to hold some of our long cables that we use for tethering as well as a case with the mouse and keyboard for the computer. This might now exactly be essential but it certainly convenient and if you need an extra place to hang a light you can use the arm for that as well.
Useful Kupo side angle baby pin
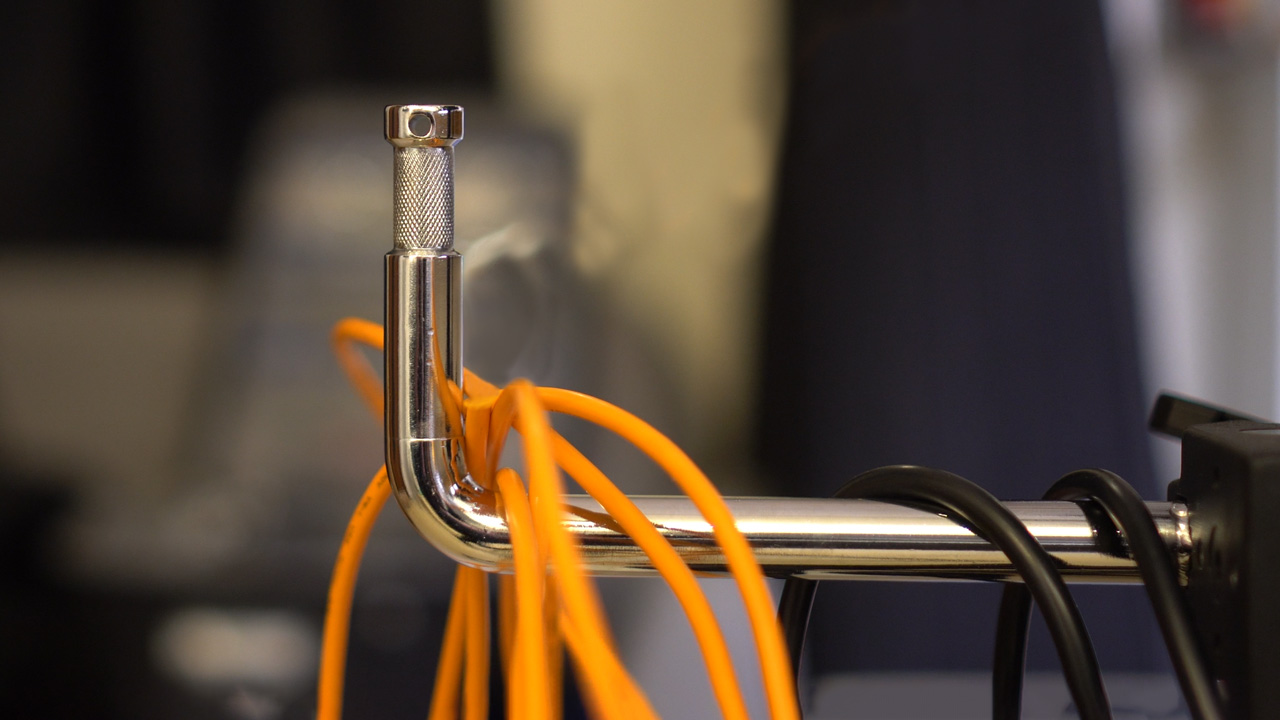
- Cables – we have mentioned the cables just now and we have been using one of Tether Tools TetherPro 15 feet USB cables – they are not super flexible but they are long and very durable. We also sometimes use a USB dummy battery connected to our computer to power our A6500 camera on our LensVid shooting “station”.
- Software – No less important than all the hardware is the software that we use for this project. We tried more than half a dozen different software and although for stills tethering there are many options, for video there are surprisingly limited number of good ones. In the past, we used and loved DSLRDashboard but this software hasn’t been updated in a while and it doesn’t work with our Sony A6500 wired at all and has many issues connecting wirelessly. After testing quite a few other options we decided to give Sony’s own free software – Imaging Edge Remote a chance and at the moment this is what we are using and we will dive into it and some of its limitations in a moment. If you have a positive experience with Sony cameras and some other software for shooting tethered video – please let us know in the comments.
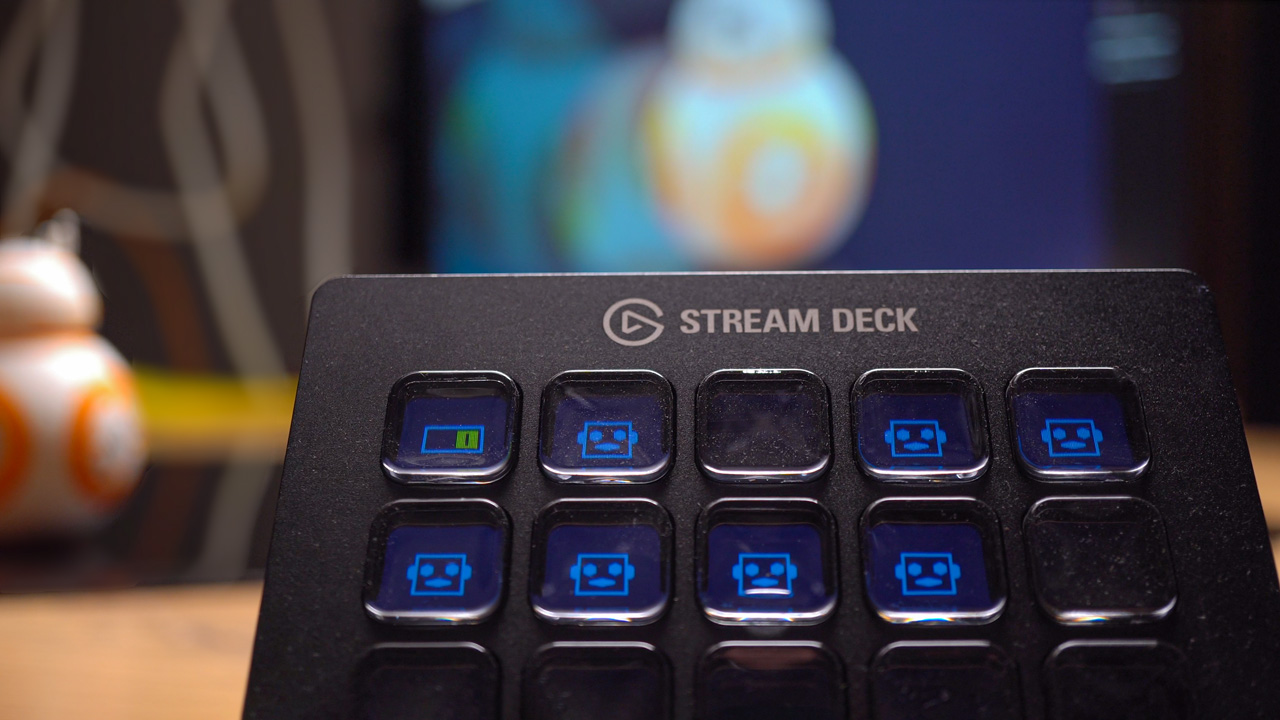
- Elgato Stream Deck – One last piece of gear before we actually talk about how we use this whole setup has been our trusty Stream Deck mini keyboard. We have reviewed this fantastic piece of gear several months ago and we love it so much that we bought another unit for the studio. The reason that we mention the stream deck here has to do with Sony’s Imaging Edge Remote software’s ability to operate the camera using shortcuts. Since you can assign these shortcuts to the Stream Deck this means that you can shoot and change key settings in your camera with a single press of a bottom on your Stream Deck – and this works actually pretty well and is very useful.
You can program the Stream Deck to operate the camera
Using everything together
As we have mentioned on our studio tour video we record two main types of videos in our studio. LensVid videos which are typically product reviews although we also do interviews and some DIY and projects videos such as the one you are watching now. We also work on our vegan food channel Veggiez where we record videos of vegan food recipes. Both for product shots and for our recipes we record a lot of footage from an overhead camera (we will be making a separate video about that project which is actually still ongoing). This means that the camera that we use is out of our reach unless we use a ladder or an apple box and we need a way to both see and control the camera remotely. Another situation when we need to control the camera remotely and see what we are shooting on a different screen than the one on the back of the camera is when we record the intro and conclusion bits of our videos for LensVid.
Shooting top down into the system
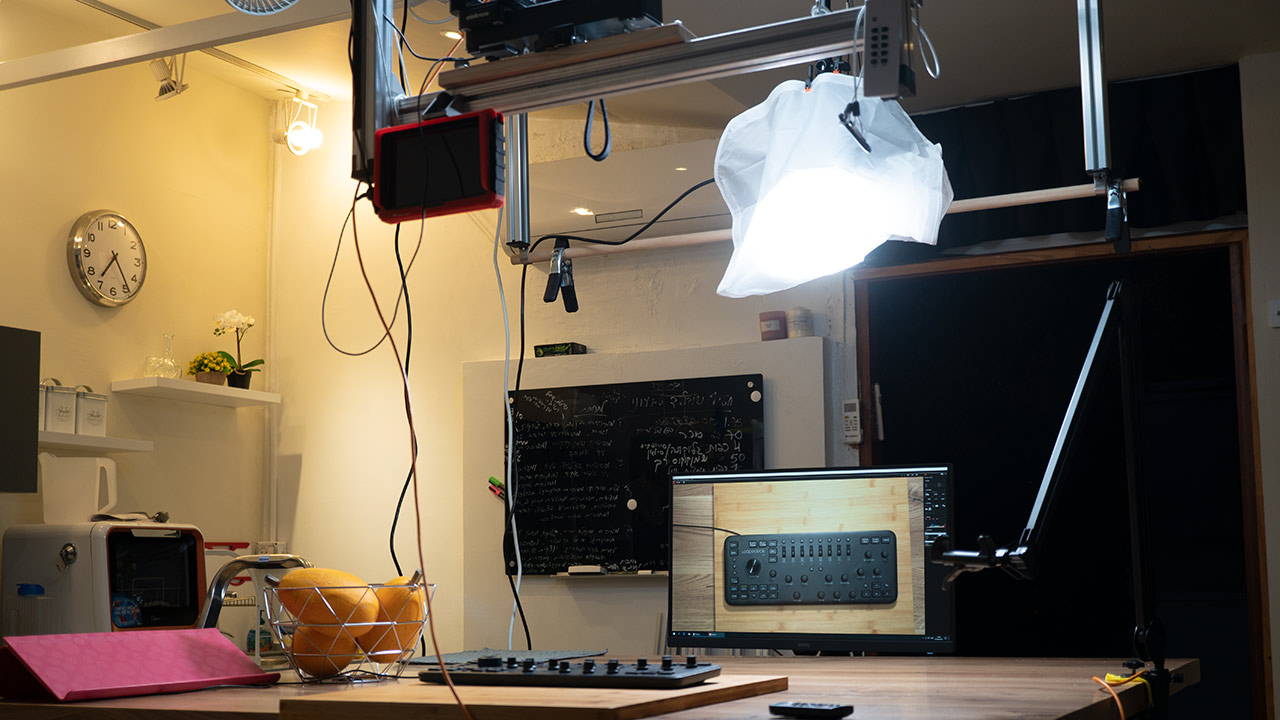
For both these tasks, we created the rolling studio shooting rig. It is easy to move around the studio and we can place it either near the main table or close to our LensVid shooting station.
Working with Sony’s Imaging Edge Remote software is pretty simple. You need to make sure that you Sony camera USB Connection settings is set to PC Remote and connect the camera to the computer using a USB cable – sadly wireless connection to a PC/Mac is not possible at this stage. This is not the only drawback – many of the main features of this software do not seem to work with older Sony cameras – even our A6500, quite, unfortunately – for example, all focus functions do not work (so you can’t really control the focus at all from the computer). We communicated this and a number of other limitations to Sony recently and we can only hope that they are listening and working on resolving this in a future update to the software.
Despite these limitations even with the current Imaging Edge Remote software, you can change many of the camera settings quite easily (that is if the screen is close to you since on our 27″ 4K monitor the icons and text are super small, another thing we hope Sony will fix in the future).
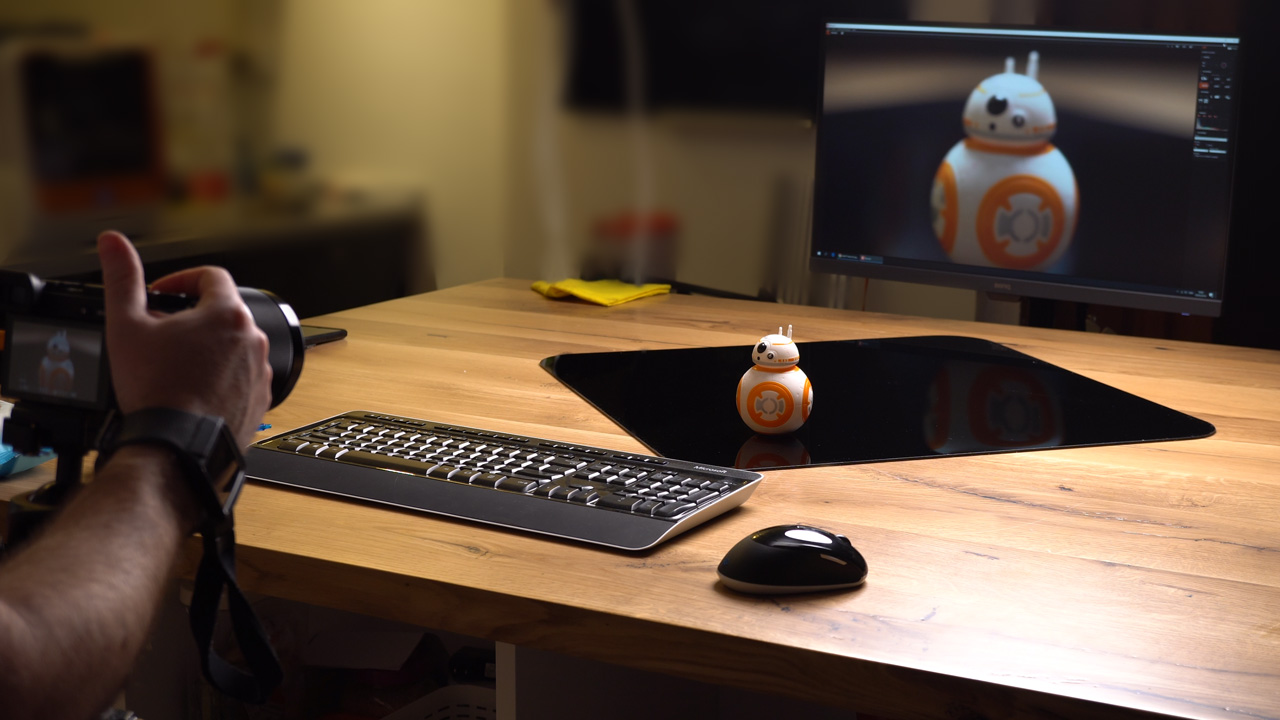
Large monitor makes our life that much easier

Finally, we wanted to demonstrate how cool it is to use the Elgato Stream Deck for camera control. We assigned specific buttons for stills and video, changing ISO and other settings and everything with a simple and clear button press. Really the only drawback aside for the cost of the Stream Deck is that it is not wireless and we have found no easy way to turn it wireless (and trust us we looked). This means that you need to connect it via an extension cord which is not really ideal.
Sony needs to add focus functionality to all of its older camera models
Despite these drawbacks and limitations of our rig and software, we discovered that being able to view what we are shooting on a large high resolution, color calibrated monitor while being able to control the camera quickly and directly is very handy. Although there are surely simpler and far less expensive solutions such as working with apps on tablets or even smartphones, at the moment and for our workflow this feels like the best option that we could come up with and if it fits your workflow and you have the budget – we can highly recommend it.
You can check out more LensVid exclusive articles and reviews on the following link.
You can support LensVid by shopping with our affiliate partners
Affiliates: Amazon, B&H, Adorama and E-bay.
Why should you trust us?